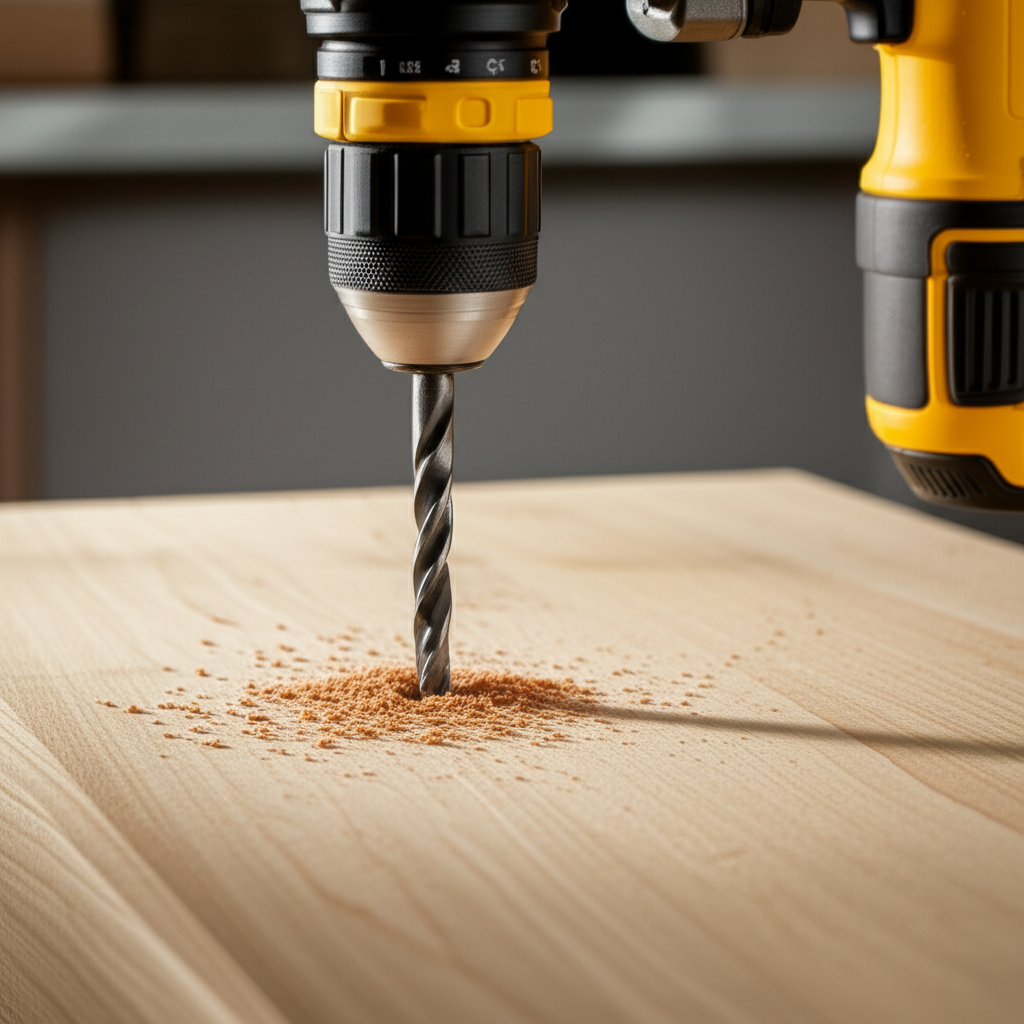
Yes, you absolutely can use a hammer drill on wood! While designed for tough materials like masonry, a hammer drill, when used correctly and with the right settings, can be a powerful tool for drilling into wood, often providing faster results than a standard drill. We’ll explore the surprising benefits and essential tips for doing it safely and effectively.
Must-Have Tools in Your House If You Work Regularly


Ever found yourself staring at a piece of stubborn wood, wishing your drill had a little more… oomph? Maybe you’ve heard that hammer drills are only for concrete and brick, leaving you wondering if you’re missing out on a versatile tool for your woodworking projects. It’s a common question, and the answer might surprise you! Many DIYers and seasoned pros alike stick to standard drills for wood, fearing they might damage the material or the tool itself. But what if we told you that a hammer drill, with a few simple adjustments, could actually make your woodworking tasks easier and quicker? We’re here to demystify the process and show you exactly how to harness the power of a hammer drill on wood, revealing some truly shocking results that might just change the way you approach your next project. Get ready to discover the hidden potential of your hammer drill!
What Exactly is a Hammer Drill?
Before we dive into using it on wood, let’s quickly understand what makes a hammer drill unique. At its core, a hammer drill is a power tool designed for drilling holes in hard materials like concrete, brick, and stone. Its distinctive feature is the “hammer” action – a rapid, percussive blow delivered to the drill bit as it rotates. This hammering motion, often referred to as “impact drilling,” helps to pulverize the material, making it easier to penetrate. Most hammer drills offer two modes: standard drilling and hammer drilling.
The hammer action is achieved through a mechanism, typically a series of cams or gears, that causes the chuck (the part that holds the drill bit) to move back and forth rapidly along the axis of the drill. This is different from a rotary hammer, which uses a piston mechanism to deliver a much more powerful, single, impactful blow. Think of a hammer drill as a very fast, very light hammer combined with a drill, whereas a rotary hammer is more like a jackhammer.
Understanding these modes is crucial, as using the hammer function on wood is generally not recommended. We’ll get into why and what settings to use shortly.
Can You Use a Hammer Drill on Wood? The Surprising Truth
The short answer is a resounding yes, you absolutely can use a hammer drill on wood. In fact, many people find it to be an excellent tool for woodworking tasks, especially when dealing with hardwoods or when speed is a factor. The key lies in knowing how to use it and, most importantly, which setting to select.
Think of it this way: a hammer drill is essentially a standard drill with an added hammer function. When you disengage the hammer action, it operates just like any other drill. This means that for most woodworking applications, you’ll be using your hammer drill in its standard, non-hammering mode.
So, why does this question even come up? It stems from the tool’s name and its primary design purpose. Because it’s built to tackle concrete, people often assume it’s too powerful or too aggressive for softer materials like wood. However, modern hammer drills offer versatility, allowing users to switch between drilling modes with the flick of a switch.
The “shocking results” often referred to relate to how quickly and efficiently a hammer drill can bore through wood when used correctly, often surpassing the performance of a standard drill, especially in denser woods. We’ll explore the benefits and potential drawbacks of this approach.
How to Use a Hammer Drill on Wood Safely and Effectively
Using a hammer drill on wood is straightforward, but there are a few critical steps to ensure you get the best results and avoid damaging your workpiece or the tool. The most important rule is to always turn off the hammer function when drilling into wood.
Most hammer drills have a mode selector ring or switch, usually located near the chuck or on the back of the tool. This selector typically has three symbols: a drill bit symbol (for standard drilling), a hammer symbol (for hammer drilling), and sometimes a screwdriver symbol (for driving screws). For wood, you want the drill bit symbol.
Here’s a step-by-step guide:
- Select the Correct Mode: Locate the mode selector on your hammer drill. Ensure it is set to the standard drilling mode (the drill bit icon), NOT the hammer mode (the hammer icon). This is the most crucial step.
-
Choose the Right Drill Bit: For wood, use drill bits specifically designed for woodworking. Common types include:
- Twist Bits: General-purpose bits that work well for most wood.
- Spade Bits (Paddle Bits): For larger diameter holes quickly.
- Forstner Bits: For clean, flat-bottomed holes, ideal for dowel joints or recesses.
- Auger Bits: Designed for deep, clean holes, especially in thicker lumber.
Ensure the bit is sharp and the correct size for your needs.
- Secure Your Workpiece: Always clamp your wood securely to a workbench or stable surface. This prevents the wood from moving while you drill, which can lead to inaccurate holes, splintering, or even injury.
- Mark Your Hole: Use a pencil to mark the exact spot where you want to drill. For precision, you can use a center punch to create a small indentation, which helps the drill bit start in the right place and prevents “walking.”
- Set the Speed: Most hammer drills have variable speed settings. For starting a hole or drilling into softwoods, a lower speed is generally better. For hardwoods or larger holes, you might use a medium to higher speed. Experiment on a scrap piece of wood to find the optimal speed.
-
Start Drilling:
- Begin with the drill bit just touching the surface.
- Start the drill at a slow speed to create a pilot divot.
- Once the bit is seated, increase the speed and apply steady, even pressure.
- Keep the drill perpendicular to the wood surface.
- Let the drill do the work; don’t force it. If you encounter resistance, you might be drilling too fast or the bit could be dull.
- Clearing Debris: For deeper holes, occasionally pull the drill bit partially out of the hole while it’s still spinning slowly. This helps clear wood shavings and dust, preventing the bit from getting stuck.
- Finishing the Hole: As you near the end of the hole, ease up on the pressure to minimize tear-out on the backside of the wood. If drilling all the way through, you can drill partway from one side, then flip the piece and drill from the other side to meet the first hole for a cleaner finish.
Remember, the goal is to use the drill’s rotational power, not its hammering action, on wood. The hammer drill’s higher torque and often more robust motor can be a significant advantage.
Benefits of Using a Hammer Drill on Wood
You might be wondering, “If I turn off the hammer function, isn’t it just a regular drill?” While true, hammer drills often offer advantages even in their standard drilling mode that make them superior for certain woodworking tasks:
- Increased Torque: Hammer drills typically have more powerful motors and higher torque output compared to many standard drills. This extra power is incredibly useful when drilling large-diameter holes or working with dense hardwoods like oak, maple, or walnut.
- Better Speed Control: The variable speed triggers on hammer drills often provide a finer degree of control, allowing for precise starting of holes and efficient drilling at optimal speeds for different wood types and bit sizes.
- Durability and Robustness: Hammer drills are built to withstand tougher conditions. This often translates to more durable components and a more robust overall construction, meaning they can handle demanding tasks without overheating or failing as easily as some lighter-duty standard drills.
- Versatility: Even if you primarily use it for wood, having the hammer function available means you can switch to masonry tasks without needing a second tool. This makes it a great all-around choice for homeowners and DIYers with diverse project needs.
- Reduced Effort for Large Holes: The higher power and torque can make drilling larger holes with spade bits or hole saws significantly easier and faster, requiring less physical effort from the user.
These benefits can translate into saved time, reduced frustration, and cleaner results, especially for more challenging woodworking projects.
When to Avoid Using the Hammer Function on Wood
This cannot be stressed enough: never use the hammer function when drilling into wood. While the temptation might be to think “more power is better,” the percussive action of a hammer drill is actually detrimental to wood.
Here’s why the hammer function is a no-go for wood:
- Splintering and Tear-Out: The hammering action, combined with the rotation, will violently chip away at the wood fibers. Instead of a clean cut, you’ll get significant splintering and rough edges, especially on the exit side of the hole. This is often referred to as “tear-out.”
- Damage to Drill Bits: Woodworking drill bits are designed for cutting and shaving wood. The impact action can chip, bend, or even break specialized wood bits. Standard twist bits designed for metal might survive longer but will still suffer excessive wear and tear.
- Inefficiency: The hammering action doesn’t help cut wood; it pulverizes it. This creates a lot of unnecessary dust and debris and can actually slow down the drilling process in wood compared to a clean cut.
- Damage to the Drill: While hammer drills are robust, consistently using the hammer function on soft materials like wood can put unnecessary stress on the internal hammer mechanism.
Think of it like trying to cut butter with a chainsaw – the tool is fundamentally mismatched for the task in that mode. Always ensure the hammer mode is disengaged.
Hammer Drill vs. Standard Drill for Wood: A Comparison
Many users wonder if there’s a significant difference between using a hammer drill (in standard mode) and a regular drill for wood. The primary differences lie in power, durability, and feature set.
| Feature | Hammer Drill (Standard Mode) | Standard Drill |
|---|---|---|
| Motor Power | Generally higher wattage, more torque | Varies, often lower wattage than hammer drills |
| Hammer Function | Available, but disengaged for wood | Not available |
| Durability | Often built more robustly for tougher tasks | Can be lighter duty |
| Weight | Can be slightly heavier due to the hammer mechanism | Typically lighter |
| Best For | Hardwoods, large holes, frequent use, versatility | Softwoods, light DIY, occasional use |
| Potential Advantage on Wood | More power for dense woods, faster drilling of larger holes | Lighter weight, potentially simpler to operate for absolute beginners |
For most woodworking tasks, a standard drill is perfectly adequate. However, if you frequently work with hardwoods, need to drill many large holes, or want a tool that can handle both wood and masonry projects, a hammer drill used in its standard mode offers a compelling advantage. The extra power can make a noticeable difference, reducing strain and speeding up your work.
Consider your typical projects. If you’re assembling IKEA furniture or building simple birdhouses, a standard drill will likely suffice. But if you’re building a deck, crafting furniture from oak, or need to drill through thick beams, the added torque of a hammer drill can be a game-changer.
Troubleshooting Common Issues
Even when using a hammer drill correctly on wood, you might encounter a few hiccups. Here’s how to address them:
-
Drill Bit Gets Stuck:
- Cause: Drilling too fast, dull bit, not clearing debris, or hitting a knot.
- Solution: Ensure the hammer function is OFF. Try reversing the drill direction briefly to loosen the bit. Reduce speed. Use a sharper bit. Periodically pull the bit out while drilling deeper holes to clear shavings.
-
Wood is Splintering (Tear-Out):
- Cause: Dull bit, drilling too fast, applying too much pressure, or drilling through the end grain.
- Solution: Use a sharp bit designed for wood. Slow down the drill speed as you near the exit point. Apply consistent, moderate pressure. For clean exits, place a scrap piece of wood underneath the exit point and drill through both simultaneously, or use a backing board. Forstner bits and auger bits are less prone to tear-out than standard twist bits.
-
Drill Overheats:
- Cause: Pushing the drill too hard, prolonged continuous use, or a dull bit causing friction.
- Solution: Ease up on the pressure. Allow the drill to cool down between tasks. Ensure your drill bits are sharp. Use the appropriate speed for the material and bit size.
-
Hole is Not Straight:
- Cause: Starting the drill at an angle, workpiece not secured, or bit “walking.”
- Solution: Ensure the drill is held perpendicular to the surface. Use a center punch or clamp the workpiece firmly. Start slowly to seat the bit properly.
Remember, patience and the right technique go a long way in achieving clean, precise holes every time.
Safety First, Always!
Working with any power tool requires a commitment to safety. Here are essential precautions when using your hammer drill on wood:
- Wear Safety Glasses: Wood chips and dust can fly at high speeds. Always protect your eyes.
- Use Hearing Protection: While drilling wood is generally not as loud as masonry, prolonged exposure to the drill’s motor can still be damaging. Earplugs or earmuffs are recommended.
- Wear a Dust Mask: Wood dust, especially from hardwoods, can be harmful to inhale. A dust mask or respirator is crucial.
- Secure Your Workpiece: As mentioned, never hold small pieces by hand while drilling. Use clamps.
- Check for Obstructions: Before drilling, ensure there are no hidden nails, screws, or wires within the wood, especially if working with reclaimed lumber.
- Proper Grip: Hold the drill firmly with both hands, using the auxiliary handle if provided, especially when drilling larger holes.
- Keep Cords Tucked Away: If using a corded drill, ensure the cord is positioned so it won’t get caught by the drill bit or snagged on your workpiece.
- Know Your Tool: Read your hammer drill’s manual to understand its specific features, safety guidelines, and maintenance requirements.
A safe approach ensures that your projects are enjoyable and that you come away injury-free.
Frequently Asked Questions
Can I use the hammer function on plywood?
No, you should never use the hammer function on plywood or any other wood product. The impact action will cause excessive splintering and damage the material, leading to very rough, unsightly holes. Always ensure the hammer function is turned off when drilling into wood, even engineered wood like plywood.
Will a hammer drill damage my wood?
If you use the hammer function, yes, it will likely damage the wood through splintering and tear-out. However, if you use the hammer drill in its standard drilling mode with the