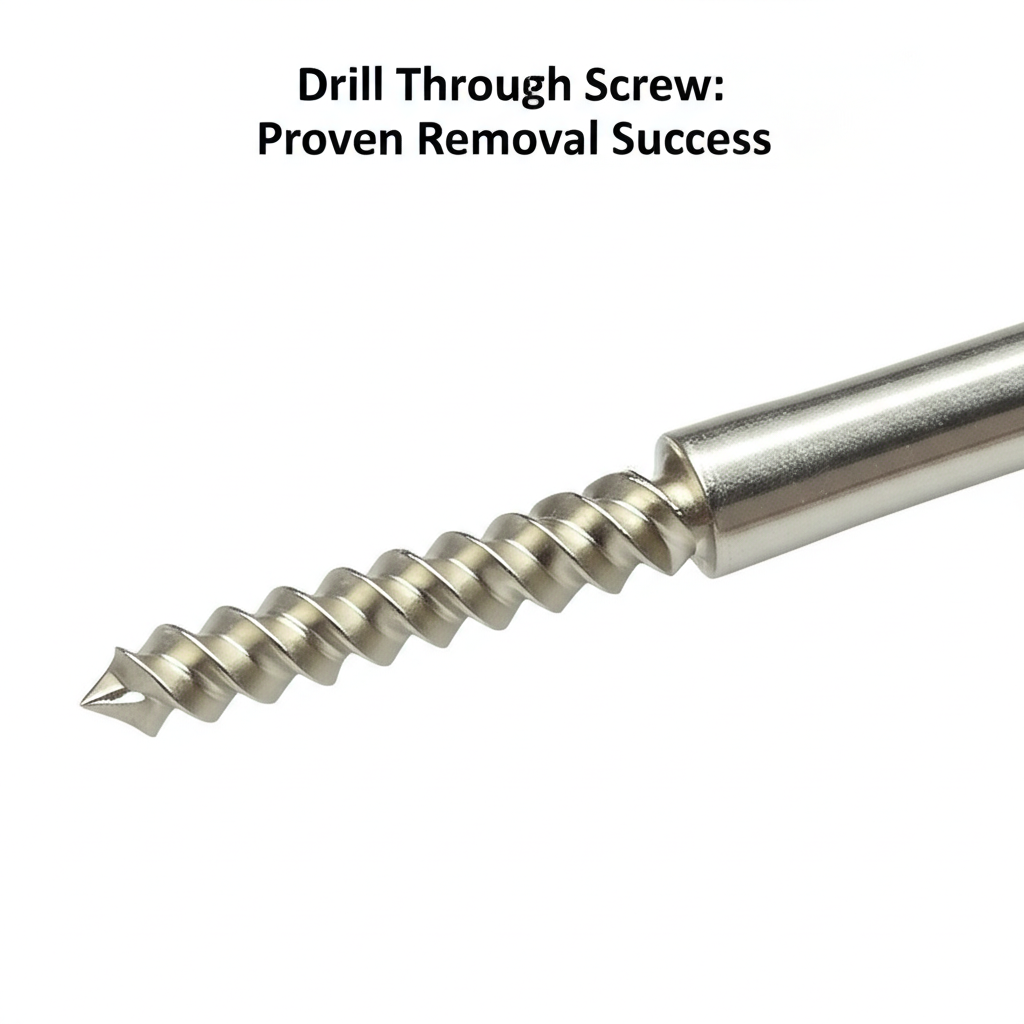
Yes, you absolutely can drill through a screw to remove it! This common DIY and automotive repair technique is highly effective for stubborn or stripped screws, offering a reliable solution when traditional methods fail. With the right drill bit and a few simple steps, you can successfully extract stuck screws and get your project back on track.
Must-Have Tools in Your House If You Work Regularly


Ever faced a screw that just won’t budge? You’ve tried the screwdriver, maybe even a bit of WD-40, but it’s stubbornly holding on. It’s a frustrating situation, whether you’re working on your car, a piece of furniture, or a home repair project. The good news is that you don’t have to give up! There’s a proven method that uses your drill to effectively remove even the most stubborn screws. It might sound a little daunting to drill into a screw, but with the right guidance, it’s a straightforward process that can save your project and your sanity. Let’s dive into how you can master this technique and tackle those immovable fasteners with confidence.
Understanding the Drill-Through Screw Removal Method
The idea behind drilling through a screw might seem counterintuitive at first. After all, isn’t drilling supposed to create holes, not remove fasteners? However, this technique is about strategically weakening and essentially destroying the screw’s integrity in a controlled manner, allowing for its removal. It’s a powerful problem-solver when the screw head is stripped, rusted, or otherwise impossible to grip with a standard screwdriver or extractor.
This method is particularly useful in situations where:
- The screw head is completely rounded out or stripped, preventing any tool from getting a grip.
- The screw is rusted or corroded into its housing, making it impossible to turn.
- The screw is broken off flush with the surface, leaving no head to grab.
- You need to remove a screw quickly and efficiently without damaging the surrounding material excessively.
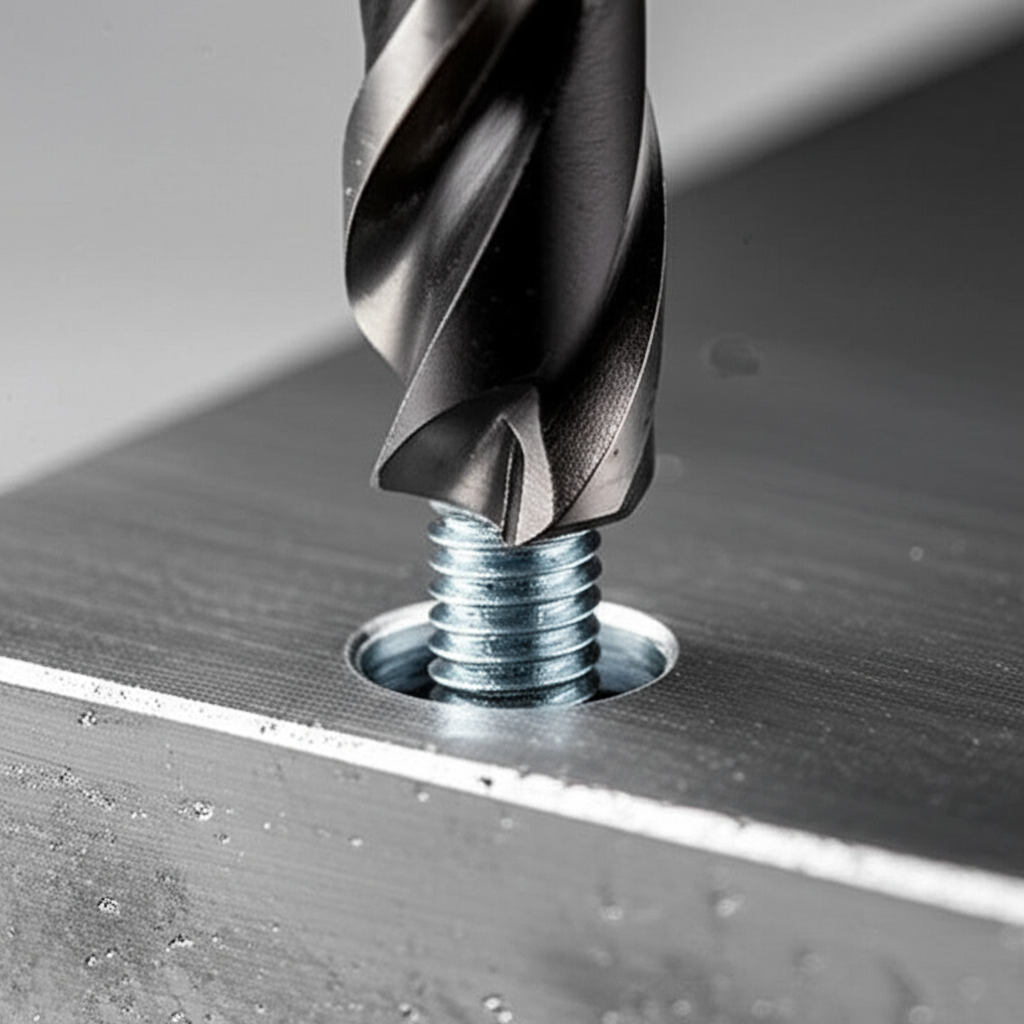
The core principle involves using a drill bit that is slightly smaller than the shank of the screw. By drilling directly down the center of the screw, you effectively create a channel that either loosens the screw’s hold or breaks it apart, making it easier to extract the remaining pieces or simply push them out of the way. It’s a bit like performing a controlled demolition on the fastener itself!
When to Choose the Drill-Through Method
While drilling through a screw is a highly effective method, it’s not always the first resort. Other screw removal techniques might be less invasive or quicker for simpler issues. Here’s a quick rundown of when this method shines:
When Other Methods Have Failed
Before you reach for the drill, consider these alternatives:
- Manual Screwdriver with More Force: Sometimes, a firm, steady pressure with the correct size screwdriver bit can still work on slightly stripped heads.
- Rubber Band or Steel Wool Trick: Placing a wide rubber band or a piece of steel wool between the screwdriver bit and the stripped screw head can provide extra grip.
- Screw Extractor Kits: These specialized bits have a reverse thread that bites into the damaged screw head as you drill. They are excellent for moderately stripped screws.
- Pliers or Vise Grips: If any part of the screw head is exposed, locking pliers can sometimes grip and twist it out.
- Cutting a New Slot: For screws with accessible heads, a Dremel or hacksaw can cut a new slot for a flathead screwdriver.
Ideal Scenarios for Drilling Through
The drill-through method is your go-to when:
- The screw head is entirely stripped or rounded out.
- The screw is broken off below the surface of the material.
- The screw is deeply corroded or seized, making extraction impossible.
- You need to remove multiple damaged screws efficiently.
It’s important to note that this method is generally irreversible for the screw itself. The screw will likely be destroyed in the process. However, the goal is to salvage your project, and this technique often achieves that when other options are exhausted.
Essential Tools for Success
Having the right tools is crucial for safely and effectively drilling through a screw. Using the wrong tools can lead to further damage, injury, or frustration. Here’s what you’ll need:
Drill
A variable-speed drill is ideal. The ability to control the speed allows you to start slowly and increase as needed. Cordless drills are convenient, but a corded drill can offer more consistent power for tougher jobs.
- Cordless Drill: Offers portability and ease of use. Look for one with good torque and battery life.
- Corded Drill: Provides consistent power, which can be beneficial for drilling through hardened steel screws.
Drill Bits
This is where precision matters. You’ll need high-quality drill bits designed for metal. The size of the bit is critical.
- High-Speed Steel (HSS) Bits: These are standard for metal drilling and are generally affordable and effective for most common screws.
- Cobalt Bits: These are harder and more heat-resistant than HSS bits, making them excellent for drilling through very hard screws or hardened steel. They are more expensive but offer superior performance and longevity in tough applications.
- Titanium Nitride (TiN) Coated Bits: These have a gold-colored coating that reduces friction and heat, extending bit life and improving drilling speed.
Choosing the Right Drill Bit Size: This is the most critical aspect. You want a bit that is slightly smaller than the shank (the threaded body) of the screw, not the head. If you drill with a bit too large, you risk damaging the threads in the hole the screw was in. A good rule of thumb is to use a bit that is about 50-75% of the screw’s shank diameter.
For example:
| Screw Shank Diameter | Recommended Drill Bit Size (Approximate) |
|---|---|
| 3mm (1/8 inch) | 1.5mm – 2mm (1/16 inch – 5/64 inch) |
| 5mm (3/16 inch) | 3mm – 3.5mm (1/8 inch – 9/64 inch) |
| 8mm (5/16 inch) | 5mm – 6mm (3/16 inch – 1/4 inch) |
Center Punch
A center punch is essential for creating a small indentation on the screw’s head. This indentation provides a starting point for your drill bit, preventing it from wandering off and damaging the surrounding material.
Safety Gear
Never skip safety gear when working with power tools.
- Safety Glasses: Absolutely mandatory to protect your eyes from metal shavings and debris.
- Gloves: Protect your hands from sharp edges and heat.
- Ear Protection: If working for extended periods or with a loud drill.
Lubricant
A cutting fluid or general-purpose lubricant can help reduce friction, keep the drill bit cool, and make drilling smoother and easier, especially with harder metals.
Hammer
Used in conjunction with the center punch.
Step-by-Step Guide to Drilling Through a Screw
Follow these steps carefully to ensure a successful and safe screw removal process.
Step 1: Prepare the Work Area and Screw
Ensure the item you’re working on is stable and secure. If you’re working on something delicate, consider placing a protective barrier underneath.
Clean any dirt or debris from the screw head and the surrounding area. This will help you see what you’re doing and prevent contaminants from getting into the hole.
Step 2: Mark the Center of the Screw
Using your center punch and hammer, create a small dimple directly in the center of the screw head. Apply firm, consistent taps with the hammer. This divot is critical for guiding the drill bit accurately.
Tip: If the screw head is very smooth or rounded, try to create the deepest dimple possible without deforming the head too much.
Step 3: Select the Correct Drill Bit
As discussed earlier, choose a high-speed steel or cobalt drill bit that is slightly smaller than the screw’s shank diameter. It’s better to start with a bit that’s a little too small and move up if necessary than to start too large.
Step 4: Set Up Your Drill
Insert the drill bit securely into your drill’s chuck. If using a variable-speed drill, set it to a low to medium speed. High speeds can generate excessive heat and wear out your drill bit quickly. For most metal applications, a speed between 200-500 RPM is a good starting point, depending on the drill’s power.
If your drill has a hammer function, ensure it is turned OFF. You want a smooth, consistent rotation, not percussive blows.
Step 5: Begin Drilling
Align the tip of the drill bit with the dimple you created with the center punch. Apply steady, firm pressure to the drill. Let the drill bit do the work; don’t force it. Slowly begin drilling straight down the center of the screw.
Lubrication: Apply a small amount of cutting fluid or lubricant to the drill bit tip periodically, especially when drilling into harder materials or for extended periods. This will help keep the bit cool and extend its life.
Drilling Depth: Continue drilling down the center of the screw. The goal is to drill through the entire length of the screw, or at least deep enough to compromise its structure. As you drill, you’ll be removing material from the screw, effectively destroying it.
Managing Swarf: Metal shavings (swarf) will be produced. Periodically withdraw the drill bit from the hole to clear out the shavings. This prevents the hole from becoming clogged and allows the lubricant to reach the cutting surface.
Step 6: Assess and Remove
Once you’ve drilled through the screw, or a significant portion of it:
- If the screw has been completely drilled out: You may be able to simply pull the remaining material out with needle-nose pliers.
- If the screw has been weakened: The remaining parts of the screw might fall out on their own, or you might be able to gently tap them out from the back if accessible.
- If the screw head was the only issue: After drilling, the head might have essentially disintegrated or separated, allowing you to remove the remaining shaft with pliers.
- If the screw shank remains: You might be able to use a slightly larger drill bit to ream out the hole or even tap new threads if the original threads are completely destroyed. Alternatively, a screw extractor can sometimes be used on the remaining shaft if a small portion is still protruding.
Important Consideration: If you are drilling into a threaded hole, be mindful of the original threads. Drilling too aggressively or with too large a bit can damage the threads in the receiving material. If the threads are damaged, you may need to use a tap to chase or recut the threads, or potentially use a larger screw or insert.
Tips for Enhanced Success and Safety
Mastering the drill-through screw removal technique involves more than just following the steps; it’s about understanding the nuances and adopting best practices.
Drill Bit Maintenance
Keep your drill bits sharp. A dull bit requires more force, generates more heat, and is more likely to break or wander. Consider investing in a drill bit sharpener or replacing bits regularly, especially if you work with metal frequently. For detailed information on drill bit care and types, resources like Machinery Lubricants offer valuable insights.
Speed and Pressure Control
Patience is key. Start with slow speeds and moderate pressure. As the bit begins to cut, you can gradually increase speed if needed, but always listen to your drill and feel for resistance. Overheating is the enemy of drill bits and can make the job much harder.
Cooling the Bit
Metal drilling generates heat. Besides using cutting fluid, you can also dip the drill bit in water or a coolant solution periodically to prevent it from overheating. This is especially important when drilling through tough materials like hardened steel.
Drilling Pilot Holes for Extracts
Sometimes, after drilling out the majority of a screw, a small portion of the shank might remain. In such cases, you might drill a pilot hole into the remaining fragment and then use a screw extractor (also known as an “easy-out”) to grip and remove it. The pilot hole size for an extractor is usually specified in the extractor kit instructions.
Dealing with Broken Screw Shafts
If a screw breaks off flush or below the surface, the center punch and drill method is often the best first step. Once you’ve drilled out the core, you might be left with the screw’s outer shell. You can sometimes use a pick or a small chisel to collapse the shell inward and extract it, or if the hole is large enough, you might be able to drive a slightly larger screw into the remains to push it out.
When to Call a Professional
While this technique is effective, if you’re working on a critical component, a valuable antique, or are simply uncomfortable with the process, it’s always wise to consult a professional mechanic or handyman. They have specialized tools and experience that can prevent costly mistakes.
Common Mistakes to Avoid
Even with the best intentions, mistakes can happen. Here are some common pitfalls and how to sidestep them:
- Using the Wrong Drill Bit: This is the most common error. Using a wood bit or a bit too large for the screw shank will lead to poor results and potential damage. Always use metal-drilling bits.
- Drilling Off-Center: Without a center punch, the drill bit can easily wander, damaging the surrounding material and making the screw removal more difficult.
- Drilling Too Fast: Excessive speed generates heat, dulls the drill bit, and can cause the bit to break. Slow and steady wins the race.
- Applying Too Much Pressure: Forcing the drill can cause it to bind, break the bit, or damage the workpiece. Let the sharp bit cut the material.
- Not Using Lubricant: This leads to increased friction, heat, and premature wear on the drill bit, especially with harder metals.
- Ignoring Safety Gear: Metal shavings are sharp and can cause serious eye injury. Always wear safety glasses.
Frequently Asked Questions (FAQ)
Can you drill through any type of screw?
You can drill through most common types of screws, including steel, brass, and aluminum. However, extremely hardened or specialty alloy screws may require specialized drill bits (like cobalt or carbide) and techniques. It’s always best to identify the material of the screw if possible.
What happens to the threads in the hole after drilling?
If you drill precisely down the center of the screw and use a bit that is only slightly smaller than the screw shank, you can often preserve the original threads in the hole. However, if you drill off-center or use too large a bit, the threads can be damaged. In such cases, you might need to re-tap the hole with a larger tap, use a thread repair kit (like a Heli-Coil), or use a slightly larger screw.
How do I know what size drill bit to use?
The key is to choose a drill bit that is slightly smaller than the shank (the unthreaded body) of the screw, not the head. A good starting point is to use a bit that is about 50-75% of the screw’s shank diameter. If you’re unsure, measure the screw shank with calipers or use a drill bit gauge to find a bit that fits snugly alongside the shank.
Can I use a screw extractor instead of drilling through?
Yes, a screw extractor is often a preferred method for screws with damaged heads, especially if the head is still accessible and somewhat intact. Extractor kits usually involve drilling a pilot hole into the center of the screw and then using the extractor bit, which has reverse threads, to grip and unscrew the damaged fastener. Drilling through the screw is generally reserved for cases where the head is completely gone, severely damaged, or the screw is seized beyond the capabilities of an extractor.
What if the screw breaks off below the surface?
If a screw breaks off flush with or below the surface, the drill-through method is often the most effective. After center-punching, you’ll drill directly into the broken shaft. The goal is to drill out the core of the broken screw. Once the core is removed, you might be able to collapse the remaining screw shell inward with a small pick or chisel to remove it. If the hole is large enough, you might be able to