Yes, with limitations and proper setup, a drill press can perform some milling operations. While not a true milling machine, it can achieve similar results for lighter tasks, offering a cost-effective solution for DIYers and hobbyists needing precision without the investment of a dedicated mill.
Must-Have Tools in Your House If You Work Regularly


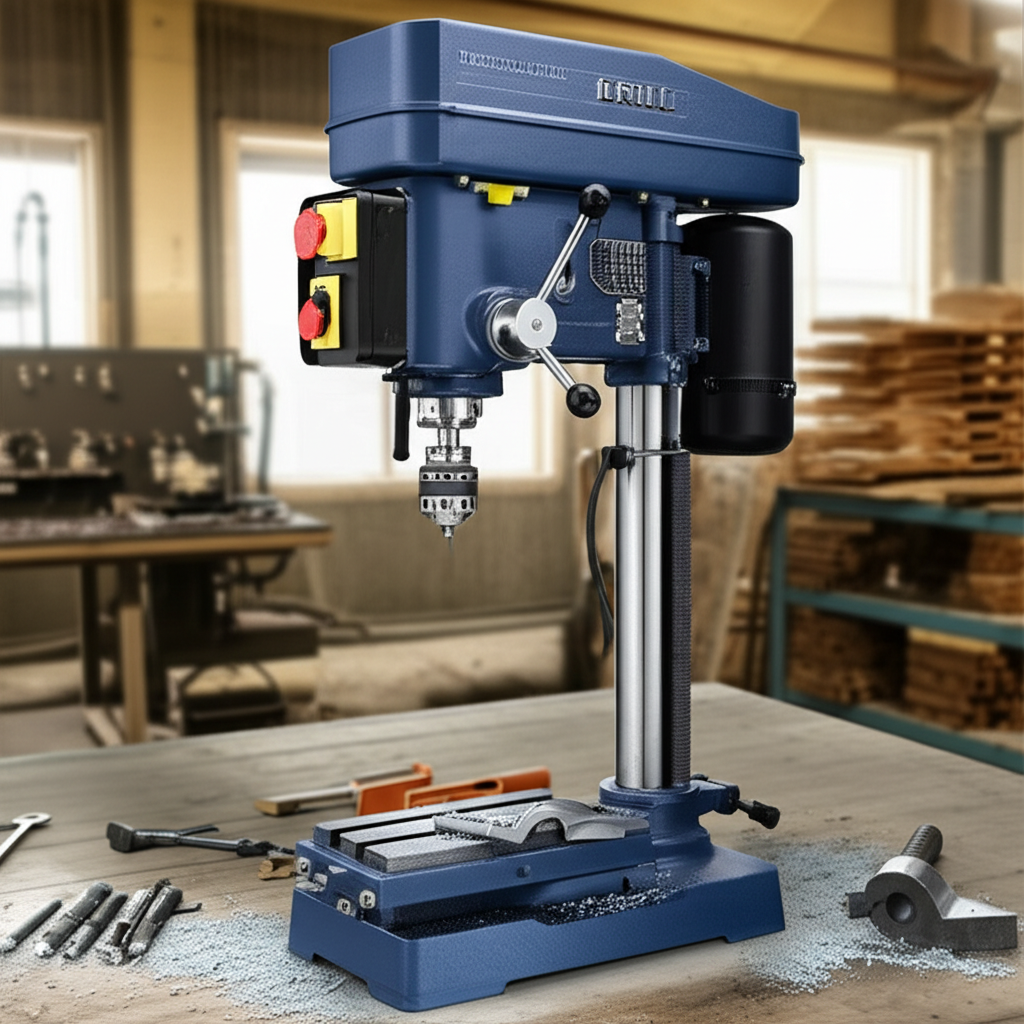
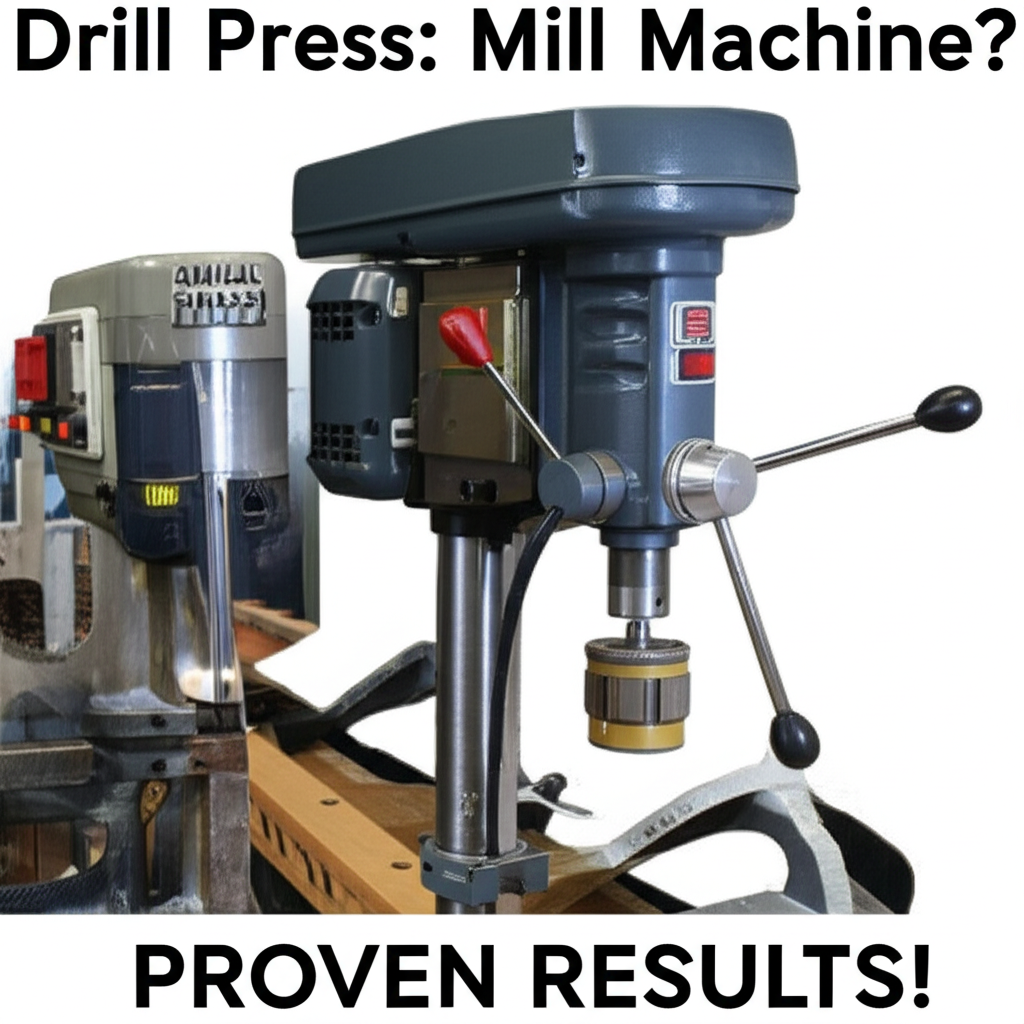
Can a Drill Press Be Used as a Milling Machine? Proven Results!
Ever looked at your trusty drill press and wondered if it could do more than just spin a drill bit? You’re not alone! Many DIYers, mechanics, and home workshop enthusiasts find themselves needing to create slots, flatten surfaces, or make precise cuts, tasks that often scream “milling machine.” But the thought of investing in a heavy-duty milling machine can be daunting, both in terms of cost and space. So, the big question arises: can a drill press, that familiar workhorse of your shop, actually handle some of these more intricate milling tasks? We’ve got the answers and the proven results to show you how it’s done, often with surprisingly effective outcomes.
It’s a common frustration: you need to make a clean, straight groove or machine a flat surface, but your drill press, as it is, doesn’t seem quite up to the job. You might be hesitant to push its limits, worried about damaging your tool or, worse, causing an accident. But what if we told you that with a few key accessories and a bit of know-how, your drill press can step up and perform tasks that were previously out of reach? We’re going to break down exactly how to achieve this, from the essential accessories you’ll need to the techniques that ensure safety and accuracy. Get ready to unlock new capabilities in your workshop!
Understanding the Difference: Drill Press vs. Milling Machine
Before we dive into how to make your drill press act like a mill, it’s crucial to understand what sets them apart. A milling machine is specifically designed for material removal in multiple directions with high precision. It features a robust, rigid structure to withstand lateral forces and a powerful motor capable of driving specialized milling cutters. The spindle on a milling machine can move both vertically and horizontally, allowing for complex cuts and shaping.
On the other hand, a drill press is primarily built for drilling holes. Its spindle moves only vertically, and its frame, while sturdy for drilling, isn’t engineered to handle the significant side loads that milling cutters generate. This fundamental difference means that while you can adapt a drill press for milling, you must be aware of its limitations to avoid damage or injury.
Can a Drill Press Be Used as a Milling Machine? The Basics
The short answer is yes, but with significant caveats. A drill press can be adapted to perform basic milling operations, especially for softer materials like wood, plastics, and aluminum. Think of it as a light-duty mill. You won’t be carving steel with it, but you can certainly cut slots, flatten small areas, or create dados.
The key to making this work lies in understanding how to manage the forces involved and using the right equipment. You’ll primarily be using a drill press vise and, crucially, a milling vise or a cross-slide vise that allows for controlled movement along two axes (X and Y). The vertical feed of the drill press provides the Z-axis movement.
Essential Accessories for Milling with a Drill Press
To even begin thinking about milling with your drill press, you’ll need a few critical accessories. These tools are what bridge the gap between drilling and light milling.
- Cross-Slide Vise (Milling Vise): This is arguably the most important accessory. A standard drill press vise only holds the workpiece. A cross-slide vise has two sets of adjustable jaws, typically controlled by handwheels and lead screws, allowing you to move the workpiece precisely along the X and Y axes. This controlled movement is essential for making cuts across the material.
- Milling Cutters: You cannot use standard drill bits for milling. You’ll need specialized milling cutters, such as end mills or slotting cutters. End mills have cutting edges on their sides as well as their ends, allowing them to cut horizontally. Slotting cutters are designed specifically for creating grooves.
- Drill Press Table: While not strictly necessary for all milling operations, a good drill press table, especially one with T-slots, is invaluable. T-slots allow you to securely mount your vise and other workholding devices, providing a stable platform for your milling operations.
- Workholding: Beyond the vise, you might need clamps, hold-downs, or other methods to secure your workpiece, especially if it’s an irregular shape.
- Speed Reducer (Optional but Recommended): Milling cutters generally require slower spindle speeds than drilling. Many drill presses have multiple speed settings, but a good quality drill press might benefit from a belt-driven speed reducer to achieve the slower RPMs needed for effective milling without overheating the cutter or workpiece.
How to Mill with a Drill Press: A Step-by-Step Guide
Once you have your accessories, you can start milling. Remember, patience and precision are key here.
- Secure Your Workpiece: Mount your workpiece firmly in the cross-slide vise. Ensure it’s positioned so the cut will be made accurately. Use parallels or riser blocks if needed to bring the workpiece to the correct height for the cutter.
- Mount the Vise: Secure the cross-slide vise to your drill press table or a sturdy mounting plate. Ensure it’s locked in place and won’t shift during operation.
- Select the Correct Cutter and Speed: Choose the appropriate end mill or slotting cutter for the material you’re working with and the type of cut you need to make. Consult charts or manufacturer recommendations for the ideal spindle speed. Slower speeds are generally better for milling, especially in harder materials.
- Set Up for the Cut: Lower the drill press spindle until the milling cutter is just above the workpiece. You’ll use the cross-slide vise’s handwheels to position the workpiece relative to the cutter.
- Make the First Cut (Plunge or Traverse):
- Plunge Cut: For drilling a hole or starting a slot where the cutter is centered, you’ll lower the spindle (Z-axis) into the workpiece.
- Traverse Cut: For cutting a slot across the material, you’ll engage the Z-axis feed (lowering the spindle) to the desired depth, then use the X or Y handwheel on the vise to move the workpiece horizontally under the spinning cutter.
- Control the Feed Rate: This is critical. You want a steady, controlled feed rate. Don’t force the cutter. Let it do the work. If you’re using the drill press’s quill feed for the Z-axis, do it slowly and smoothly. If you’re moving the workpiece with the vise handwheels, turn them at a consistent pace.
- Take Shallow Passes: For most milling tasks on a drill press, it’s best to take multiple shallow passes rather than trying to remove a lot of material at once. This reduces the load on the drill press spindle and the cutter, leading to cleaner cuts and a longer tool life.
- Clear Chips: Periodically stop the spindle and clear away chips from the cutting area. Accumulating chips can interfere with the cut and potentially damage the cutter or workpiece. Use a brush or compressed air (carefully, to avoid blowing chips into your eyes).
- Measure and Repeat: After each pass, measure your work to ensure you’re achieving the desired dimensions. Adjust the vise or quill depth as needed for subsequent passes.
When Your Drill Press Isn’t Enough: Limitations and Considerations
It’s important to be realistic about what a drill press can do when adapted for milling. Here are some key limitations:
- Lateral Force: The biggest limitation is the drill press’s inability to handle significant side loads. Milling cutters exert considerable sideways force, which can flex the drill press quill and spindle, leading to inaccurate cuts and potentially damaging the bearings or the quill itself.
- Spindle Runout: Drill presses, especially less expensive models, may have more spindle runout (wobble) than a dedicated milling machine. This runout can affect the precision and finish of your milled parts.
- Rigidity: The overall rigidity of a drill press is much lower than a milling machine. This means vibrations are more common, which can result in rougher finishes and limit the depth of cut you can safely achieve.
- Feed Control: While handwheels on a cross-slide vise offer some control, they don’t provide the same fine-tuned, powered feed control as a milling machine.
- Workpiece Size: The size of your drill press table and the throat depth (distance from the column to the spindle) will limit the size and shape of the workpieces you can mill.
These limitations mean that for heavy-duty milling, production work, or achieving extremely high precision on tough materials like steel, a drill press conversion will likely not suffice. In such cases, a dedicated milling machine is the only viable option.
Comparing Drill Press Milling to Dedicated Mills
To further illustrate the differences, let’s look at a comparison:
| Feature | Drill Press (Adapted for Milling) | Dedicated Milling Machine |
|---|---|---|
| Primary Function | Drilling holes; light milling adaptation | Precise material removal in multiple axes |
| Lateral Load Capacity | Very Low | High |
| Spindle Movement | Vertical only (Z-axis); X/Y via vise | Vertical (Z-axis) and often horizontal (X/Y) |
| Rigidity | Moderate to Low | High |
| Precision | Moderate (dependent on accessories & setup) | High to Very High |
| Speed Control for Milling | May require reducer for optimal speeds | Designed for a wide range of speeds |
| Cost | Lower (tool + accessories) | Significantly Higher |
| Typical Applications | Wood, plastic, aluminum; slots, light facing | Metals, plastics, wood; complex shapes, precision parts |
As you can see, the drill press is a versatile tool for its intended purpose, and with the right add-ons, it can extend its capabilities. However, it’s not a replacement for a machine designed from the ground up for milling.
Proven Results: What Can You Actually Achieve?
Many experienced woodworkers and metalworkers have successfully used drill presses for milling tasks. Here are some common “proven results” you can expect:
- Cutting Slots: Using a slotting cutter or an end mill, you can create clean, straight slots in wood, acrylic, or aluminum for joinery, housing components, or decorative purposes.
- Flattening Surfaces (Light Facing): For small, relatively flat workpieces, you can use a face mill or a large-diameter end mill to achieve a smoother, flatter surface than a standard drill press could provide. This is often done in multiple shallow passes.
- Creating Keyways: Small keyways can be accurately milled into shafts or pulleys.
- Engraving and Lettering: With precise control and small-diameter end mills, you can achieve a form of engraving.
- Chamfering Edges: Special chamfering cutters can be used to create beveled edges on workpieces.
The key to achieving these results is careful setup, appropriate tooling, slow speeds, and shallow cutting depths. It’s about managing the forces and working within the tool’s capabilities.
Safety First: Essential Precautions
Working with milling cutters on a drill press introduces new safety considerations. Always prioritize safety:
- Eye Protection: Always wear safety glasses or a face shield. Milling can produce flying chips.
- Workholding is Paramount: Ensure your workpiece and vise are securely fastened. A spinning cutter can easily dislodge unsecured material, turning it into a dangerous projectile.
- No Loose Clothing or Jewelry: Keep long hair tied back and avoid loose clothing or jewelry that could get caught in the spinning machinery.
- Use the Correct Speed: Too fast a speed can cause cutters to overheat, break, or grab the workpiece. Too slow can lead to inefficient cutting and poor finish.
- Feed in the Correct Direction: When using the quill feed, lower it smoothly. When using the vise for traverse cuts, ensure you are feeding the workpiece into the cutter in a controlled manner.
- Never Reach Under a Spinning Cutter: Always wait for the spindle to stop completely before making adjustments or clearing chips.
- Understand the Limits: Do not attempt to mill hard metals like steel or to take deep cuts. Stick to softer materials and shallow passes.
- Keep Hands Away from the Cutting Zone: Use the handwheels for X/Y movement and the quill feed lever for Z-axis movement.
For more detailed safety guidelines on machining, you can refer to resources from organizations like the Occupational Safety and Health Administration (OSHA), which provides general safety standards for machine operation. While OSHA may not specifically detail drill press milling, their principles for machine safety are universally applicable. You can find valuable information on their website, such as Machine Guarding best practices.
Alternatives and Upgrades
If you find yourself needing more milling capability than your drill press can provide, but a full-sized mill is still out of reach, consider these options:
- Benchtop Milling Machines: These compact mills are designed for hobbyists and small workshops. They offer much greater rigidity and precision than a converted drill press and can handle light metalworking. Brands like Grizzly, Baileigh Industrial, and LittleMachineShop offer various models.
- Drill Press Milling Attachments: Some manufacturers offer specialized attachments that bolt onto the quill or base of a drill press to provide rudimentary X/Y movement. While often less robust than a dedicated cross-slide vise, they can be an option for very light tasks.
- CNC Conversion Kits: For the adventurous DIYer, there are kits available to convert a drill press (or a more robust vertical mill) into a CNC machine, offering automated, precise movements.
When evaluating any tool, especially for metalworking, looking at specifications like machine weight, spindle taper, and available accessories can give you a good indication of its capabilities. For instance, a drill press with a Morse Taper spindle is generally more robust than one with a simple Jacobs chuck mount, potentially handling milling tasks slightly better.
Frequently Asked Questions (FAQ)
Can I use a regular drill bit for milling on a drill press?
No, you should not use regular drill bits for milling. Drill bits are designed for axial (downward) cutting and lack the side-cutting edges needed for milling operations. Using them for milling can damage the bit, the workpiece, and your drill press, and it’s also very unsafe.
What is the best type of cutter to use for milling on a drill press?
The best cutters are typically end mills or slotting cutters. End mills have cutting edges on their sides and end, allowing for both plunge cuts and traverse cuts. Slotting cutters are specifically designed for creating grooves and slots.
How deep can I safely mill with a drill press?
This depends heavily on the material, the cutter, and the rigidity of your drill press. Generally, you should aim for very shallow passes, often no more than 0.010 to 0.020 inches (0.25 to 0.5 mm) per pass, especially when milling metal. Always err on the side of caution and take lighter cuts.
Will milling damage my drill press?
Yes, it’s possible if done improperly or beyond the drill press’s capabilities. Excessive lateral forces from milling can bend the quill, damage spindle bearings, or even crack the drill press head casting. Always be mindful of the side load and avoid forcing the operation.
What kind of materials can I mill with a drill press?
Drill presses adapted for milling are best suited for softer materials like wood, plastics, acrylics, and aluminum. They can handle very light milling on softer steels or brass with appropriate cutters and very shallow passes, but it’s generally not recommended for extensive work on harder metals.
Is a cross-slide vise necessary for milling with a drill press?
Yes, a cross-slide vise (or milling vise) is essential. It provides the necessary controlled movement along two axes (X and Y) that a drill press lacks. Without it, you cannot perform traverse milling operations accurately or safely.
What spindle speed should I use for milling?
Milling generally requires slower spindle speeds than drilling. The exact speed depends on the material being cut, the diameter of the cutter, and the type of cutter. A good starting point for aluminum with a 1