Yes, absolutely! With the right setup and precautions, a drill press can be safely and effectively adapted to function as a lathe, opening up a world of creative woodworking and metalworking possibilities for DIY enthusiasts and professionals alike.
Must-Have Tools in Your House If You Work Regularly


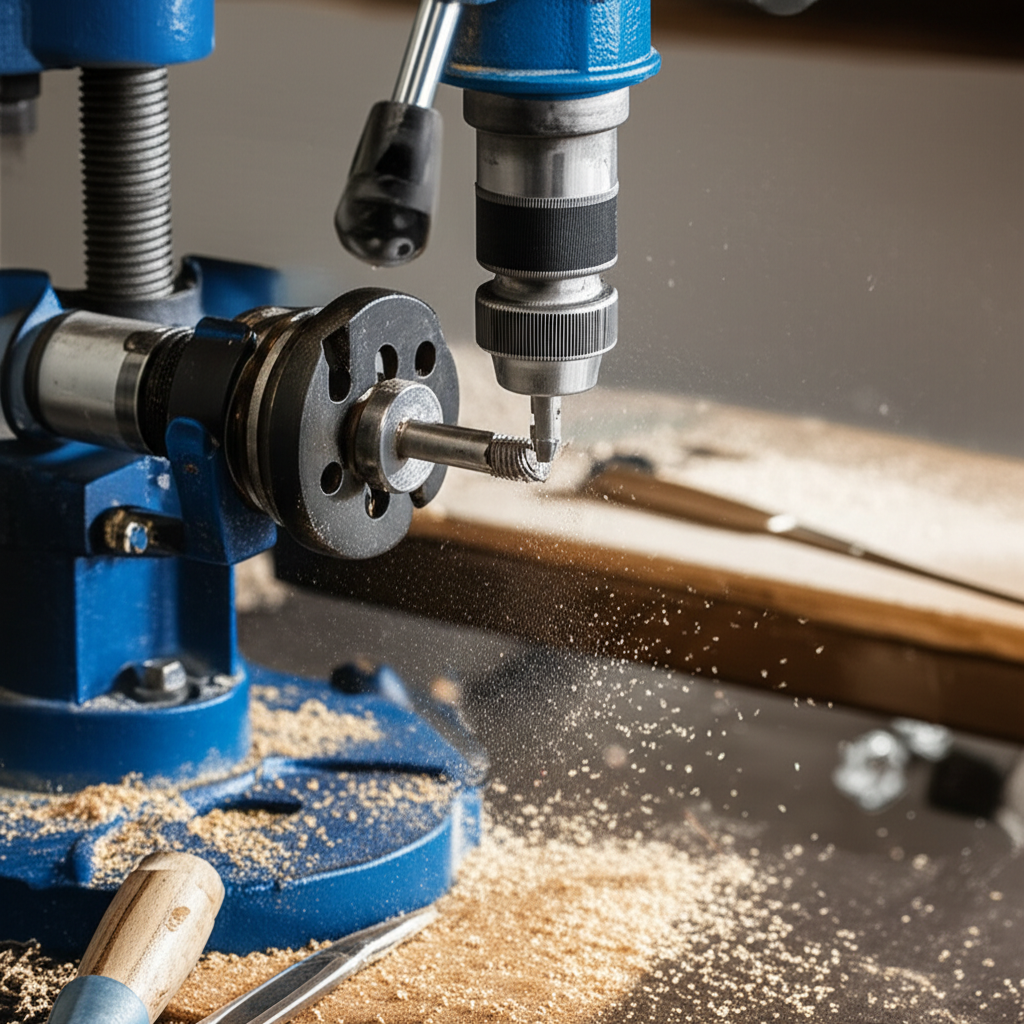
Ever found yourself staring at your drill press, wondering if it could do more than just holes? Many DIYers, mechanics, and homeowners face a similar question when they need to shape or smooth cylindrical pieces but don’t have a dedicated lathe. It’s a common challenge, especially when you’re working on a project that requires precise curves or smooth finishes on metal or wood. The good news is, your trusty drill press might just be the versatile tool you need to tackle these tasks. We’ll guide you through how to safely and effectively transform your drill press into a functional lathe, unlocking new capabilities for your workshop.
Can a Drill Press Be Used as a Lathe? The Surprising Truth
The short answer is a resounding yes! While a drill press isn’t designed to be a lathe from the ground up, its core mechanics—a stationary motor driving a rotating spindle—make it a surprisingly capable substitute for certain lathe tasks. This transformation allows you to perform operations like sanding, polishing, and even some light cutting on cylindrical workpieces. It’s a fantastic way to expand your tool’s functionality without investing in a separate, specialized machine.
This adaptability is a game-changer for anyone who enjoys woodworking, metal fabrication, or even intricate repairs. Imagine being able to smooth the edges of a custom wooden dowel, polish a metal rod to a mirror finish, or even shape small decorative pieces right on your existing drill press. The key lies in understanding the principles of lathing and how to safely adapt your drill press to achieve these results.
Understanding the Basics: Drill Press vs. Lathe
Before we dive into the “how,” it’s helpful to understand the fundamental differences and similarities between a drill press and a lathe.
- Drill Press: Primarily designed for drilling precise, perpendicular holes. It features a stationary base, a vertical column, a table that moves up and down, and a motor that spins a chuck holding a drill bit. The workpiece is held stationary on the table, and the spinning tool moves down into it.
- Lathe: Designed for shaping rotating workpieces. It has a headstock that spins the workpiece, a tailstock that supports longer workpieces, and a tool rest where cutting or shaping tools are held. The workpiece rotates, and the stationary tool is moved into it to remove material.
When you use a drill press as a lathe, you’re essentially reversing the typical operation. The drill press spindle remains stationary in its downward travel (or is locked in place), and the workpiece, mounted securely, is what rotates against a stationary tool or abrasive.
Why Adapt Your Drill Press? The Advantages
There are several compelling reasons why DIYers and professionals alike consider converting their drill press into a makeshift lathe:
- Cost-Effectiveness: Purchasing a dedicated lathe can be a significant investment. Adapting your existing drill press is a much more budget-friendly option, especially for occasional use or smaller projects.
- Space Saving: For those with limited workshop space, utilizing a drill press for lathing means not needing to accommodate an entirely separate machine.
- Versatility: It allows you to perform a wider range of tasks with a single primary tool, making your workshop more efficient.
- Accessibility: For beginners, it’s an excellent way to learn the fundamental principles of lathing in a controlled environment before committing to more expensive equipment.
What Can You Actually Do with a Drill Press Lathe?
While a drill press conversion won’t replace a heavy-duty industrial lathe, it’s surprisingly capable for a variety of tasks:
- Sanding and Polishing: This is perhaps the most common and effective use. You can attach sanding drums, buffing wheels, or polishing pads to the drill press chuck to smooth and finish turned or cylindrical objects.
- Light Shaping of Wood: With the right chisels or carving tools, you can perform light shaping on softwoods. This is ideal for creating rounded edges, tapers, or simple decorative elements.
- Metal Finishing: Polishing metal shafts, rods, or small parts can be easily done. You can use wire wheels, buffing compounds, and various abrasive materials.
- Sharpening Tools: Some users adapt their drill press for sharpening tools like chisels, plane blades, or even drill bits, using appropriate grinding wheels or sharpening stones.
- Creating Small Parts: For very small, precise projects like custom knobs, beads, or model parts, a drill press lathe can be quite effective.
How to Safely Set Up Your Drill Press as a Lathe
Safety is paramount when adapting tools for new purposes. Here’s a step-by-step guide to setting up your drill press for lathing:
Step 1: Assess Your Drill Press
Not all drill presses are created equal. Before you start, consider these factors:
- Power and Stability: A heavier, more powerful drill press with a stable base and minimal wobble is ideal. Light benchtop models might struggle with the forces involved in lathing.
- Chuck Capacity: Ensure your drill press chuck can securely grip the workholding device (e.g., a drill bit shank, a specialized chuck adapter) you’ll be using.
- Speed Control: Variable speed control is highly beneficial. Lower speeds are generally safer and more effective for lathing, especially when starting.
Step 2: Secure the Workpiece
This is arguably the most critical step for safety. You need a reliable way to hold your workpiece while it spins. Here are common methods:
Method A: Using a Large Drill Bit and Chuck
For smaller, cylindrical pieces (like dowels or metal rods), you can often use a large drill bit as an intermediary.
- Select a drill bit with a shank that your drill press chuck can securely grip.
- Drill a pilot hole into the center of your workpiece if it’s wood. For metal, you might need a center drill or a specialized clamp.
- Insert the drill bit into the drill press chuck and tighten it firmly.
- Carefully align the workpiece with the drill bit. For wood, the bit can often be inserted directly into the pilot hole. For metal, you might need to rig a simple clamp or use a vise designed for this purpose to hold the workpiece against the spinning drill bit shank.
- Crucially, ensure the drill bit is perfectly centered in the workpiece. An off-center setup will cause severe vibration and is extremely dangerous.
Method B: Specialized Lathe Adapters and Chucks
For more robust and versatile lathing, you can invest in specialized adapters designed to fit drill press spindles.
- Drill Press Lathe Adapters: These often consist of a threaded rod that screws into the drill press spindle (replacing the chuck) or attaches to the quill. They provide a mounting point for a small lathe chuck or a faceplate.
- Lathe Chucks: Keyed chucks (similar to drill press chucks but often designed for heavier loads) or scroll chucks can be mounted to these adapters, allowing you to securely grip a wider variety of workpiece shapes and sizes.
- Faceplates: These flat discs with threaded centers can be attached to the spindle and allow you to mount workpieces using screws, clamps, or even glue for specific tasks.
Research adapters specifically made for your drill press model or general-purpose adapters that fit common spindle threads.
Step 3: Mount Your Tool Rest
A tool rest is essential for supporting and guiding your shaping or sanding tools. Since drill presses don’t come with them, you’ll need to improvise or purchase one.
- Improvised Tool Rest: A sturdy piece of metal (like a thick steel bar or angle iron) can be clamped securely to the drill press column or base. It needs to be positioned so that your tool can rest on it at the correct height and angle relative to the spinning workpiece. Ensure it’s clamped firmly – it should not move during operation.
- Purchased Tool Rests: Some companies offer universal tool rests designed to clamp onto drill press columns. These are often more adjustable and stable than DIY solutions.
The tool rest should be positioned close enough to the workpiece to provide solid support but far enough away to prevent the tool from catching or binding.
Step 4: Select and Mount Your Abrasives or Tools
Once your workpiece is secured and your tool rest is in place, you can attach your working medium.
- Sanding Drums: These are common attachments for drill presses. They have a spindle that fits into the drill press chuck, and sandpaper is wrapped around the drum.
- Buffing/Polishing Wheels: Felt, cloth, or foam wheels designed for polishing can be mounted similarly to sanding drums.
- Grinding Wheels: For sharpening or grinding, use wheels specifically designed for bench grinders or angle grinders and ensure they can be securely mounted.
- Woodworking Chisels/Gouges: These require careful handling. You’ll need to hold them firmly against the tool rest and carefully apply them to the spinning workpiece.
Ensure whatever you mount is perfectly balanced. An unbalanced attachment will cause dangerous vibrations.
Step 5: Adjust Speed and Settings
Proper speed settings are crucial for safety and effectiveness.
- Lower Speeds are Safer: For most lathing tasks, especially with wood, start at the lowest speed setting on your drill press. Higher speeds increase the risk of the workpiece flying off or the tool binding.
- Consider Material: Softer materials can often be worked at lower speeds. Harder materials might require slightly higher speeds for efficient shaping or polishing, but always err on the side of caution.
- Lock the Quill: Once you have the desired height set for your tool or workpiece, lock the drill press quill to prevent it from moving up or down unintentionally.
- Turn Off the Motor Before Adjusting: Always turn off the drill press before making any adjustments to speed, tool position, or workpiece.
Step 6: The Lathing Process – Safety First!
With everything set up, it’s time to start. Remember these vital safety points:
- Wear Safety Glasses: Always wear a full face shield or safety glasses. Wood chips, metal shavings, or abrasive fragments can fly off at high speed.
- Secure Clothing: Avoid loose clothing, jewelry, or long hair that could get caught in the rotating workpiece or machine.
- Maintain a Firm Stance: Stand in a balanced position, ready to react.
- Start Slowly: Begin with minimal pressure and gradually increase as needed. Let the tool do the work.
- Never Force It: If the tool is binding or the drill press is struggling, stop immediately. You may need to adjust your technique, the tool, or the speed.
- Keep Hands Clear: Keep your hands and fingers well away from the point of contact between the tool and the workpiece.
- Workpiece Security Check: Periodically check that the workpiece remains securely mounted.
When sanding or polishing, gently bring the abrasive or wheel into contact with the spinning workpiece. Move the tool back and forth along the length of the workpiece to create an even finish.
Proven Results: What Can You Achieve?
Many hobbyists and even some professionals have achieved impressive results using a drill press as a lathe:
- Smooth Wooden Handles: Creating ergonomically shaped wooden handles for tools or custom furniture pieces.
- Polished Metal Components: Achieving a high-gloss finish on metal shafts, spindles, or decorative rods for projects.
- Custom Knobs and Buttons: Shaping small wooden or plastic knobs for electronics or custom cabinetry.
- Decorative Wood Turnings: Crafting simple turned elements like finials, beads, or small decorative spindles for craft projects.
- Sharpened Tools: Restoring the edge on chisels, plane blades, and drill bits with precision.
The quality of the results often depends on the stability of the drill press, the security of the workpiece mounting, the quality of the tools used, and the operator’s skill and patience.
Comparison: Drill Press Lathe vs. Dedicated Lathe
It’s important to understand the limitations of a drill press lathe compared to a dedicated machine.
| Feature | Drill Press Lathe | Dedicated Lathe |
|---|---|---|
| Primary Function | Drilling holes (adapted for lathing) | Turning and shaping workpieces |
| Workpiece Size Capacity | Limited (typically smaller diameters and lengths) | Much larger capacities, depending on the model | Varies; often less torque for sustained heavy cuts | Designed for turning; typically higher torque and power for material removal |
| Tooling & Accessories | Requires improvisation or specialized adapters | Wide range of specialized chucks, tool rests, and cutters available |
| Stability & Vibration | Can be an issue if not properly secured; more prone to vibration | Engineered for stability; much less vibration, especially in heavier models |
| Precision & Control | Good for sanding/polishing; less precise for complex cuts | High precision for intricate cuts, threading, and shaping |
| Cost | Low (if you already own a drill press) | Moderate to very high |
For detailed specifications and considerations when purchasing a dedicated lathe, resources like Popular Mechanics’ guide to wood lathes can be very insightful.
Troubleshooting Common Issues
Even with the best setup, you might encounter some challenges:
- Excessive Vibration: This is usually caused by an unbalanced workpiece, a loose chuck, or an unstable tool rest. Double-check all connections and ensure your workpiece is centered.
- Workpiece Slipping: The workholding method is not secure enough. Re-evaluate how your workpiece is mounted. For wood, a deeper pilot hole or a more substantial attachment might be needed.
- Poor Finish Quality: This could be due to worn sandpaper, the wrong grit, excessive speed, or an unsteady tool rest. Ensure your abrasives are fresh and your tool rest provides solid support.
- Tool Binding: Applying too much pressure or using an incorrect angle with a cutting tool. Ease up on the pressure and ensure the tool is correctly angled on the rest.
FAQ: Your Drill Press Lathe Questions Answered
Can I use any drill press as a lathe?
While you can adapt most drill presses, heavier, more powerful models with a stable base and variable speed control will yield better and safer results. Light benchtop models might struggle with the demands of lathing, especially if you plan on doing any material removal.
What’s the safest way to hold the workpiece?
The safest method is using a dedicated lathe chuck mounted via a specialized drill press adapter that screws into the spindle. If improvising, a large drill bit shank firmly gripped by the chuck and inserted into a well-drilled pilot hole (for wood) is a common, albeit less secure, method. Always prioritize a solid, centered connection.
What kind of tools can I use?
For sanding and polishing, you can use sanding drums, buffing wheels, or flap discs that fit the drill press chuck. For light wood shaping, specialized mini-lathe chisels designed for smaller spindles can be used, but they require extreme care and a very stable tool rest.
Is it safe to cut metal with a drill press as a lathe?
Cutting metal is significantly more demanding and potentially dangerous than sanding or polishing. It requires a very sturdy drill press, a secure workholding method, and specialized metal-cutting tools. For anything beyond light deburring or polishing, a dedicated metal lathe is strongly recommended.
What are the limitations of a drill press lathe?
The main limitations are workpiece size capacity, power, torque for material removal, and precision. Drill press lathes are best suited for sanding, polishing, and light shaping of smaller items, rather than heavy stock removal or intricate turning that a dedicated lathe excels at.
Do I need special attachments?
While you can improvise, special drill press lathe adapters and chucks significantly improve safety, versatility, and the quality of results. These attachments provide more secure mounting options for your workpiece and tools.
What safety gear is essential?
Always wear safety glasses or a full face shield. Work gloves can be helpful for handling workpieces, but