Yes, you absolutely can use a standard drill as a Dremel for many tasks! While a dedicated Dremel offers finer control and specialized attachments, a drill can effectively handle light-duty cutting, sanding, polishing, and engraving with the right accessories and a bit of practice. Discover how to make your drill work like a Dremel with proven results for your DIY projects.
Must-Have Tools in Your House If You Work Regularly


Ever found yourself in the middle of a project, needing that precise touch only a rotary tool seems to offer, only to realize you don’t have one? It’s a common frustration for DIYers and home mechanics alike. You’ve got your trusty drill, a powerhouse for holes and driving screws, but can it really do the delicate work of a Dremel? The good news is, with the right attachments and a little know-how, your drill can indeed step in for those lighter, more intricate tasks. This guide will walk you through how to transform your drill into a versatile rotary tool, giving you proven results without needing to buy another gadget.
Unlocking Your Drill’s Potential: Drill vs. Dremel
It’s natural to wonder if a tool designed for brute force can handle finesse. A standard drill is typically larger, heavier, and often more powerful than a Dremel rotary tool. Dremels are specifically engineered for precision work, featuring a pencil-like grip, a flexible shaft option, and a vast array of tiny, specialized bits designed for intricate cutting, grinding, polishing, and engraving. They generally operate at higher RPMs (revolutions per minute) than many standard drills, allowing for finer detail work.
However, the core function of both tools involves a rotating spindle to which various accessories can be attached. This fundamental similarity is what makes a drill a viable, albeit different, alternative for many Dremel-like tasks. It’s important to understand the limitations and advantages of using a drill in this capacity to ensure safety and achieve the best possible outcomes.
Key Differences to Consider
Before we dive into how to use your drill as a Dremel, let’s quickly highlight the main distinctions:
- Size and Weight: Drills are generally bulkier and heavier, making them less ideal for prolonged, intricate detail work that requires a steady, lightweight hand.
- Speed Control: While many modern drills have variable speed triggers, Dremels often offer a wider range of precise speed settings, crucial for different materials and tasks. Higher RPMs are typically found on Dremels, which is beneficial for certain finishing work.
- Ergonomics: Dremels are designed for a comfortable, precise grip, similar to holding a pen. Drills are designed for a two-handed grip, which can be cumbersome for detailed operations.
- Attachment Variety: While drills can use a variety of rotary tool accessories, Dremels boast an unparalleled selection of specialized bits and attachments for almost any crafting or detailing need.
When Can Your Drill Act Like a Dremel?
Your drill can effectively step into the Dremel’s shoes for several common DIY and repair tasks, especially those that don’t require extreme precision or prolonged, delicate manipulation. Think of it as a capable assistant rather than a direct replacement for highly specialized jobs.
Suitable Applications for a Drill as a Dremel:
- Light Sanding and Polishing: With sanding drums, polishing pads, or wire brushes, your drill can smooth rough edges, clean metal, or buff surfaces.
- Cutting Small Materials: Cutting discs attached to your drill can handle thin plastics, vinyl, or even light sheet metal for small modifications or repairs.
- Grinding and Sharpening: Small grinding stones or sharpening bits can be used to touch up blades, bits, or tools.
- Engraving on Softer Materials: Engraving bits can be used on wood, plastic, or soft metals, though achieving fine, intricate detail might be challenging.
- Cleaning and Rust Removal: Wire brushes and cleaning wheels are excellent for removing rust, paint, or debris from various surfaces.
- Buffing and Car Detailing: Soft buffing wheels are perfect for applying wax or polish to cars and other surfaces.
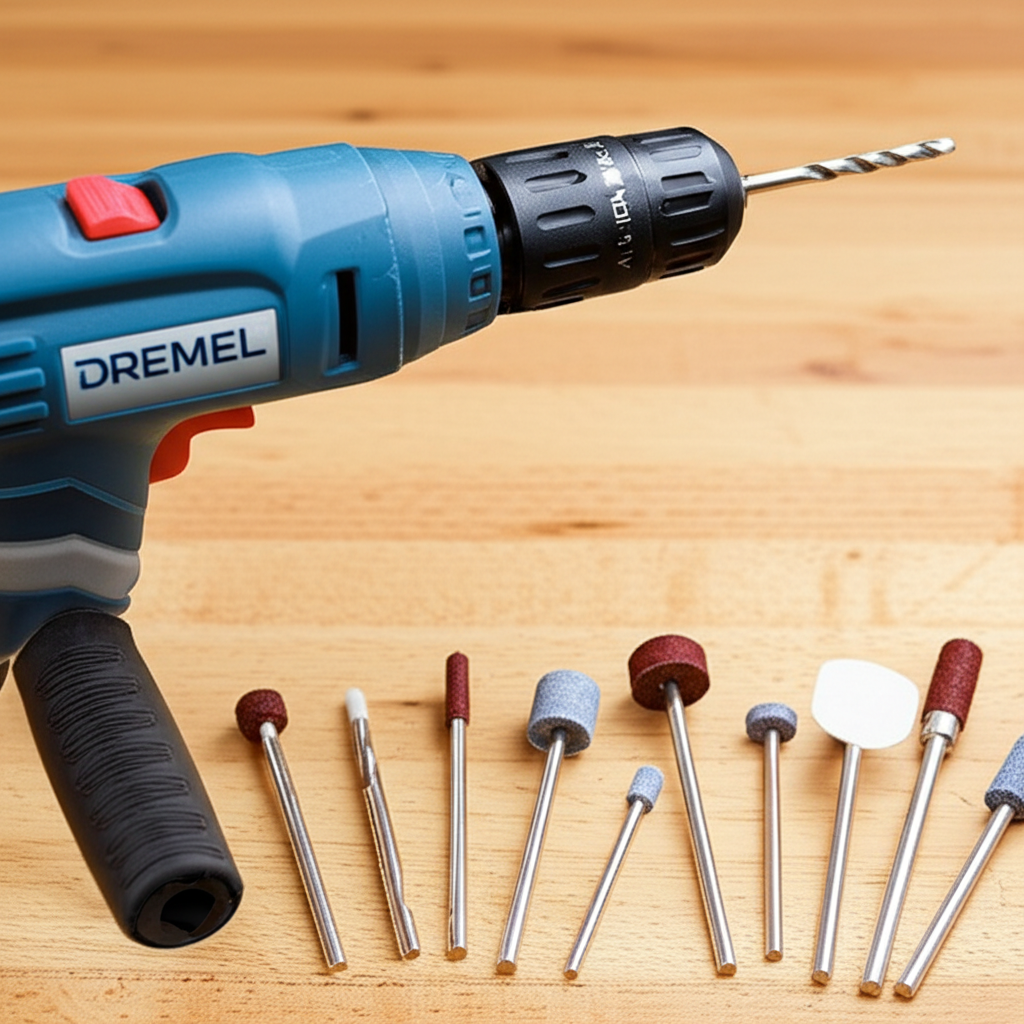
Essential Accessories for Your Drill-to-Dremel Conversion
The magic happens with the right attachments. To use your drill as a Dremel, you’ll need specific accessories that are designed to fit a drill’s chuck. Fortunately, many rotary tool accessory kits are available that include mandrels (small shafts that hold the accessories) with a 1/8-inch shank, which is standard for most Dremel accessories and many drill-compatible rotary bits.
Must-Have Attachments:
- Mandrel: This is the connector piece that typically screws onto the accessory (like a cutting wheel or sanding drum) and then inserts into your drill’s chuck. Ensure the mandrel has the correct shank size for your drill (usually 1/8″ for Dremel-style bits).
- Cutting Wheels: Thin abrasive discs used for cutting metal, plastic, or wood. They come in various diameters and thicknesses.
- Sanding Drums and Bands: Small abrasive drums or sleeves that are great for smoothing edges, shaping wood, or removing material.
- Wire Brushes: Brass or steel brushes for cleaning, rust removal, and surface preparation.
- Polishing and Buffing Wheels: Felt or cloth wheels, often used with polishing compounds, for shining surfaces.
- Engraving Bits: Small, pointed bits made of carbide or diamond for etching or engraving.
- Grinding Stones: Small stones for sharpening or grinding metal.
When purchasing accessories, always double-check that they are compatible with your drill’s chuck size and that the shank diameter fits the accessory holder. Many kits are specifically marketed for use with rotary tools but will work perfectly fine with a standard drill.
Step-by-Step: Using Your Drill as a Dremel
Converting your drill is straightforward, but it requires careful attention to detail and safety. Here’s how to do it:
Step 1: Prepare Your Drill
Ensure your drill has a variable speed trigger. This is crucial for control. If your drill only has an on/off switch, it will be much harder to manage the delicate work. Cordless drills often offer better maneuverability for this type of task compared to corded ones.
Step 2: Select and Attach the Accessory
Choose the appropriate accessory for your task (e.g., a cutting wheel for cutting, a sanding drum for sanding).
- Insert the mandrel into your drill’s chuck.
- Secure the accessory onto the mandrel according to the accessory’s instructions (this often involves a small screw).
- Tighten the drill chuck firmly around the mandrel to prevent any slippage.
Step 3: Set Your Speed
This is a critical step. For most Dremel-like tasks, you’ll want a higher speed than you might use for drilling holes, but not necessarily the absolute maximum.
- For cutting and grinding: Start with a moderate to high speed (e.g., 10,000-20,000 RPM).
- For sanding and polishing: Lower to moderate speeds (e.g., 5,000-15,000 RPM) are usually best to prevent overheating the material or the accessory.
- For engraving: Higher speeds can work, but control is paramount.
Experiment on a scrap piece of material to find the optimal speed for your specific task and accessory.
Step 4: Practice and Control
Before tackling your main project, practice on a piece of scrap material.
- Hold the drill with a firm but relaxed grip. For more control, try gripping it closer to the chuck if possible, almost like a pencil, though this might feel awkward with larger drills.
- Let the tool do the work. Don’t force it. Applying too much pressure can break accessories, overheat the drill motor, or lead to poor results and potential injury.
- Move the drill smoothly and deliberately. Avoid jerky motions.
Step 5: Safety First!
This cannot be stressed enough. When using your drill with small rotary accessories, safety is paramount.
- Always wear safety glasses to protect your eyes from flying debris.
- Consider wearing gloves to protect your hands, especially when working with sharp accessories or rough materials.
- Wear a dust mask if you are creating dust, particularly when sanding or grinding.
- Ensure your work area is well-lit and clear of clutter.
- Secure your workpiece with clamps or a vise to prevent it from moving unexpectedly.
- Be aware of the drill’s cord if using a corded model, to avoid entanglement or cutting it.
- Never hold the workpiece in your hand while using a rotary accessory.
Familiarize yourself with the safety guidelines for both your drill and the accessories you are using. Reputable sources like the Occupational Safety and Health Administration (OSHA) provide general guidelines for safe tool operation.
Proven Results: What to Expect
When used correctly, your drill can deliver surprisingly good results for many applications. You might find it excellent for quick touch-ups, minor repairs, or hobby projects where the ultimate in precision isn’t required. For instance, using a small grinding stone to sharpen garden tools or a wire brush to clean corrosion off battery terminals can be highly effective.
For tasks like polishing a car’s chrome trim or sanding down a small wooden craft piece, a drill can achieve a satisfactory finish. However, for extremely fine detail work, such as intricate wood carving, detailed metal engraving, or precise cutting of very hard materials, a dedicated Dremel or a more specialized rotary tool will likely offer superior control and results.
Pros and Cons of Using a Drill as a Dremel
Like any tool adaptation, there are benefits and drawbacks to consider.
Advantages:
- Cost-Effective: You leverage an existing tool, saving the expense of purchasing a dedicated rotary tool.
- Versatility: Expands the capabilities of your current drill.
- Accessibility: Most DIYers already own a drill, making this a readily available solution.
- Power for Larger Tasks: For tasks requiring a bit more torque than a typical Dremel can provide, a drill might be advantageous.
Disadvantages:
- Reduced Precision: The size and weight of a drill make fine, intricate work more challenging.
- Ergonomic Issues: Holding a drill for extended periods of detailed work can be fatiguing.
- Limited Speed Range: Some drills may not offer the very high RPMs or the fine-tuned low speeds ideal for certain Dremel tasks.
- Accessory Wear: Using accessories at speeds or pressures not intended for them might reduce their lifespan.
- Potential for Overheating: Pushing a standard drill motor to perform very fine, high-speed tasks it wasn’t designed for can lead to overheating.
Comparing Drill Types for Dremel-like Tasks
Not all drills are created equal when it comes to adapting them for Dremel-style work. The type of drill you have can influence the ease and effectiveness of the conversion.
| Drill Type | Pros for Dremel Use | Cons for Dremel Use |
|---|---|---|
| Cordless Drill (Basic) | Good maneuverability. Variable speed triggers are common. | May have limited RPM range. Battery life can be a factor. Can be heavier. |
| Cordless Drill (Hammer/Impact) | Generally more powerful, better torque. | Hammer function is irrelevant and can be a distraction. Often heavier and bulkier. |
| Corded Drill | Consistent power supply, usually more power than cordless. | Limited by cord length and availability of outlets. Less maneuverable. |
| Right-Angle Drill | Excellent for tight spaces where a standard drill won’t fit. | Can be awkward to hold for precise work. Often lower RPMs. |
For the best results, a variable-speed, preferably lightweight, cordless drill is often the most suitable choice. The ability to control the speed with a sensitive trigger and the freedom from a cord significantly enhance usability for these tasks.
Maintaining Your Tools
Whether you’re using a dedicated Dremel or your drill adapted for similar tasks, proper maintenance ensures longevity and performance. Regularly clean your drill chuck and accessories. Inspect accessories for wear and tear; replace them if they are damaged or significantly worn.
For any power tool, keeping it clean and free from dust and debris is crucial. Consult your drill’s user manual for specific maintenance recommendations. For instance, the DeWalt website offers manuals for many of their tools, which can guide you on best practices.
Frequently Asked Questions (FAQ)
Frequently Asked Questions
Can I use a drill for detailed engraving like a Dremel?
Yes, you can use a drill for engraving, but it requires significant practice and a very steady hand. Use small engraving bits designed for rotary tools. Start at a moderate speed and focus on light pressure. Achieving the fine, precise lines that a dedicated Dremel can produce might be challenging due to the drill’s size and weight, but for basic etching on softer materials, it’s certainly possible.
What’s the best speed to use my drill at for Dremel-like tasks?
The ideal speed varies depending on the accessory and the material. For cutting and grinding, higher speeds (10,000-20,000 RPM) are often effective. For sanding and polishing, lower to moderate speeds (5,000-15,000 RPM) are generally recommended to prevent overheating and achieve a smoother finish. Always start at a lower speed and gradually increase it while observing the material and accessory.
Are there specific drill bits I need to buy?
You don’t use standard drill bits. Instead, you’ll need accessories designed for rotary tools, such as cutting discs, sanding drums, wire brushes, and polishing wheels. These typically have a small shank (usually 1/8 inch) that fits into a mandrel, which then goes into your drill’s chuck. Look for “rotary tool accessory kits” or individual accessories compatible with 1/8-inch shanks.
Can a drill really replace a Dremel for all tasks?
No, not for all tasks. While a drill can handle many light-duty cutting, sanding, polishing, and cleaning jobs, it’s not a direct replacement for a Dremel when extreme precision, intricate detail, or sustained high-speed operation is required. Dremels are specifically designed for these finer tasks and offer better ergonomics and control.
What is the most important safety precaution when using a drill as a Dremel?
The most critical safety precaution is wearing appropriate personal protective equipment (PPE). Always wear safety glasses to protect your eyes from flying debris. A dust mask and gloves are also highly recommended depending on the material and task. Ensure your workpiece is securely clamped.
My drill doesn’t have variable speed. Can I still use it?
Using a drill without variable speed for Dremel-like tasks is very difficult and often not recommended. The lack of speed control makes it hard to manage the tool effectively for delicate work, increasing the risk of damaging the material, breaking accessories, or causing injury. If your drill lacks variable speed, it’s best to reconsider using it for these applications or invest in a tool that offers better control.
How do I prevent accessories from breaking when using my drill?
To prevent accessories from breaking, avoid applying excessive pressure. Let the tool do the work by guiding it gently. Ensure accessories are properly secured to the mandrel and the mandrel is securely tightened in the drill chuck. Using the correct speed for the material and accessory is also vital. If an accessory feels unstable or vibrates excessively, stop immediately and check its mounting.