Yes, you absolutely can drill through Perspex safely and effectively with the right technique and tools. This guide reveals proven results and simple steps to ensure a clean, crack-free finish every time, making your DIY projects a success.
Must-Have Tools in Your House If You Work Regularly


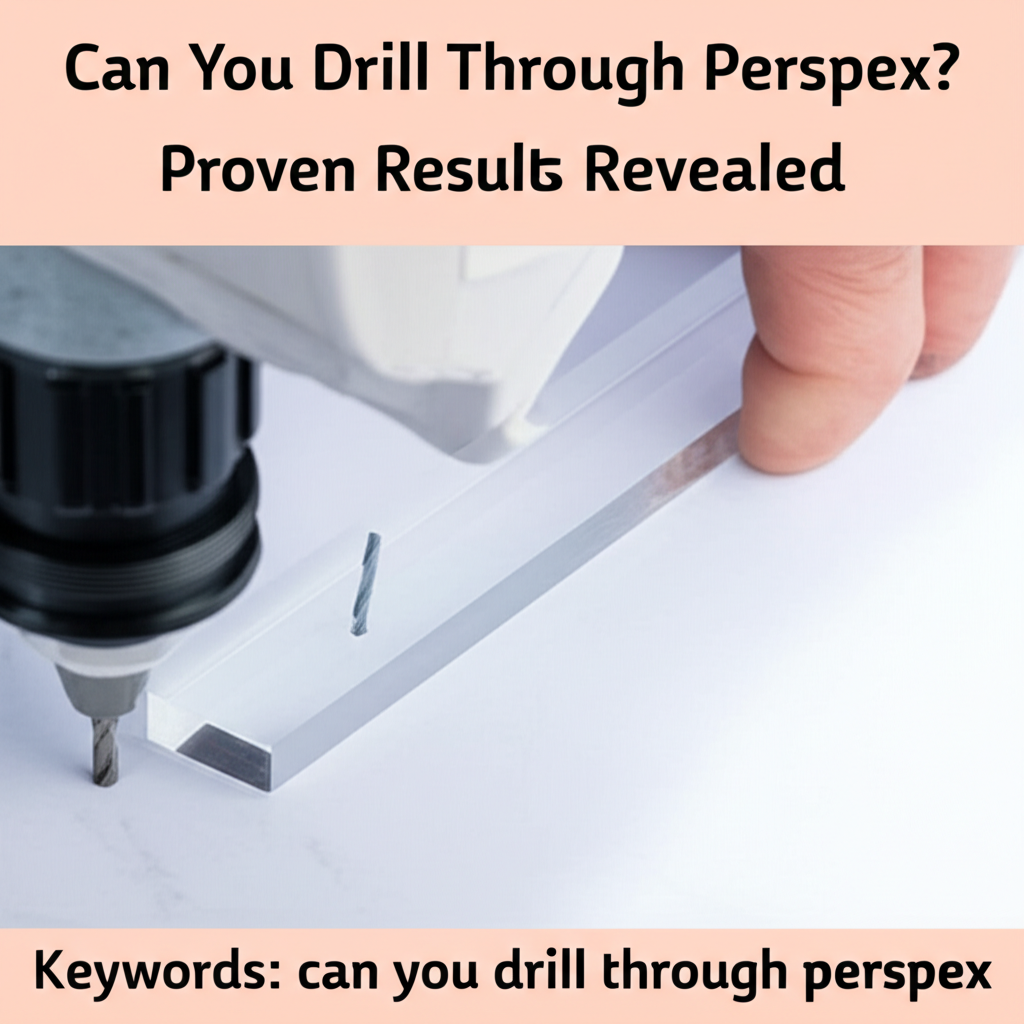
Ever found yourself staring at a beautiful sheet of Perspex, envisioning a new project, only to hesitate at the thought of drilling? You’re not alone! Many DIYers and professionals worry about cracking or damaging this versatile material. Perspex, also known as acrylic glass, is fantastic for everything from custom enclosures and protective screens to artistic creations and automotive modifications. But when it comes to making holes, a common question arises: can you drill through Perspex without turning your project into a costly mess? The good news is, with the right approach, it’s entirely achievable. We’re here to walk you through exactly how to do it, ensuring your results are as smooth and professional as you envision. Get ready to transform your ideas into reality!
Understanding Perspex (Acrylic) and Drilling
Perspex, chemically known as polymethyl methacrylate (PMMA), is a transparent thermoplastic often used as a lightweight, shatter-resistant alternative to glass. Its clarity, durability, and workability make it a popular choice for a wide range of applications. However, its thermoplastic nature means it can melt or chip if not handled correctly during drilling. Unlike materials like wood or metal, acrylic requires a gentler, more controlled approach to avoid heat buildup and stress that can lead to cracks or spiderwebbing.
The key to successfully drilling Perspex lies in understanding its properties. When you drill, friction generates heat. In materials like metal, this heat dissipates quickly. In acrylic, however, the heat can soften the material, causing the drill bit to bind and potentially fracture the sheet. Furthermore, excessive pressure can create stress points, which, combined with heat, are the primary culprits behind cracking.
This is why standard drilling techniques used for wood or metal often fail with acrylic. You need specialized drill bits and a slower, more deliberate drilling speed. But don’t let this deter you; with the right preparation and tools, drilling Perspex is a straightforward process that opens up a world of creative possibilities.
What You’ll Need: Essential Tools and Materials
Before you start drilling, gathering the right equipment is crucial for a successful outcome. Using the wrong tools can lead to frustration and wasted material. Here’s a breakdown of what you’ll need:
- Perspex Sheet: Ensure it’s clean and free from dust or debris.
- Drill: A standard corded or cordless drill will work. A drill press offers more stability for consistent holes.
- Specialized Drill Bits: This is perhaps the most critical item. Standard twist drill bits can overheat and chip acrylic. Look for bits specifically designed for plastics or acrylics. These often have a sharper point angle and a wider flute to help clear chips and reduce heat.
- Masking Tape: Painter’s tape or masking tape is essential for marking your drilling point and providing a surface to prevent the drill bit from wandering.
- Center Punch or Awl: To create a small indentation for the drill bit to start in, preventing it from slipping.
- Clamps: To secure the Perspex sheet firmly to your work surface. Never drill freehand without proper clamping.
- Safety Glasses: Always protect your eyes from flying debris.
- Work Surface: A sturdy, flat surface that won’t be damaged by the drill.
- Optional: Coolant/Lubricant: For larger holes or extended drilling, a cutting fluid designed for plastics can help manage heat.
Drill Bit Types for Perspex: A Closer Look

The type of drill bit you use makes a significant difference. Here’s a comparison of common drill bit types and their suitability for Perspex:
| Drill Bit Type | Suitability for Perspex | Notes |
|---|---|---|
| Standard Twist Drill Bit | Poor | Prone to melting, chipping, and cracking due to heat buildup and aggressive cutting angle. |
| Spade/Paddle Bit | Fair (with caution) | Can work for larger holes, but requires very slow speeds and careful pressure to avoid chipping. Prone to catching. |
| Step Drill Bit (Conical) | Good | Excellent for creating a range of hole sizes without changing bits. Allows for gradual hole enlargement, reducing stress. |
| Brad-Pointed Wood Bit | Fair to Good | The sharp point can help prevent wandering, but the flutes may not clear chips effectively, leading to heat buildup. Use at lower speeds. |
| Plastic/Acrylic Drill Bits | Excellent | Specifically designed with a 0-degree or negative rake angle, wider flutes, and a sharper point. These bits cut cleanly with minimal heat and chip evacuation. This is the recommended choice. |
Plastic or acrylic drill bits are engineered to shear the material rather than scrape it. Their geometry helps to reduce friction and prevent the acrylic from melting and gumming up the bit. A 0-degree or negative rake angle means the cutting edge is almost perpendicular to the material, leading to a cleaner cut with less tendency to push or splinter.
Step-by-Step Guide to Drilling Perspex
Follow these steps carefully to achieve clean, precise holes in your Perspex sheet. Patience and precision are your allies here.
Step 1: Preparation is Key
Start by preparing your workspace and the Perspex sheet. Ensure you have adequate lighting and ventilation. Place the Perspex sheet on a flat, stable surface. If you’re drilling through a larger sheet, consider placing it on a sacrificial backing material like MDF or plywood. This provides support and prevents blowout on the exit side.
Clean the area where you intend to drill thoroughly. Dust and small particles can get embedded in the acrylic during drilling, creating imperfections or stress points. Use a soft cloth and a mild cleaning solution, then dry it completely.
Step 2: Mark Your Drilling Point
Use a ruler or measuring tape to accurately mark the center of your desired hole. Then, apply a piece of masking tape over the marked spot. This tape serves a dual purpose: it provides a stable surface for the drill bit to start on, preventing it from skittering across the smooth acrylic, and it helps to reduce chipping on the surface as the bit enters.
For added precision, use a center punch or an awl to create a small indentation at the exact center of your mark. This indentation will guide the tip of your drill bit, ensuring it starts in the correct position and doesn’t wander.
Step 3: Secure the Perspex
This is a non-negotiable step for safety and accuracy. Use clamps to securely fasten the Perspex sheet to your work surface. Ensure the clamps are positioned so they don’t obstruct your drilling path but hold the material firmly. If you’re drilling near an edge, place a piece of scrap wood or cardboard under the clamp jaws to prevent them from damaging the Perspex surface.
The Perspex should not move at all during the drilling process. Any shifting can cause the drill bit to bind, leading to cracks or an improperly sized hole.
Step 4: Set Your Drill Settings
This is where technique really matters. For most acrylic drilling tasks, you’ll want to use a low to medium speed setting on your drill. High speeds generate excessive heat, which, as we’ve discussed, is the enemy of acrylic. The exact speed will depend on the size of the hole and the type of drill bit, but starting slow is always best.
If your drill has a variable speed trigger, use it to control the speed precisely. For larger holes, consider using a drill press set to its lowest speed setting for maximum control and stability.
Step 5: The Drilling Process
Begin drilling by gently applying the tip of the drill bit to the indentation you made. Start the drill at a low speed. As the bit begins to cut, gradually increase the speed slightly, but keep it well below the maximum speed of your drill. Apply steady, consistent, and light pressure. Let the drill bit do the work; forcing it will only increase the risk of damage.
As the drill bit cuts through the Perspex, you’ll notice chips or shavings being produced. Periodically withdraw the drill bit slightly while it’s still spinning at a low speed. This action helps to clear the flutes of the drill bit, removing accumulated material and allowing heat to dissipate. This is often referred to as “clearing the hole.”
Continue drilling until the drill bit is about to break through the other side. At this point, reduce the pressure even further. If possible, flip the Perspex sheet over and finish the hole from the other side. This technique, known as “back drilling,” helps to prevent chipping or cracking on the exit side, which is often more prone to damage.
Step 6: Finishing Touches
Once the hole is complete, carefully withdraw the drill bit. Remove the masking tape slowly. You may find small burrs or rough edges around the hole. These can often be smoothed out with a piece of fine-grit sandpaper (around 400-grit or higher) or a deburring tool specifically designed for plastics. Be gentle to avoid scratching the surface of the Perspex.
Clean the area again with a soft cloth to remove any remaining dust or debris.
Troubleshooting Common Issues
Even with the best preparation, you might encounter a few hiccups. Here’s how to deal with common problems:
- Cracking or Chipping: This is usually caused by excessive speed, too much pressure, or using the wrong drill bit. If you notice any signs of cracking, stop immediately. Try again with a slower speed, lighter pressure, and a specialized bit. If the sheet is already cracked, you might need to start with a new piece or consider if the crack can be hidden or incorporated into the design.
- Melting or Gumming: If the drill bit is melting the plastic instead of cutting it, your drill speed is too high, or you’re applying too much pressure. Slow down, reduce pressure, and ensure you’re clearing the hole periodically.
- Drill Bit Wandering: This happens when the drill bit doesn’t start in the center. Using masking tape and a center punch or awl before drilling should prevent this.
- Rough Edges: Minor rough edges can be smoothed with fine-grit sandpaper or a deburring tool. If the edges are significantly rough, it might indicate that the drilling process was too aggressive.
When to Use Different Drilling Methods
The size of the hole you need to drill can influence the best approach. For small pilot holes (e.g., for screws), standard acrylic bits at low speeds are usually sufficient. For larger holes, consider alternative methods:
Drilling Larger Holes
For holes larger than about 1/2 inch (12-13mm), using a standard drill bit can be challenging due to heat buildup and the increased risk of chipping. Here are better options:
- Step Drill Bits: These are ideal for creating larger holes progressively. They start with a smaller diameter and widen the hole gradually, minimizing stress and heat.
- Hole Saws: Specifically designed hole saws for plastics can be used. Ensure they have sharp teeth and run at a very slow speed, lubricating if possible.
- Jigsaw or Router with a Circle Cutting Jig: For very large or precise circles, cutting from the edge or using a jig with a jigsaw or router might be more suitable than drilling.
When using hole saws or jigs, always maintain a slow speed and apply gentle, consistent pressure. Lubrication, such as a light spray of soapy water or a dedicated plastic cutting fluid, can be very beneficial for larger diameter cuts to help dissipate heat.
Using a Drill Press
A drill press offers superior stability and control compared to a handheld drill. This is particularly advantageous when drilling larger holes or when high precision is required. With a drill press, you can set a consistent, slow speed and maintain a steady downward pressure, significantly reducing the risk of errors.
Mounting the Perspex securely to the drill press table is still essential. Ensure the drill bit is sharp and appropriate for acrylic. The ability to precisely control the depth of the hole is another benefit of using a drill press.
Comparing Drill Speeds and Bit Sizes
The ideal drill speed is inversely proportional to the drill bit diameter. Smaller bits require faster speeds (though still relatively slow compared to metal), while larger bits need much slower speeds. Here’s a general guideline, though always refer to manufacturer recommendations:
| Drill Bit Diameter | Recommended Speed (RPM) | Notes |
|---|---|---|
| 1/8″ – 1/4″ (3-6mm) | 800 – 1500 RPM | Use specialized plastic bits. Clear the hole frequently. |
| 1/4″ – 1/2″ (6-12mm) | 400 – 800 RPM | Step bits or plastic bits are recommended. Steady pressure. |
| 1/2″ – 1″ (12-25mm) | 200 – 400 RPM | Step bits or hole saws for plastic. Consider lubrication. |
| Over 1″ (25mm) | Below 200 RPM | Specialized hole saws or routing may be better. Very slow speed is critical. |
These are approximate figures, and the exact material thickness and specific type of acrylic can also influence optimal speeds. It’s always best to test on a scrap piece of Perspex if possible.
Safety First!
Working with tools and materials always requires a focus on safety. When drilling Perspex:
- Wear safety glasses at all times. Acrylic chips can be sharp.
- Secure your workpiece firmly with clamps.
- Keep your fingers away from the drill bit and moving parts.
- Ensure good ventilation, especially if using any lubricants.
- Use sharp, appropriate drill bits. Dull bits increase pressure and heat.
Following these safety guidelines will help ensure your project goes smoothly and without injury. Remember, safety is paramount in any DIY or workshop setting.
Frequently Asked Questions (FAQ)
Can I use a regular drill bit for Perspex?
While it’s possible in a pinch for very small holes at extremely low speeds with minimal pressure, it’s highly discouraged. Regular drill bits are designed for wood or metal and tend to generate too much heat and friction, leading to melting, chipping, and cracking of the Perspex.
What is the best drill bit for acrylic?
The best drill bits for acrylic are those specifically designed for plastics or acrylics. These bits typically feature a 0-degree or negative rake angle, wider flutes for chip evacuation, and a sharper point to shear the material cleanly with minimal heat buildup.
How fast should I drill Perspex?
You should drill Perspex at a slow to medium speed. The exact speed depends on the diameter of the drill bit; smaller bits can be drilled slightly faster than larger ones, but always err on the side of caution. Generally, keeping speeds below 1500 RPM, and much lower for larger holes, is recommended.
Do I need to use a lubricant when drilling Perspex?
For small to medium-sized holes, lubrication is often not necessary if you are using the correct drill bit and technique. However, for larger holes, extended drilling, or if you notice excessive heat, a light lubricant like a spray of soapy water or a specialized plastic cutting fluid can help dissipate heat and improve the cutting action.
How do I prevent chipping when drilling Perspex?
Prevent chipping by using masking tape over the drilling area, creating a small pilot indentation with a center punch, using specialized drill bits for plastics, drilling at slow speeds with light, steady pressure, and withdrawing the bit periodically to clear chips and heat. Finishing the hole from the back side, if possible, also helps minimize exit chipping.
Can I drill very small holes in Perspex?
Yes, you can drill very small holes in Perspex. Use a small, sharp drill bit designed for plastics or a very sharp brad-point bit. Start at a slow speed with light pressure, and be sure to use masking tape and a pilot indentation to prevent the bit from wandering.
Drilling through Perspex doesn’t have to be a daunting task. By understanding the material, using the right tools, and employing the correct techniques, you can achieve clean, precise holes for all your projects. Armed with this knowledge, you’re ready to tackle your next build with confidence!