Yes, you absolutely can drill through metal! With the right drill bits, techniques, and safety precautions, drilling metal is a manageable and achievable task for DIYers and professionals alike. This guide will equip you with the proven tips to successfully drill through various types of metal, ensuring a clean and precise result every time.
Must-Have Tools in Your House If You Work Regularly


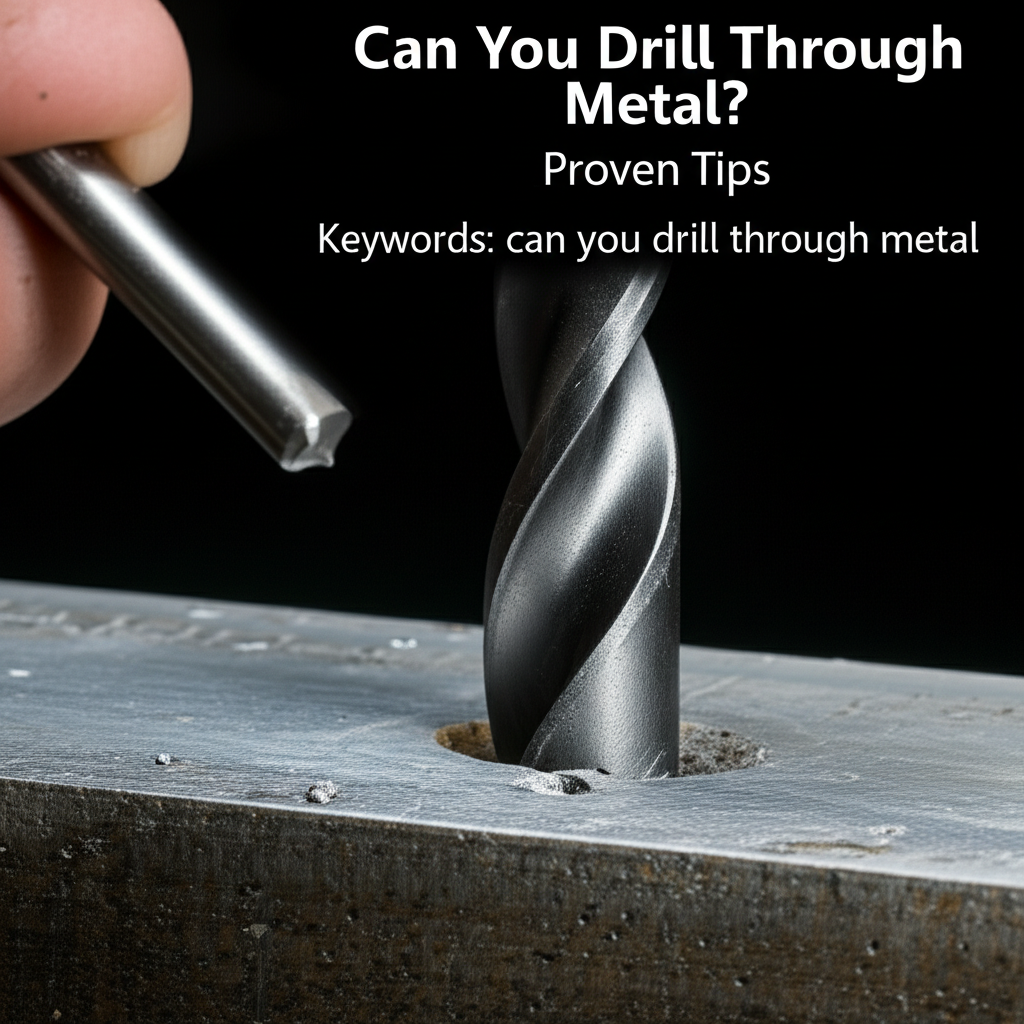
Ever faced a project where you needed to join two metal pieces, attach something to a metal surface, or simply create a hole in metal for a bolt or wire? If you’ve ever wondered, “Can you drill through metal?” you’re not alone. It’s a common question, and the thought of damaging your drill or the metal itself can be a little daunting. But don’t worry! Drilling metal is definitely within your reach. With a few key pieces of knowledge and the right approach, you can tackle metal drilling projects with confidence. We’ll walk you through everything you need to know, from choosing the right tools to mastering the technique, so you can achieve professional-looking results without the stress.
Understanding Metal Drilling Essentials
Drilling through metal might seem intimidating, but it’s all about understanding the material and using the correct tools and techniques. Unlike wood, metal is much denser and harder, which means it requires a different approach to prevent overheating, bit damage, and inaccurate holes.
What You’ll Need: The Right Tools for the Job

Before you even think about picking up a drill, ensure you have the essential tools. Using the wrong equipment is a surefire way to run into trouble. Here’s what you’ll need:
- Drill: A corded or cordless drill with variable speed settings is crucial. Higher power is generally better, especially for thicker metals. Look for a drill with a decent amperage (for corded) or voltage (for cordless). A hammer drill function is usually not needed or even detrimental for metal drilling, as it can chip the metal and damage your bit.
- Drill Bits: This is perhaps the most critical component. For drilling metal, you need specialized drill bits designed for harder materials.
- Safety Gear: This is non-negotiable. Always wear safety glasses or a face shield to protect your eyes from flying metal chips. Gloves are also recommended to protect your hands from sharp edges and heat.
- Cutting Fluid or Lubricant: Also known as cutting oil or tapping fluid, this is essential for reducing friction, cooling the bit and the workpiece, and preventing the metal from galling (sticking to the bit).
- Center Punch: This tool creates a small indentation at your drilling point, preventing the drill bit from “walking” or wandering when you start drilling.
- Clamps: Securely clamping your workpiece to a stable surface is vital for safety and accuracy.
- Measuring Tape and Marker: For accurate marking of your drilling points.
- Deburring Tool or File: To clean up the edges of the hole after drilling.
Choosing the Right Drill Bits for Metal
The type of drill bit you use directly impacts your success when drilling metal. Not all drill bits are created equal, and using a wood bit on metal will likely result in a broken bit and a frustrated you.
Types of Metal Drill Bits
Here’s a breakdown of the most common and effective drill bits for metal:
- High-Speed Steel (HSS) Bits: These are the most common and affordable bits for metal. They are durable and can handle most general-purpose drilling in softer metals like aluminum, brass, and mild steel.
- Cobalt Bits: Made from HSS with added cobalt, these bits are significantly harder and more heat-resistant than standard HSS bits. They are ideal for drilling harder metals like stainless steel, cast iron, and titanium. Cobalt bits are more brittle, so they should be used with care to avoid breakage.
- Titanium-Coated Bits: These are typically HSS bits coated with titanium nitride. The coating makes them harder and reduces friction, allowing them to drill faster and last longer than uncoated HSS bits. They are a good option for a variety of metals but are not as heat-resistant as cobalt bits.
- Carbide-Tipped Bits: These bits have carbide tips brazed onto a steel shank. Carbide is extremely hard and heat-resistant, making these bits suitable for drilling very hard metals and abrasive materials. They are more expensive and brittle than HSS or cobalt bits.
- Step Bits: These are multi-sized drill bits that look like a staircase. They are excellent for drilling clean holes in thin sheet metal and for enlarging existing holes without needing to change bits. They create a smooth, burr-free edge.
Drill Bit Sizes and Their Uses
Drill bit sizes are typically measured in fractions of an inch or millimeters. The size you choose depends on the desired hole diameter. It’s often recommended to start with a smaller pilot hole for larger diameters, especially in thicker metals. This makes drilling the final, larger hole easier and more accurate.
For instance, if you need to drill a 1/4-inch hole, you might first drill a 1/8-inch pilot hole. This reduces the stress on the drill and the bit when drilling the larger diameter.
Here’s a quick reference for common drill bit types and their applications:
| Drill Bit Type | Materials Best For | Pros | Cons |
|---|---|---|---|
| HSS | Aluminum, Brass, Copper, Mild Steel, Wood | Affordable, widely available, good for general use | Can overheat easily, less durable on harder metals |
| Cobalt | Stainless Steel, Cast Iron, Hardened Steel, Titanium | Excellent heat resistance, very hard, lasts longer in tough metals | More brittle, more expensive than HSS |
| Titanium-Coated | Steel, Aluminum, Wood, Plastics | Reduces friction, drills faster, good lifespan | Coating can wear off, not as heat-resistant as cobalt |
| Carbide-Tipped | Hardened Steel, Stainless Steel, Cast Iron, Fiberglass | Extremely hard, high heat resistance, drills very tough materials | Most expensive, very brittle, requires careful handling |
| Step Bits | Sheet Metal, Thin Plastics, Thin Aluminum | Drills multiple sizes with one bit, clean holes, good for enlarging existing holes | Not ideal for thick metals, can snag if not used correctly |
The Step-by-Step Process for Drilling Metal
Now that you have your tools and bits ready, let’s get to the actual drilling. Following these steps will ensure a safe, efficient, and successful outcome.
- Safety First: Put on your safety glasses and gloves. Ensure your workpiece is securely clamped to a workbench or sturdy surface. If drilling a large piece, make sure it’s stable and won’t move during the process.
- Mark Your Spot: Use a measuring tape and marker to accurately mark where you want to drill the hole. Then, use a center punch to create a small indentation at this mark. This indentation will guide the tip of your drill bit and prevent it from skidding across the metal surface. A light tap with a hammer should be enough to create the dimple.
- Select the Right Bit and Speed: Choose the appropriate drill bit for the metal type and the desired hole size. For most metals, a slower drill speed is better. High speeds generate more heat, which can dull your bit and make drilling difficult. A good starting point for steel is around 200-300 RPM, while softer metals like aluminum can be drilled slightly faster. Consult your drill’s manual or online resources for recommended speeds for specific metals and bit types.
- Apply Cutting Fluid: Before drilling, apply a small amount of cutting fluid or lubricant to the marked spot and around the area where the hole will be. This will keep the drill bit cool, reduce friction, and help clear away metal shavings. You may need to reapply it during the drilling process, especially for longer drilling times or tougher metals.
- Start Drilling Slowly: Position the tip of your drill bit in the center punch indentation. Begin drilling at a slow speed, applying steady, even pressure. Let the drill bit do the work. Avoid forcing the drill; if you’re meeting significant resistance, it might be time to slow down further or check if your bit is dull.
- Maintain Steady Pressure and Coolant: As the hole progresses, continue to apply steady downward pressure. Periodically lift the drill bit slightly (while it’s still spinning) to clear out metal chips and allow the cutting fluid to reach the cutting edge. This also helps prevent the bit from overheating. If you’re drilling a deep hole, you’ll need to do this more frequently.
- Drill Through: Continue drilling until the bit breaks through the other side of the metal. Try to maintain consistent pressure as you near the exit point to minimize burring on the backside.
- Clean Up the Hole: Once the hole is drilled, carefully withdraw the drill bit. Use a deburring tool or a file to smooth out any sharp edges or burrs around the entrance and exit of the hole. This makes the hole safer and cleaner.
Tips for Drilling Different Metals
While the basic process remains the same, the specific metal you’re drilling can influence your approach. Here are some tips for common metals:
Drilling Steel
Steel, especially thicker mild steel, can be drilled effectively with HSS or cobalt bits. Key considerations include:
- Speed: Use a slower speed (around 200-300 RPM for mild steel).
- Lubrication: Cutting fluid is essential to prevent overheating and bit wear.
- Pressure: Apply firm, steady pressure.
- Pilot Holes: For steel thicker than 1/8 inch, using a pilot hole is highly recommended.
- Heat Management: Allow the bit and metal to cool down periodically, especially when drilling multiple holes or thicker stock.
For harder steels like stainless steel, cobalt drill bits are a must. You’ll also need to slow down your drill speed further and ensure consistent lubrication.
Drilling Aluminum
Aluminum is a softer and more malleable metal, making it easier to drill. However, it can also be prone to “galling,” where the aluminum chips stick to the drill bit, potentially damaging the bit or the workpiece.
- Speed: You can use slightly higher speeds than with steel (around 300-500 RPM).
- Lubrication: While not as critical as with steel, cutting fluid or even a light oil can help prevent galling and improve the finish.
- Chip Clearance: Aluminum chips can be sticky. Regularly withdraw the bit to clear chips and reapply lubricant.
- Pilot Holes: Generally not needed unless drilling very large holes in thicker aluminum.
- Bit Type: HSS bits are usually sufficient.
Drilling Stainless Steel
Stainless steel is notorious for its hardness and tendency to work-harden, meaning it gets harder the more you drill into it. This requires a more robust approach:
- Drill Bits: Cobalt drill bits are highly recommended.
- Speed: Use very slow drill speeds (around 100-200 RPM).
- Lubrication: Generous use of cutting fluid or specialized stainless steel lubricant is crucial for cooling and preventing galling.
- Pressure: Apply consistent, firm pressure.
- Pilot Holes: Always use pilot holes for stainless steel, especially for holes larger than 1/4 inch.
- Chip Load: Ensure you have a good “chip load” – the amount of material removed by each cutting edge of the bit. This means not drilling too shallow and shallowly, but also not forcing the bit too much. A consistent feed rate is key.
For a deeper understanding of metal drilling and machining, resources from organizations like the National Institute of Standards and Technology (NIST) often provide valuable technical data on material properties and machining parameters.
Drilling Sheet Metal
Sheet metal is thin and can be easily deformed or cut through unexpectedly if not handled correctly.
- Bit Type: HSS bits or step bits are excellent for sheet metal.
- Speed: Moderate to high speeds can be used, but always start slow.
- Clamping: Ensure the sheet metal is well-supported and clamped to prevent vibration, which can lead to ragged holes. You might place a scrap piece of wood underneath the sheet metal to support it.
- Pressure: Use light, steady pressure. Let the bit cut rather than force it.
- Step Bits: These are particularly useful for creating clean holes in thin sheet metal, as they gradually widen the hole, reducing the risk of tearing or deforming the metal.
Common Problems and How to Solve Them
Even with the best preparation, you might encounter a few hiccups. Here’s how to troubleshoot:
- Drill Bit Wandering: This is usually due to not using a center punch. Re-center your mark with a punch and try again.
- Overheating Drill Bit: This is a common issue. Ensure you’re using cutting fluid, drilling at an appropriate speed, and clearing chips regularly. If the bit gets too hot, let it cool completely before continuing.
- Dull Drill Bit: If the bit is no longer cutting effectively and is just “rubbing” against the metal, it’s likely dull. For HSS bits, you might be able to sharpen them, but for cobalt or coated bits, it’s often best to replace them.
- Broken Drill Bit: This usually happens when too much force is applied, the bit is the wrong type, or the drill speed is too high, causing the bit to bind. Always use the correct bit, appropriate speed, and steady pressure. If a bit breaks off in the workpiece, you might need specialized tools or professional help to remove it.
- Rough Hole Edges (Burrs): This is normal, but can be cleaned up with a deburring tool or a file.
When to Consider Professional Help
While most metal drilling tasks are manageable for DIYers, there are times when it’s best to call in a professional or use specialized equipment:
- Very Thick or Hardened Metals: Drilling through very thick steel plates, hardened tool steel, or exotic alloys can be extremely challenging and may require industrial drill presses, specialized bits, or even plasma cutters.
- Precision or Critical Applications: If the hole needs to be extremely precise for critical structural components or aerospace applications, professional machining services might be necessary.
- Limited Tooling: If you don’t have the right drill, bits, or safety equipment, it’s safer and more effective to hire someone who does.
For more information on materials and machining, the Thomasnet platform provides extensive resources on manufacturing processes and material suppliers.
Frequently Asked Questions About Drilling Metal
Frequently Asked Questions
Can I use a regular drill bit to drill metal?
While you can attempt to drill metal with a standard HSS (High-Speed Steel) drill bit, it’s not ideal for harder metals or prolonged use. For best results and to avoid damaging your bits or the metal, it’s highly recommended to use drill bits specifically designed for metal, such as cobalt or titanium-coated bits, especially for tougher materials like stainless steel.
What is the best drill bit for drilling steel?
For general steel, High-Speed Steel (HSS) bits are suitable. However, for harder steels like stainless steel or tool steel, cobalt drill bits are the best choice due to their increased hardness and heat resistance. Titanium-coated bits are also a good option for steel.
Do I need to use oil when drilling metal?
Yes, using a cutting fluid or lubricant is highly recommended when drilling metal. It helps to cool the drill bit and the workpiece, reduce friction, clear away metal chips, and prevent the bit from dulling or breaking. This is especially important when drilling harder metals or for extended periods.
What speed should I use to drill metal?
Generally, slower speeds are better for drilling metal than for drilling wood. For steel, a good starting point is between 200-300 RPM. Softer metals like aluminum can be drilled at slightly faster speeds (300-500 RPM). Always consult your drill’s manual or bit manufacturer’s recommendations for specific speeds.