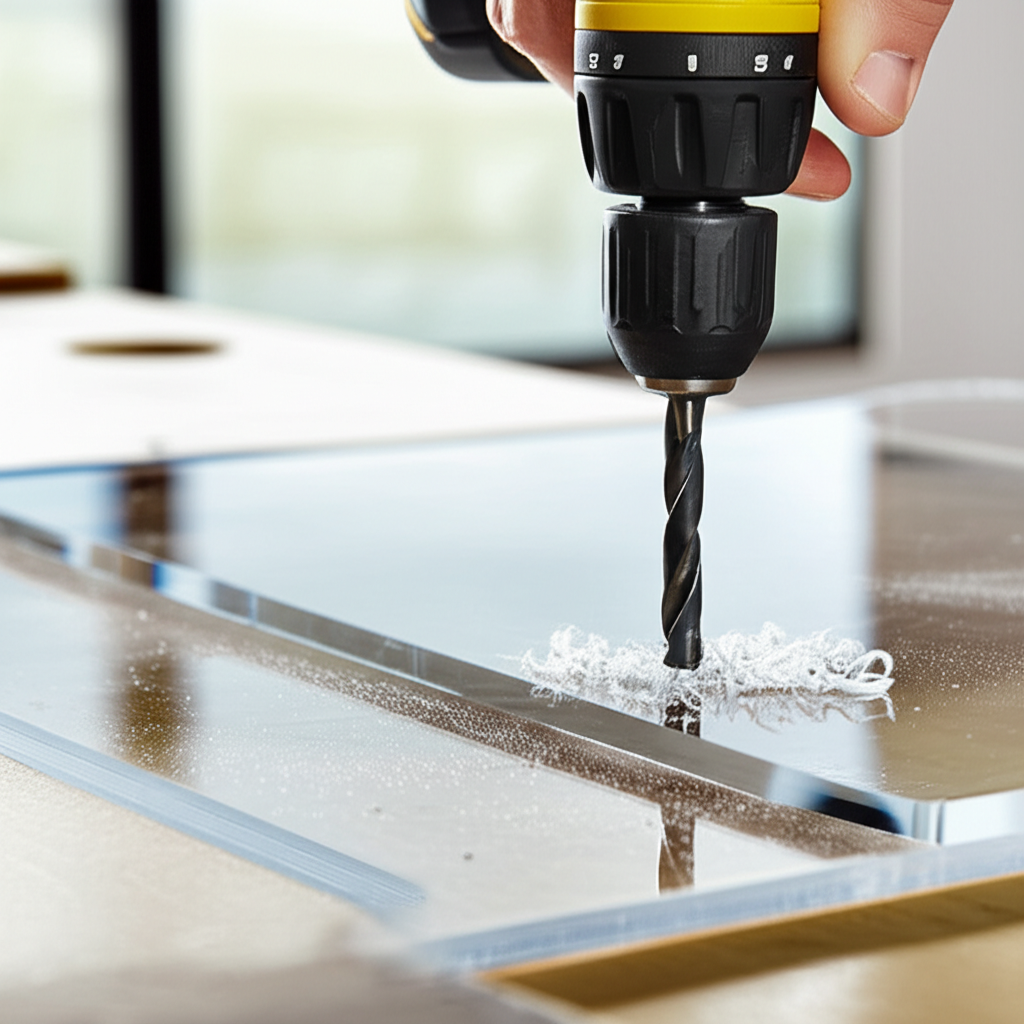
Yes, you absolutely can drill through acrylic safely and effectively! With the right drill bits, techniques, and a little patience, you can achieve clean, crack-free holes for your projects. This guide will show you how, ensuring successful results every time.
Must-Have Tools in Your House If You Work Regularly


Have you ever found yourself staring at a beautiful sheet of acrylic, brimming with project ideas, only to hesitate at the thought of drilling? Many DIYers and professionals alike worry about cracking, chipping, or melting this versatile material. It’s a common concern, and for good reason – improper drilling can indeed lead to frustrating and costly mistakes. But don’t let that stop you! With the correct approach, drilling acrylic is not only possible but can be a smooth and precise process. We’re here to walk you through it, step-by-step, so you can confidently tackle your next acrylic project.
Understanding Acrylic and Drilling Challenges
Acrylic, also known as Plexiglas or polymethyl methacrylate (PMMA), is a transparent thermoplastic that’s popular for its shatter resistance, optical clarity, and workability compared to glass. However, its thermoplastic nature also makes it susceptible to heat buildup when drilled. This heat is the primary culprit behind melting, gumming up the drill bit, and potentially cracking the material. Unlike wood or metal, acrylic requires a more delicate touch and specialized tools to prevent these issues.
The key to successful acrylic drilling lies in managing heat and pressure. When a drill bit spins, friction generates heat. If this heat isn’t dissipated effectively, it can soften the acrylic, causing the shavings to stick to the bit (gumming) or even melt the material around the hole. Excessive pressure can also put stress on the acrylic, leading to fractures, especially as the bit exits the material.
Essential Tools for Drilling Acrylic
To drill through acrylic like a pro, you’ll need a few specific tools and supplies. Having the right equipment makes all the difference in achieving clean, precise holes without damaging your acrylic sheet.
1. The Right Drill Bits

This is arguably the most crucial element. Standard metal or wood drill bits can work, but they often generate excessive heat and can chip the acrylic. Specialized bits are designed to cut acrylic cleanly.
- Acrylic-Specific Drill Bits: These often feature a unique point geometry, like a 90-degree or 60-degree point angle, and wider flutes. The sharper point reduces the chance of “walking” or slipping on the surface, and the wider flutes help clear chips more efficiently, reducing heat buildup.
- Step Drills (or Unibits): These bits look like a cone with multiple “steps.” They allow you to create holes of progressively larger diameters with a single bit. This is excellent for drilling larger holes in acrylic because it reduces the cutting force and heat generated at each step.
- Spade Bits (or Paddle Bits): While not ideal for very small holes, spade bits with sharp, well-ground cutting edges can be used for larger diameter holes. Ensure they are specifically designed for plastics or have very sharp points.
- Standard Twist Bits (with caution): If using standard twist bits, choose those made for metal. You’ll need to modify them slightly (see below) and use very slow speeds.
2. Power Drill
A variable-speed drill is essential. You need to be able to control the rotational speed accurately. Cordless drills with good torque control are excellent, as they allow for precise speed adjustments. A drill press offers even greater stability and control, especially for repetitive or precise drilling.
3. Clamping System
Securely clamping your acrylic sheet to a stable work surface is non-negotiable. Use C-clamps, bar clamps, or a vise. Sandwiching the acrylic between two pieces of scrap wood (one on top, one on the bottom) is a highly recommended technique. This distributes clamping pressure, supports the acrylic on both sides of the hole, and helps prevent chipping or cracking as the drill bit exits.
4. Cutting Fluid or Lubricant (Optional but Recommended)
A small amount of cutting fluid, mineral oil, or even soapy water can help lubricate the drill bit, reduce friction, and keep the acrylic cool. Avoid petroleum-based lubricants, as they can sometimes react with acrylic over time.
5. Safety Gear
Always wear safety glasses or goggles to protect your eyes from flying debris. Gloves are also a good idea to protect your hands.
Preparing Your Acrylic for Drilling
Proper preparation is key to a successful drilling experience. Taking a few minutes to set up correctly will save you a lot of hassle and ensure a clean result.
1. Mark Your Hole Location
Use a fine-tip marker or a scribe to accurately mark where you want to drill. For precise placement, consider using masking tape over the marked area. This can help prevent the drill bit from wandering when you start drilling.
2. Choose the Right Drill Bit Size
Select a drill bit that matches the diameter of the hole you need. If you’re using a step drill, start with the smallest step that will create your desired hole size or the pilot hole for larger diameters.
3. Modify Standard Drill Bits (If Necessary)
If you’re using a standard metal drill bit, you can improve its performance on acrylic by slightly modifying the cutting edge. You want to reduce the rake angle, essentially making the bit cut more like a chisel rather than scraping. This can be done with a grinding wheel or a sharpening stone, creating a more aggressive cutting angle. A 90-degree split point on the tip can also help prevent wandering.
4. Secure the Acrylic Sheet
As mentioned earlier, clamping is crucial. Place your acrylic sheet on a flat, stable surface. Use clamps to hold it firmly in place. Employ the sandwich method: place a piece of scrap wood on your work surface, lay the acrylic on top, and then place another piece of scrap wood on top of the acrylic, aligning it with the drill location. Clamp through all layers. This protects your work surface and the acrylic.
Step-by-Step Drilling Guide
Now that you have your tools and the acrylic prepared, let’s get drilling! Follow these steps carefully for the best results.
Step 1: Set Your Drill Speed
This is critical. You need a slow to moderate speed. High speeds generate too much heat. For a typical ¼ inch drill bit, speeds around 200-500 RPM are often recommended. For larger bits, you’ll need even slower speeds. Check your drill’s manual for the lowest speed settings. A good rule of thumb is: the larger the drill bit, the slower the speed.
Here’s a general guideline for drill speed based on acrylic thickness and bit size (these are approximate and may need adjustment):
| Drill Bit Diameter | Recommended RPM (Approximate) | Acrylic Thickness |
|---|---|---|
| 1/8″ – 1/4″ | 400 – 700 RPM | Up to 1/8″ |
| 1/4″ – 1/2″ | 200 – 500 RPM | 1/8″ – 1/4″ |
| 1/2″ – 1″ | 100 – 300 RPM | 1/4″ – 1/2″ |
| Larger (Step Drills) | Slow & Steady (adjust based on step size) | Variable |
Step 2: Apply Gentle, Steady Pressure
Start the drill and bring it to the marked spot. Apply light, consistent pressure. Let the drill bit do the work; forcing it will only increase the risk of cracking or melting.
Step 3: Drill Slowly and Steadily
Begin drilling at your chosen slow speed. As the bit starts to cut, you can slightly increase pressure if needed, but always maintain control. If you see the acrylic starting to melt or gum up, you’re drilling too fast or applying too much pressure. Back off immediately.
Step 4: Clear Chips Regularly
Periodically pull the drill bit back slightly while it’s still spinning slowly. This helps clear the plastic shavings from the flutes of the drill bit and the hole, which is crucial for preventing heat buildup and jamming.
Step 5: Use Lubrication (If Desired)
If you notice any signs of melting or excessive heat, apply a small amount of cutting fluid or lubricant to the drill bit and the surface of the acrylic. A spray bottle with a water and a drop of dish soap mixture can also work.
Step 6: Ease Pressure as You Exit
As the drill bit is about to break through the other side of the acrylic, reduce your pressure significantly. This is when the acrylic is most likely to chip or crack due to the unsupported material at the exit point. Let the drill bit guide itself through the final millimeters.
Step 7: Smooth the Edges
Once the hole is drilled, you might have a small burr or rough edge. You can smooth this out with fine-grit sandpaper (e.g., 220-grit or higher) or a deburring tool. A quick pass with a flame (using a propane torch held very briefly and at a distance) can also melt away minor imperfections for a polished edge, but this requires extreme caution and practice.
Drilling Techniques for Different Acrylic Thicknesses
The thickness of your acrylic sheet will influence the best approach.
Thin Acrylic (e.g., up to 1/8 inch)
Thin acrylic is more prone to flexing and cracking. The sandwich method with scrap wood is almost mandatory here. Use a sharp, specialized acrylic bit or a modified twist bit. Keep speeds very slow and pressure minimal. A drill press provides the best stability.
Medium Thickness Acrylic (e.g., 1/8 inch to 1/4 inch)
This is where most DIY projects fall. Use the recommended slow speeds and moderate pressure. Acrylic-specific bits or step drills are highly recommended. The sandwich method is still very beneficial. Regular chip clearing is important.
Thick Acrylic (e.g., 1/4 inch and up)
For thicker sheets, you might consider drilling a pilot hole first, especially if you need a larger diameter hole. Use a smaller bit (e.g., 1/8 inch) to drill a pilot hole, then follow up with your larger bit or a step drill. This reduces the strain on the drill and the material. Again, slow speeds, ample lubrication, and consistent pressure are key. A drill press is ideal for thick acrylic to ensure straight holes.
Common Mistakes to Avoid When Drilling Acrylic
Even with the best intentions, a few common pitfalls can trip up even experienced crafters. Being aware of these will help you avoid them.
- Using the Wrong Drill Bits: Standard wood bits with aggressive rakes will often chew up and melt acrylic.
- Drilling Too Fast: This is the number one cause of melting and cracking. Slow and steady wins the race.
- Applying Too Much Pressure: Let the bit cut. Forcing it creates stress and heat.
- Not Securing the Acrylic: Any movement or vibration during drilling can lead to fractures.
- Ignoring Heat Buildup: If the bit or acrylic feels hot, stop and let it cool.
- Drilling Without a Pilot Hole (for large diameters): This can put excessive strain on the drill and material.
- Not Clearing Chips: Clogged flutes mean more heat and potential jamming.
When to Use a Drill Press vs. a Handheld Drill
Both tools can be used effectively, but they offer different advantages:
| Feature | Handheld Drill | Drill Press |
|---|---|---|
| Stability & Accuracy | Lower (requires steady hand) | Higher (consistent, straight holes) |
| Speed Control | Variable, but can be harder to maintain consistently | Often more precise and easier to adjust |
| Pressure Control | Manual, requires feel | More controlled, vertical feed |
| Best For | On-site work, smaller projects, general use | Precision work, repetitive holes, larger/thicker acrylic |
For critical projects where perfectly straight holes are required, or when working with thicker acrylic, a drill press is the superior choice. It offers unparalleled stability and control, significantly reducing the risk of errors.
Alternative Methods for Creating Holes in Acrylic
While drilling is the most common method, other techniques exist:
- Rotary Tools (like Dremel): With the right bits (like specialized plastic bits or small grinding stones) and very low speeds, rotary tools can be used for small holes or details. However, they generate significant heat and require a very steady hand.
- Laser Cutting: For precise, clean holes of any shape, laser cutting is an excellent option, though it requires specialized equipment.
- CNC Routing: Similar to laser cutting, CNC routers can create precise holes and shapes.
For most DIYers, however, a well-equipped power drill and the right bits remain the most accessible and effective solution.
Frequently Asked Questions About Drilling Acrylic
Can I use a regular drill bit on acrylic?
You can, but it’s not ideal. Regular twist bits (especially those for wood) tend to generate more heat, leading to melting and chipping. If you must use a regular bit, choose one designed for metal, keep the speed very slow, use minimal pressure, and consider modifying the bit for better chip clearance and a sharper cutting angle.
What is the best drill bit for acrylic?
The best drill bits for acrylic are those specifically designed for plastics or acrylic. These often have a sharp point (like a 90-degree or 60-degree included angle) and wider flutes for efficient chip removal. Step drills (unibits) are also excellent for creating clean holes of various sizes in acrylic.
How do I prevent acrylic from cracking when drilling?
Preventing cracks involves several factors: use the correct drill bit, drill at a slow speed, apply gentle and consistent pressure, support the acrylic on both sides (using scrap wood in a clamp sandwich is highly recommended), and ease off pressure as the bit exits the material. Allowing the material to cool between drilling sessions can also help.
What speed should I drill acrylic at?
You should drill acrylic at a slow to moderate speed. High speeds generate excessive heat, which causes melting and potential cracking. For smaller drill bits (e.g., 1/8 inch), speeds around 400-700 RPM might be suitable, while larger bits require even slower speeds (e.g., 100-300 RPM). Always err on the side of caution and use the slowest speed your drill allows, especially when starting.
Should I use a lubricant when drilling acrylic?
Using a lubricant like cutting fluid, mineral oil, or a simple mixture of water and dish soap can be beneficial. It helps to cool the drill bit and the acrylic, reducing friction and the likelihood of melting or gumming. Apply it sparingly to the drill bit or the drilling area.
What if the acrylic starts melting around the drill bit?
If you notice the acrylic melting or gumming up, it means you’re generating too much heat. Immediately stop drilling, back the bit out slowly while it’s still spinning (to help clear melted material), and let the acrylic and drill bit cool down. Once cool, resume drilling at an even slower speed, with lighter pressure, and ensure you’re clearing chips effectively. Applying a lubricant can also help in this situation.
Can I drill holes larger than 1 inch in acrylic?
Yes, you can drill holes larger than 1 inch. For larger diameters, it’s highly recommended to use a step drill bit or to drill a pilot hole first with a smaller bit. This reduces the strain on your drill and the acrylic. Always use the slowest possible speed and gentle pressure when drilling large holes in acrylic.
Drilling through acrylic might seem daunting at first, but with the right knowledge and tools, it’s a very achievable task. By understanding the material’s properties and following these proven techniques, you can create clean, precise holes for all your projects. Remember to prioritize slow speeds, gentle pressure, and proper support. Happy drilling!