
Yes, you absolutely can drill plexiglass! With the right tools and techniques, drilling plexiglass is straightforward and avoids common issues like cracking or chipping. This guide will walk you through the simple steps to achieve clean, precise holes every time.
Must-Have Tools in Your House If You Work Regularly


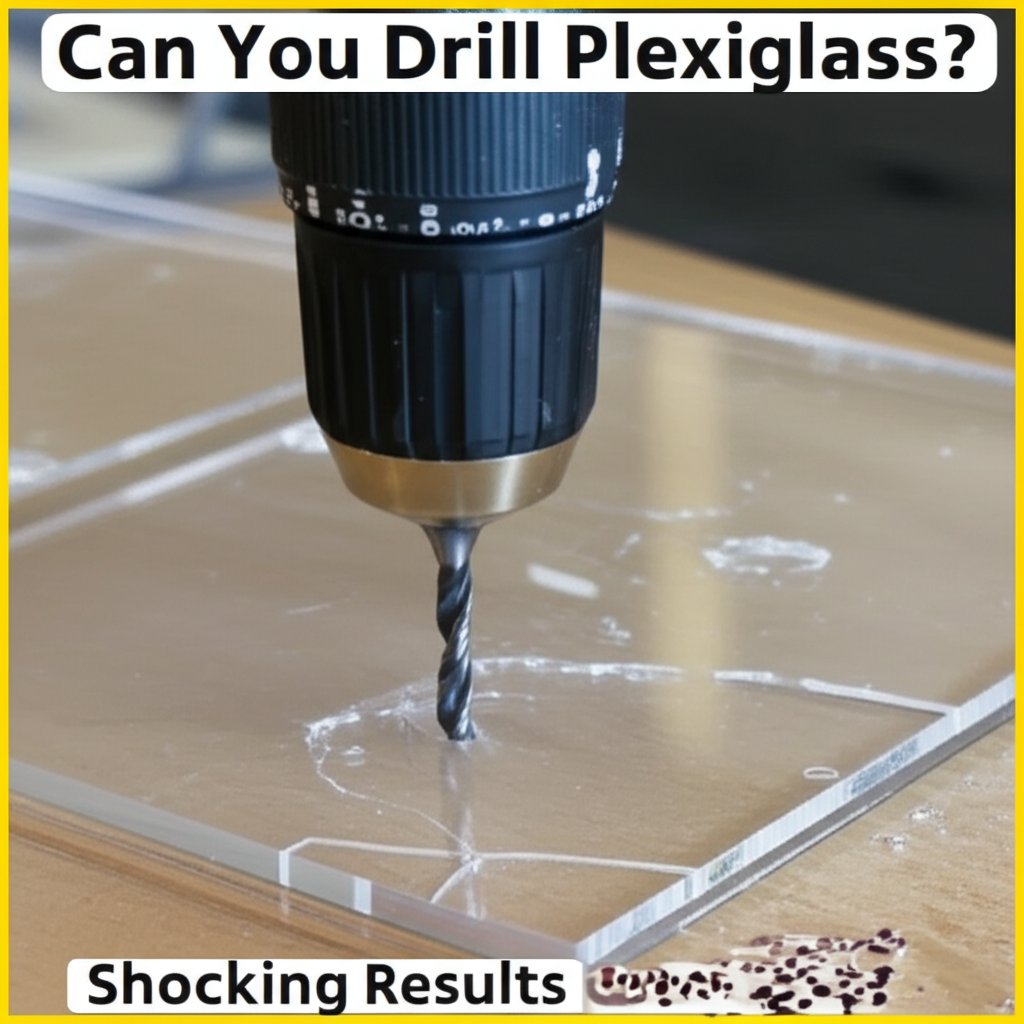
Ever found yourself staring at a beautiful sheet of plexiglass, ready for your next DIY project, only to hesitate at the thought of drilling a hole? You’re not alone. Many DIYers worry that plexiglass, also known as acrylic, is too fragile to drill without it cracking or shattering. It’s a common concern, and for good reason – if you don’t approach it correctly, you can end up with a ruined piece and a lot of frustration. But don’t let that stop you! With a little know-how and the right setup, drilling plexiglass can be surprisingly easy. We’re here to demystify the process and show you exactly how to get those perfect holes. Get ready to discover the secrets to drilling plexiglass like a pro, ensuring your projects turn out just as you envisioned.
Why Drilling Plexiglass Can Be Tricky (And How to Avoid It)
Plexiglass, or acrylic, is a fantastic material for a myriad of applications, from crafting intricate displays to creating protective barriers or even custom automotive parts. Its clarity, lightweight nature, and impact resistance make it a popular choice. However, compared to materials like wood or metal, acrylic has a lower melting point and is more prone to thermal expansion. When you apply heat and friction, like during drilling, without proper precautions, it can quickly lead to problems. The most common pitfalls include:
- Cracking or Chipping: Applying too much pressure or using the wrong drill bit can cause stress fractures.
- Melting and Gumming: Excessive friction generates heat, which can melt the acrylic, gumming up the drill bit and creating a messy hole.
- Stress Fractures from Clamping: Over-tightening clamps can also put undue stress on the material.
The key to successfully drilling plexiglass lies in managing heat and minimizing stress. This involves using the correct drill bits, controlling your drill’s speed, and ensuring the material is securely yet gently supported. We’ll cover all these essential points to help you achieve clean, precise results.
What You’ll Need: Essential Tools and Materials
Before you start drilling, gathering the right tools is crucial. Having everything ready will make the process smoother and safer. Here’s a breakdown of what you’ll need:
- Plexiglass Sheet: Your project material!
- Drill: A variable-speed drill (corded or cordless) is ideal.
- Drill Bits: Specifically designed for plastic or acrylic are best.
- Clamps: To secure the plexiglass.
- Safety Glasses: Non-negotiable for eye protection.
- Work Surface: A stable, flat surface.
- Masking Tape: To prevent scratching and help with accuracy.
- Marker: For marking your drill points.
- Optional: Lubricant (like water or cutting fluid): To help with cooling.
- Optional: Drill Press: For more controlled, straight holes.
Choosing the Right Drill Bit
This is arguably the most important factor. Standard metal or wood drill bits can work, but they often cause the issues mentioned earlier. Specialized plastic drill bits have a different cutting angle designed to shear the acrylic cleanly rather than pushing and melting it.
Here’s a look at common drill bit types and their suitability:
| Drill Bit Type | Description | Suitability for Plexiglass | Pros | Cons |
|---|---|---|---|---|
| Standard Twist Bit | Commonly used for wood and metal. | Use with caution; can cause melting/cracking. | Widely available. | Can easily overheat and damage acrylic. |
| Brad-Point Wood Bit | Has a pointed tip to prevent walking. | Better than standard twist bits, but still requires care. | Helps with initial positioning. | Can still cause chipping if not used correctly. |
| Specialty Plastic/Acrylic Bit | Designed with a higher rake angle and often a pilot point. | Highly Recommended! | Cuts cleanly, minimizes heat and stress. | May be less common or more expensive. |
| Spade/Paddle Bit | Flat bit with a point. | Suitable for larger holes, but requires very slow speed. | Good for creating larger openings. | High risk of cracking if speed is too high. |
When using standard twist bits, you can modify them slightly. By grinding down the cutting edges (the sharp edges on the flutes) at a 90-degree angle, you effectively create a “chip breaker,” reducing the tendency to melt. However, investing in proper plastic drill bits is the most reliable method.
Step-by-Step Guide: Drilling Plexiglass Safely and Effectively
Now that you have your tools and understand the potential pitfalls, let’s get drilling! Follow these steps for the best results.
Step 1: Preparation and Safety First
Always prioritize safety. Put on your safety glasses before you do anything else. Ensure your work area is well-lit and clean. If your plexiglass has a protective film on it, leave it on during drilling. This film helps prevent scratches and minor chips.
Step 2: Mark Your Drilling Points
Use a marker to carefully mark the exact spot where you want to drill. For added accuracy and to prevent the drill bit from wandering, you can place a piece of masking tape over the marked area. Then, mark the center of your hole on the tape.
Step 3: Secure the Plexiglass
This is critical. Place the plexiglass on a flat, stable surface. Use clamps to hold the plexiglass firmly in place. Ensure the clamps are not positioned too close to the drilling area, as this can create stress. You can place a piece of scrap wood or cardboard under the clamps to distribute pressure and protect the plexiglass surface. If possible, place a scrap piece of wood underneath the plexiglass where you’ll be drilling. This provides support and helps prevent blowout on the exit side.
Step 4: Set Up Your Drill
Speed is key. You want to drill at a slow to medium speed. High speeds generate too much heat, leading to melting. If you have a variable-speed drill, start with the lowest setting and gradually increase if needed, but always keep it relatively slow. For most acrylics, a speed between 200-500 RPM is recommended. If you’re unsure, err on the side of slower speeds.
If using a drill press, the controlled feed rate and stable operation make it an excellent choice for drilling plexiglass accurately.
Step 5: Start Drilling
Position the tip of your drill bit precisely on your marked spot. Apply steady, light pressure. Let the drill bit do the work; don’t force it. Start the drill slowly, allowing the bit to bite into the material. Once the hole has started, you can increase speed slightly, but remain cautious. Keep the drill perpendicular to the plexiglass surface to ensure a straight hole.
Step 6: Managing Heat and Lubrication (Optional but Recommended)
To further minimize heat buildup, you can periodically withdraw the drill bit while it’s still spinning to clear out any melted acrylic or debris. This also helps cool the bit and the material. Some people find success using a small amount of water or a specialized plastic cutting fluid as a lubricant. Apply it sparingly to the drill bit or the drilling area. Be aware that using water might create a bit of a mess, so consider protecting your work surface.
For those drilling multiple holes or larger diameters, consider using a drill press for consistent results and better control over speed and pressure. The stability of a drill press significantly reduces the risk of cracking.
Step 7: Drilling Through
As you approach the other side of the plexiglass, reduce the pressure and slow down the drill speed even further. This helps prevent the acrylic from chipping or cracking as the drill bit exits the material. If you have a backing piece of scrap wood, the drill bit will pass into it, which reduces the chance of a rough exit.
Step 8: Finishing Up
Once the hole is complete, slowly withdraw the drill bit while it’s still spinning gently. This helps to smooth the edges of the hole. Remove any remaining burrs or sharp edges with a deburring tool or a piece of fine-grit sandpaper (around 220-grit). If you left the protective film on, carefully peel it away.
Drilling Larger Holes in Plexiglass
For holes larger than about 1/2 inch (12mm), using a standard drill bit can become challenging. In these cases, consider these alternatives:
- Step Bits: These conical bits have multiple diameters, allowing you to drill progressively larger holes without changing bits. They are excellent for acrylic because they create less heat and stress than twist bits for larger diameters.
- Hole Saws: Designed for cutting large, clean holes in various materials. When using a hole saw on plexiglass, ensure it’s specifically designed for plastics or use a very slow speed and apply steady pressure. A pilot bit in the center is crucial for guiding the cut.
- Jigsaw or Router with a Circle Jig: For very large or precise circular cuts, a jigsaw with a fine-tooth blade or a router with a circle-cutting attachment can be used. These methods require more skill but offer excellent results for large openings.
When using step bits or hole saws, remember the principles of slow speed, steady pressure, and potential lubrication still apply. A drill press is highly recommended for these larger diameter holes to maintain accuracy and control.
Common Problems and How to Fix Them
Even with the best intentions, you might encounter a snag. Here are some common issues and how to address them:
- Cracked Hole: If you notice a crack forming, stop drilling immediately. You might be able to salvage the piece by cutting it down to remove the cracked area, or you may need to start with a new sheet. Try drilling a slightly larger pilot hole if the material is very thin or brittle.
- Melted Plastic: This usually means the drill speed was too high or you drilled too slowly, allowing heat to build up. Try again with a slower speed and intermittent drilling to clear debris. You can sometimes clean up minor melting with a sharp utility knife or fine sandpaper.
- Rough Edges: A bit of sanding with fine-grit sandpaper (220-grit or higher) or a deburring tool should smooth out any rough edges.
- Drill Bit Wobble: Ensure the plexiglass is clamped securely and the drill bit is sharp and centered. Using a pilot hole or a center punch (gently) can help.
When to Call in the Professionals
While drilling plexiglass is a manageable DIY task, there are times when professional services are a better option:
- Very Large or Numerous Holes: If your project requires many holes or very large diameter holes, precision machinery might be necessary.
- Extremely Thick Acrylic: Thick sheets (over 1 inch) can be challenging to drill cleanly without specialized equipment.
- Critical Precision: For applications where absolute precision is paramount (e.g., optical components), professional laser cutting or CNC routing might be more suitable.
- Lack of Proper Tools: If you don’t have access to a variable-speed drill or suitable drill bits, it might be safer and more effective to outsource the job.
Reputable plastic fabrication shops can cut, drill, and shape acrylic with high precision using specialized equipment like CNC routers and laser cutters. They can achieve results that are difficult to replicate with standard power tools.
Frequently Asked Questions (FAQ)
Can I use a regular drill bit to drill plexiglass?
Yes, you can, but it’s not ideal. Standard metal drill bits can work if you use a very slow speed, light pressure, and periodically withdraw the bit to clear debris and cool it down. However, they significantly increase the risk of cracking or melting the plexiglass. Specialty plastic drill bits are highly recommended for cleaner results and reduced risk.
What is the best speed to drill plexiglass?
The best speed is generally slow to medium, typically between 200-500 RPM. High speeds generate too much heat, which melts the acrylic. If your drill doesn’t have a speed setting, use the lowest setting and apply gentle, steady pressure.
Do I need to lubricate when drilling plexiglass?
Lubrication is not strictly necessary but is highly recommended, especially for larger holes or multiple holes. A small amount of water or a specialized plastic cutting fluid can help keep the drill bit and the plexiglass cool, reducing the risk of melting and cracking. Be mindful of potential mess.
What happens if I drill too fast?
Drilling too fast generates excessive heat. This heat can cause the plexiglass to melt around the drill bit, creating a gummy mess and potentially fusing the material to the bit. It also greatly increases the likelihood of stress fractures and cracks forming in the acrylic.
How do I prevent plexiglass from cracking when drilling?
To prevent cracking, use the correct drill bits (specialty plastic bits are best), drill at a slow speed, apply steady and light pressure, ensure the plexiglass is securely clamped but not over-tightened, and use a backing material like scrap wood to support the exit point.
Can I drill plexiglass with a hand drill?
Yes, you can drill plexiglass with a hand drill, provided it’s a variable-speed model. The key is controlling the speed and pressure. A manual hand drill (brace and bit) is also possible but requires a lot of patience and control to maintain a consistent slow speed and avoid overheating.
How do I get a clean exit hole in plexiglass?
A clean exit hole is achieved by reducing pressure and slowing down the drill as you approach the other side. Drilling into a backing material (like scrap wood) also helps prevent the acrylic from chipping or splintering as the drill bit breaks through. Some DIYers also suggest scoring the exit side with a knife before drilling.
Drilling plexiglass doesn’t have to be a daunting task. By understanding the material’s properties and employing the right techniques and tools, you can achieve clean, precise holes for all your DIY projects. Remember to prioritize safety, work with patience, and choose the right drill bits. Happy drilling!