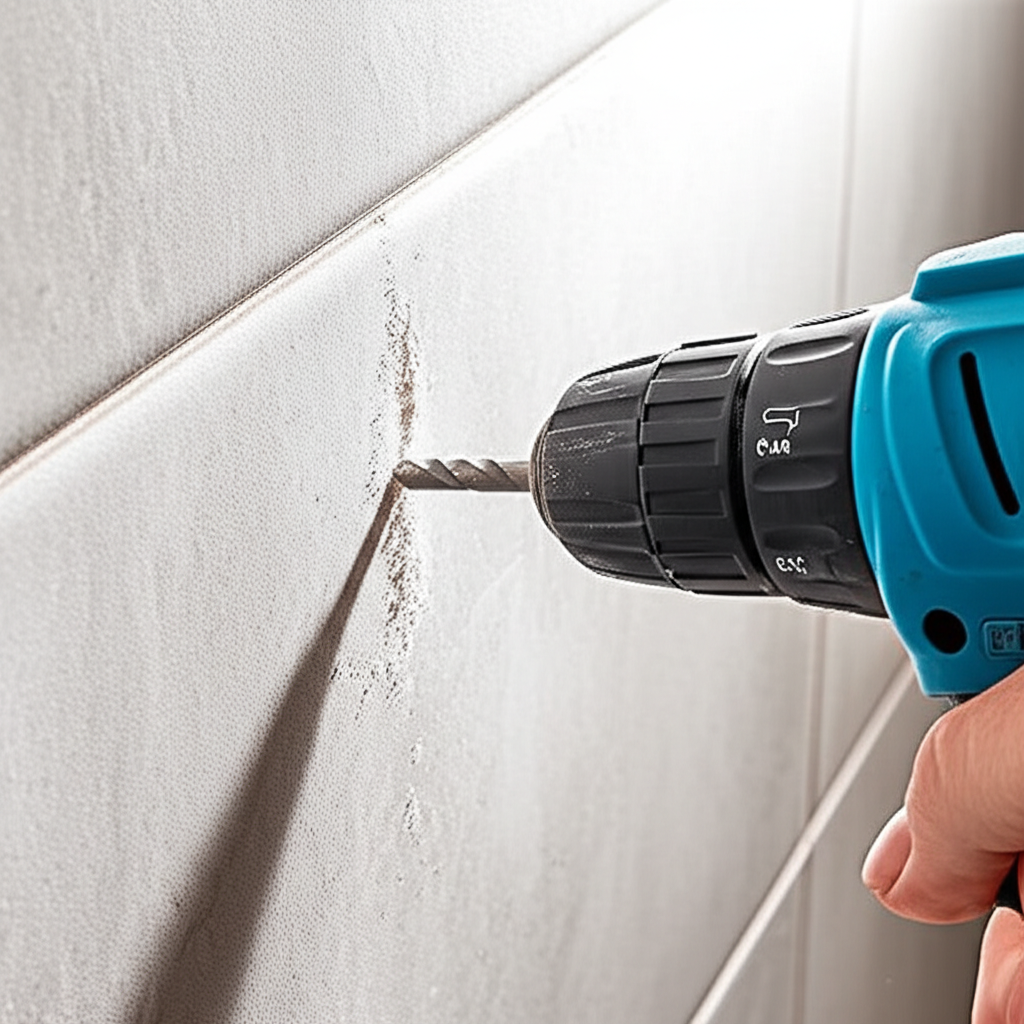
Yes, you absolutely can drill into tile! With the right tools and techniques, drilling into ceramic, porcelain, or even glass tile is a manageable DIY task. This guide will walk you through the process safely and effectively, ensuring you get the job done right.
Must-Have Tools in Your House If You Work Regularly


Ever faced a situation where you needed to hang a towel rack, mount a shelf, or install a fixture on a tiled wall or floor, only to hesitate at the thought of drilling into that hard, often brittle surface? It’s a common dilemma for homeowners and DIY enthusiasts alike. The fear of cracking or shattering the tile is real, but with the correct approach, drilling into tile can be straightforward and successful. We’re here to demystify the process and equip you with the knowledge to tackle this project with confidence. Let’s get drilling!
Understanding Tile and Drilling Challenges
Tile, while beautiful and durable for its intended purpose, presents unique challenges when it comes to drilling. Unlike wood or drywall, tile is a hard, non-porous material that can be unforgiving if you don’t use the proper methods. The primary concerns are:
- Cracking or Chipping: The brittleness of tile means that excessive force, the wrong drill bit, or too much speed can easily cause it to fracture.
- Overheating: Friction generated during drilling can overheat both the drill bit and the tile, potentially leading to damage.
- Slipping: The smooth surface of tile makes it easy for a drill bit to wander and slip, especially at the start of the hole.
Understanding these potential pitfalls is the first step to avoiding them. Fortunately, with a little preparation and the right equipment, these challenges are easily overcome.
Essential Tools for Drilling into Tile
Before you start, gather the necessary tools. Having everything ready will make the process smoother and safer. Here’s what you’ll need:
- Drill: A corded drill is often preferred for its consistent power, but a powerful cordless drill with a clutch setting will also work. Variable speed is crucial.
- Drill Bits: This is the most critical component. You’ll need specialized drill bits designed for tile and masonry.
- Safety Glasses: Always protect your eyes from flying debris.
- Gloves: Good grip and protection for your hands.
- Masking Tape or Painter’s Tape: Helps prevent the drill bit from slipping.
- Center Punch or Awl: To create a starting divot.
- Measuring Tape and Pencil: For accurate marking.
- Water (Optional but Recommended): For cooling. A spray bottle or a damp sponge works well.
- Vacuum Cleaner: To clean up dust.
Choosing the Right Drill Bits
The type of drill bit you use is paramount. Standard wood or metal bits will not work and will likely break or damage the tile. The most effective bits for drilling into tile are:
- Carbide-Tipped Masonry Bits: These are the most common and affordable option for drilling into tile. They have a spear-shaped tip made of carbide, which is a very hard material. They work well for softer tiles like ceramic.
- Diamond-Tipped Drill Bits: These are the gold standard for harder tiles like porcelain, granite, and glass. They have a hollow tip coated with diamond particles, which grind through the material rather than cutting. They are more expensive but offer superior performance and longevity.
- Glass and Tile Drill Bits: Often synonymous with diamond-tipped bits, these are specifically designed for brittle, non-metallic materials.
For most DIYers tackling common wall tiles, a good quality carbide-tipped bit will suffice. If you’re dealing with dense porcelain or glass, investing in diamond-tipped bits is highly recommended. Always ensure the bit is the correct size for the anchor or screw you plan to use.
| Drill Bit Type | Best For | Pros | Cons |
|---|---|---|---|
| Carbide-Tipped Masonry | Ceramic tile, softer porcelain | Affordable, widely available | Can overheat easily, may struggle with very hard tile |
| Diamond-Tipped | Porcelain, glass, granite, hard stone | Excellent for hard materials, cooler drilling, precise holes | More expensive, requires water cooling for best results |
Step-by-Step Guide to Drilling into Tile
Now that you have your tools and understand the basics, let’s walk through the drilling process. Remember to take your time and work carefully.
Step 1: Mark the Drilling Location
Use a measuring tape and pencil to mark the exact spot where you want to drill. For added insurance against the bit slipping, apply a piece of masking tape or painter’s tape over the marked spot. Then, mark the center of your hole directly on the tape. This tape provides a grippier surface for the drill bit to start.
If you need a very precise hole, especially with harder tiles, you can use a center punch or an awl to create a small indentation where the drill bit will start. Tap it gently with a hammer to create a small divot. Be careful not to hit too hard, as this could crack the tile.
Step 2: Prepare Your Drill
For drilling into tile, you’ll want to use a low speed and minimal pressure. Set your drill to its lowest speed setting. If your drill has a clutch, set it to the lowest torque setting to prevent over-tightening and potential damage. You do NOT want the hammer drill function engaged for drilling into tile; this is only for masonry. Ensure you are using the correct drill bit for your tile type.
Step 3: Start Drilling Slowly
Hold the drill perpendicular to the tile surface. Begin drilling at a very slow speed, applying gentle, steady pressure. The goal is to let the drill bit do the work. Let the tape and your pilot mark guide the bit. Once you’ve made a small indentation, you can gradually increase the speed slightly, but always keep it on the lower end.
Tip: If you’re using a diamond-tipped bit, you’ll want to keep the drilling area moist. You can do this by having a helper spray water on the bit and the tile, or by placing a wet sponge around the drilling area. This helps to cool the bit and reduce dust. For carbide bits, a little water can also help, but it’s less critical.
Step 4: Drill Through the Tile
Continue drilling with steady, light pressure. Listen to the drill; if it sounds like it’s struggling, ease up on the pressure. Avoid forcing the bit. As you approach the other side of the tile, reduce your speed and pressure even further. This is the point where the tile is most likely to chip or break as the bit exits.
As the drill bit breaks through the tile, you might feel a slight resistance or hear a change in sound. Ease off the pressure significantly. If you’re drilling through a wall, you’ll eventually feel the bit enter the wall material (drywall, plaster, etc.).
Step 5: Completing the Hole
Once you’ve successfully drilled through the tile, you can continue drilling into the wall or substrate behind it. If you were using a masonry bit, you might now switch to a standard masonry bit if the wall is brick or concrete, or a wood bit if it’s drywall. If you were using a diamond bit, you can generally continue with it, but be aware that it’s not optimized for drilling into wood or drywall.
If you hit a stud or a particularly hard material, you may need to switch to a more appropriate drill bit for that material.
Step 6: Clean Up
Once the hole is drilled to the desired depth, withdraw the drill bit. Use a vacuum cleaner to suck up any dust or debris from the hole and the surrounding area. You can then insert your anchor or screw.
Dealing with Different Tile Materials
While the general process remains the same, the type of tile can influence the tools and techniques you use:
- Ceramic Tile: This is the most common and generally the easiest to drill into. Carbide-tipped bits are usually sufficient.
- Porcelain Tile: Porcelain is much denser and harder than ceramic. Diamond-tipped bits are highly recommended for a clean, crack-free hole. Low speed and water cooling are essential.
- Glass Tile: Glass is very brittle. Diamond-tipped bits are a must. Start at a very slow speed, use minimal pressure, and keep the area well-cooled with water.
- Natural Stone Tiles (Granite, Marble): These also require diamond-tipped bits and careful technique due to their hardness and potential for cracking.
When to Call a Professional
While drilling into tile is a manageable DIY task, there are instances where calling a professional might be the wiser choice:
- High-Value or Delicate Tiles: If you have expensive, antique, or particularly delicate tiles, you might prefer to let an expert handle the drilling to avoid costly mistakes.
- Complex Projects: For large-scale installations or projects requiring many precise holes, a professional contractor will have the specialized equipment and experience.
- Uncertainty: If you’re not comfortable with power tools or feel unsure about any step, it’s always best to err on the side of caution and hire someone.
Professionals often use specialized wet saws with diamond blades or specific diamond core drills for larger holes, which offer greater precision and control for certain applications. For smaller holes, their experience with standard drills and diamond bits is invaluable.
Frequently Asked Questions (FAQ)
Frequently Asked Questions
Can I use a regular drill bit on tile?
No, you should not use regular wood or metal drill bits on tile. They are not hard enough and will either break, dull instantly, or cause the tile to crack or chip. You need specialized carbide-tipped or diamond-tipped drill bits designed for tile and glass.
Do I need a hammer drill for tile?
Absolutely not. The hammer function of a hammer drill is designed for drilling into masonry like concrete or brick. For tile, the hammering action will almost certainly shatter the material. Use a standard drill with a low speed and no hammer function.
How do I prevent the drill bit from slipping on the tile surface?
The best methods are to apply masking tape or painter’s tape to the drilling spot and mark the center on the tape, or to create a small pilot divot with a center punch or awl. This provides grip and a starting point for the drill bit.
How fast should I drill into tile?
You should always drill into tile at a slow speed. High speeds generate excessive heat and can cause the tile to crack. Start slow and maintain a low to moderate speed, adjusting based on the material and your drill’s capability.
Do I need to use water when drilling into tile?
Using water is highly recommended, especially for harder tiles like porcelain or glass, and when using diamond-tipped bits. Water acts as a coolant, preventing the drill bit and the tile from overheating, which reduces the risk of cracking and extends the life of your drill bit. For carbide bits, water can still be beneficial but is less critical.
What size hole can I drill into tile?
You can drill holes of various sizes into tile, depending on the drill bits you have. For standard screws and anchors, you’ll typically need holes ranging from 3/16 inch to 1/2 inch. For larger applications, like mounting a pipe or installing a fan, you might need larger diamond-tipped hole saws or core bits. Always ensure your drill and bits are rated for the size of the hole you intend to make.
What if I crack the tile?
If you accidentally crack the tile, unfortunately, the tile is likely compromised and may need to be replaced. It’s best to stop drilling immediately to prevent further damage. If the crack is small and the tile is still securely in place, you might be able to proceed with caution, but it’s generally advisable to replace it to ensure structural integrity and aesthetic appeal. For future projects, carefully review the steps for slow speed, proper bit selection, and gentle pressure.
Drilling into tile might seem daunting, but with the right preparation and tools, it’s a task any DIYer can accomplish. By understanding the material, choosing the correct drill bits, and following a careful, step-by-step process, you can confidently create the holes you need for any home improvement project. Remember, patience and precision are your best allies when working with tile. For more information on drilling techniques and tool usage, resources like those from the Popular Mechanics or This Old House can offer further insights and visual guidance.