Yes, you absolutely can drill into siding, but it requires the right approach to avoid damage. This guide covers the best methods, tools, and considerations for successfully drilling into various siding types, ensuring a clean and secure result every time.
Must-Have Tools in Your House If You Work Regularly


Ever found yourself staring at a wall, needing to hang a new fixture, mount a light, or secure something to your home’s exterior, only to wonder if drilling into the siding is a good idea? It’s a common question, and understandably so! Damaging your siding can lead to costly repairs and affect your home’s curb appeal. But the good news is, with the right knowledge and a few simple steps, you can confidently drill into your siding to get the job done safely and effectively. We’re here to walk you through everything you need to know, from choosing the right drill bit to preparing your surface for a perfect result.
Understanding Your Siding: The First Step to Success
Before you even think about picking up a drill, it’s crucial to identify the type of siding your home has. Different materials react differently to drilling, and knowing what you’re working with is key to preventing cracks, chips, or other unsightly damage. This knowledge will guide your tool selection and technique.
Common Siding Materials and How to Drill Them

Most residential siding materials can be drilled into, but the method and tools will vary. Here’s a breakdown of the most common types:
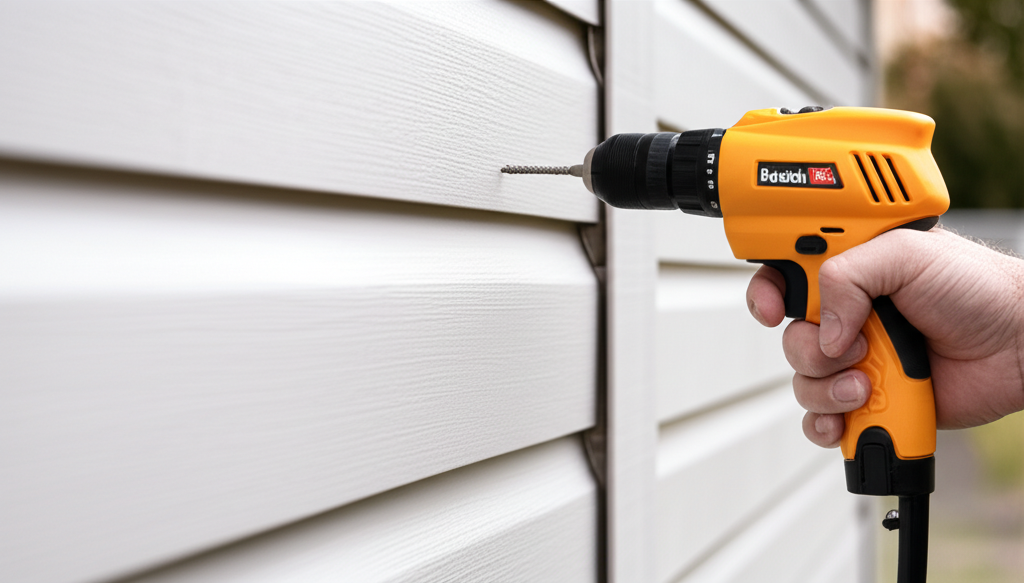
- Vinyl Siding: This is one of the most popular and DIY-friendly siding materials. It’s relatively soft and easy to drill. The main concern with vinyl is expansion and contraction due to temperature changes.
- Aluminum Siding: Similar to vinyl, aluminum is a metal that can be drilled. It’s more durable than vinyl but can dent or scratch if you’re not careful.
- Fiber Cement Siding: Materials like HardiePlank are very durable and can be drilled. However, they are harder than vinyl or aluminum, requiring specific drill bits. Drilling fiber cement also produces a fine dust that needs careful handling.
- Wood Siding: Whether it’s clapboard, shakes, or shingles, wood siding is drillable. The type of wood and its condition will influence the best approach. Older, softer wood might require a gentler touch.
- Stucco: Stucco itself is a hard plaster, and drilling into it requires a masonry bit. If your stucco has a foam or wood substrate behind it, your anchoring method will need to account for both layers.
Understanding your siding material is the first hurdle cleared. Now, let’s talk about the tools that will help you achieve a clean, precise hole.
The Right Tools for the Job: Drill Bits and More
Using the correct drill bit is paramount. A general-purpose bit might work in a pinch, but specialized bits will make your job easier and yield much better results, especially when drilling into harder siding materials.
Choosing Your Drill Bit Wisely
The type of drill bit you need depends on your siding material:
- For Vinyl, Aluminum, and Wood: A standard twist drill bit made of high-speed steel (HSS) is usually sufficient. For softer materials like vinyl, start with a smaller bit and gradually increase the size if needed. For wood, HSS bits work well, but brad-point bits can offer more accuracy and less splintering.
- For Fiber Cement and Stucco: These harder materials require specialized bits. For fiber cement, a carbide-tipped masonry bit or a diamond-tipped bit is recommended. For stucco, a standard masonry bit (often SDS-plus for hammer drills) is your best bet.
- For Metal Siding (Thicker Gauge): If you encounter thicker gauge aluminum or steel siding, a step drill bit can be very useful. These bits create clean holes in metal and can enlarge existing holes incrementally without snagging.
Always ensure your drill bits are sharp. Dull bits can chew up the material, create jagged edges, and require more force, increasing the risk of damage.
Essential Power Tools
While a basic cordless drill is often enough, consider these for specific situations:
- Cordless Drill/Driver: The workhorse for most DIYers. Look for one with variable speed and a clutch to prevent overtightening.
- Hammer Drill: Essential for drilling into masonry like stucco or brick. It adds a hammering action to the rotation, making quick work of hard materials.
- Impact Driver: While great for driving screws, they can be too powerful for drilling into siding unless used very carefully with the correct clutch setting.
Safety gear is non-negotiable. Always wear safety glasses to protect your eyes from flying debris, especially when drilling into harder materials or when dust is generated.
Step-by-Step: How to Drill into Siding Safely
Now that you have your tools and understand your siding, let’s get to the actual drilling. Follow these steps for a clean, successful outcome.
Preparation is Key
- Mark Your Spot: Use a pencil or a marker to clearly indicate where you want to drill. If hanging something, measure carefully and ensure the mark is level.
- Consider the Location: Avoid drilling directly into seams or joints in the siding. Ideally, drill into the solid face of a siding panel. If you need to mount something heavy, try to locate a stud or structural support behind the siding. You can often find studs by looking for vertical seams or by using a stud finder on the interior wall.
- Clean the Area: Brush away any dirt, cobwebs, or debris from the spot you’ll be drilling. This helps prevent the drill bit from picking up grit and scratching the surface.
- Pilot Hole (Optional but Recommended): For larger holes or harder materials, drilling a small pilot hole first can guide the larger bit and reduce the chance of the bit slipping. Use a bit that is significantly smaller than your final hole size.
The Drilling Process
- Set Your Drill: Ensure your drill is set to the correct speed and mode (e.g., “drill” not “hammer” unless drilling concrete/stucco). For most siding, a moderate speed is best.
- Position the Drill Bit: Place the tip of the drill bit directly on your marked spot. Hold the drill perpendicular to the siding surface.
- Apply Steady Pressure: Begin drilling with light, steady pressure. Let the drill bit do the work. For vinyl and aluminum, you may only need a gentle push. For harder materials, you might need to apply more firm pressure, but avoid forcing the drill.
- Control the Speed: Start slowly to create an initial indentation, then increase speed as the bit bites into the material. If drilling into wood, you might want to slow down as you approach the exit point to prevent tear-out on the backside.
- Withdraw the Bit: Once you’ve drilled through, gently pull the drill bit straight out while it’s still spinning slowly. This helps clear the hole and prevents the bit from getting stuck.
Post-Drilling Care
After drilling, inspect the hole for any rough edges. You can often clean these up with a utility knife or a deburring tool, especially on metal siding. For wood siding, consider applying a sealant to the inside of the hole to protect it from moisture.
Drilling into Specific Siding Types: Nuances and Tips
While the general steps apply, some siding types have specific considerations.
Drilling into Vinyl Siding
Vinyl siding is known for its flexibility and expansion/contraction. When drilling for fasteners like screws or nails:
- Oversize the Hole: For screws that will hold something directly, drill a hole that is slightly larger (e.g., 1/8” or 1/4”) than the screw shank. This allows the vinyl to expand and contract freely without buckling or cracking around the fastener.
- Avoid Overtightening: If you are screwing directly into vinyl, do not overtighten. The screw head should sit flush, but not pinch the vinyl.
- Use the Right Fasteners: Long screws are often needed to pass through the vinyl and into the substrate or stud.
A helpful resource on installing and working with vinyl siding can be found on the Vinyl Siding Institute’s website.
Drilling into Fiber Cement Siding
Fiber cement is a composite material that is very durable but can be abrasive to drill bits. Dust is a significant byproduct.
- Carbide or Diamond Bits: As mentioned, these are essential for efficient drilling and longevity of your bits.
- Dust Control: Fiber cement dust can be harmful if inhaled. Use a vacuum attachment on your drill if possible, or wear a respirator mask (N95 or better).
- Pilot Holes: Highly recommended for cleaner entry and exit.
- Speed: Drill at a moderate speed. Too fast can generate excessive heat and wear on the bit.
The Cement Board Association provides detailed installation guides, which often include drilling specifications.
Drilling into Wood Siding
Wood siding is fairly straightforward, but condition matters.
- Sharp Bits: A sharp HSS bit or a brad-point bit will give the cleanest holes and prevent splintering.
- Pilot Holes: Especially important for hardwoods or if you’re drilling near the edge of a board to prevent splitting.
- Depth Control: Use a depth stop on your drill to ensure you don’t drill too deep into the underlying structure if that’s not your intention.
- Sealant: Always seal the inside of drilled holes in wood siding to prevent moisture ingress and rot.
When to Call a Professional
While drilling into siding is a common DIY task, there are times when it’s best to leave it to the pros:
- Structural Concerns: If you need to drill into a load-bearing wall or are unsure about the structural integrity of the area.
- Complex Systems: If you suspect there might be electrical wiring, plumbing, or HVAC lines directly behind the area you need to drill. A professional will have tools like non-contact voltage testers or advanced stud finders.
- High or Difficult-to-Reach Areas: Working on a ladder or in awkward positions can be dangerous.
- Valuable or Delicate Siding: If you have antique, very expensive, or unique siding material, you might want to hire someone with specific experience to avoid costly mistakes.
- Uncertainty: If you are simply not comfortable or confident about the process, it’s always better to err on the side of caution and hire a professional.
Frequently Asked Questions About Drilling into Siding
Can I drill into my vinyl siding to hang a planter?
Yes, you can! It’s best to use a drill bit slightly larger than the screw or nail you plan to use. This allows the vinyl to expand and contract with temperature changes without cracking. Also, make sure you’re drilling into a solid part of the siding panel, not a seam, and consider anchoring into a stud behind the siding if the planter will be heavy.
What kind of drill bit should I use for fiber cement siding?
For fiber cement siding, you’ll need a carbide-tipped masonry bit or a diamond-tipped bit. These bits are designed to cut through hard, abrasive materials like fiber cement. Always use safety glasses and consider a dust mask, as drilling fiber cement creates fine dust.
Will drilling into my siding void the warranty?
This depends entirely on the siding manufacturer’s warranty terms. Some manufacturers may void the warranty if there is improper modification or damage caused by drilling. It’s always a good idea to check your siding’s warranty documentation or contact the manufacturer if you’re concerned.
How do I avoid cracking my siding when drilling?
To avoid cracking your siding, use the correct drill bit for the material, ensure your bits are sharp, start with a pilot hole for harder materials, use a moderate drill speed, apply steady but not excessive pressure, and if working with vinyl, drill slightly oversized holes for fasteners to accommodate expansion and contraction.
Can I drill into aluminum siding?
Yes, you can drill into aluminum siding. Use a sharp HSS twist drill bit. For thinner gauge aluminum, be careful not to apply too much pressure, as it can easily dent. For thicker aluminum, a step drill bit can create very clean holes.
What if I hit a stud when drilling?
If you hit a stud, that’s often ideal, especially if you’re mounting something heavy! It means you have a solid anchor point. If you were intending to drill through the siding only, you can stop. If you need to secure something to the stud, continue drilling through the siding into the wood stud. Use a screw that is long enough to go through the siding and get a good grip on the stud.
Should I seal the hole after drilling in wood siding?
Yes, it’s highly recommended to seal any hole drilled into wood siding. This protects the wood from moisture, which can lead to rot and decay over time. Apply a good quality exterior-grade sealant or caulk to the inside of the hole.