
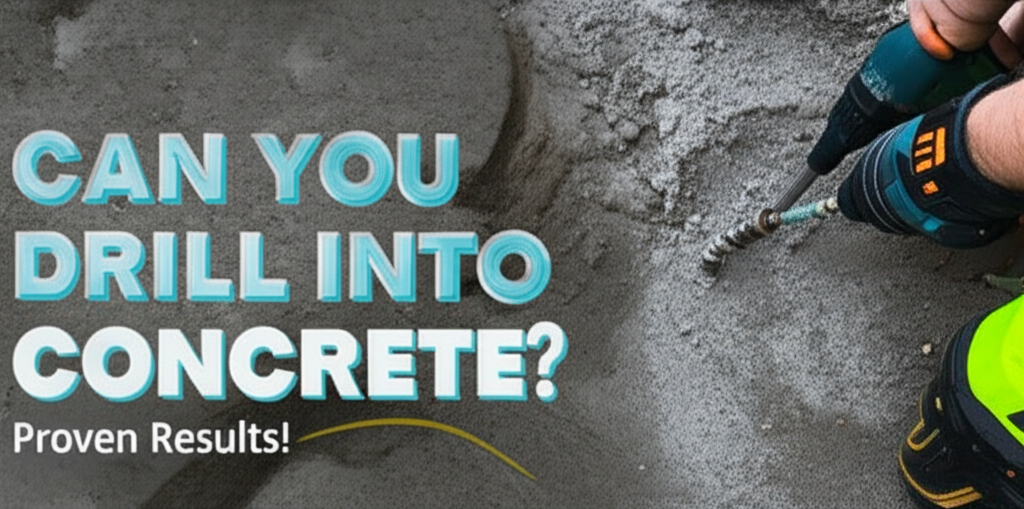
Yes, you absolutely can drill into concrete, and with the right tools and techniques, it’s a straightforward process for DIYers and professionals alike! Whether you’re mounting shelves, hanging a TV, or starting a larger project, drilling into concrete is achievable with the proper guidance. This article breaks down everything you need to know for successful concrete drilling.
Must-Have Tools in Your House If You Work Regularly


Ever stared at a solid concrete wall or floor and wondered if your trusty drill could actually tackle it? It’s a common question for homeowners and DIY enthusiasts. Concrete might seem impenetrable, but with the right approach, you can easily create holes for anchors, fasteners, or even plumbing and electrical conduits. The good news is, you don’t need to be a seasoned contractor to master this skill. We’re here to walk you through it, step-by-step, so you can confidently take on your next project. Let’s dive into how you can drill into concrete safely and effectively!
What You Need to Know Before Drilling Into Concrete
Drilling into concrete is fundamentally different from drilling into wood or metal. The material itself is significantly harder, denser, and more abrasive. This means your standard drill, while a great tool for many tasks, might struggle or even be damaged if used improperly on concrete. Understanding the material and the tools designed for it is the first crucial step to success. We’ll cover the essential tools and safety precautions you’ll need.
The Right Tools for the Job
Choosing the correct drill and drill bit is paramount. Using the wrong equipment can lead to frustration, damaged tools, and a poorly executed job.
Drill Types for Concrete
Not all drills are created equal when it comes to concrete. Here’s a breakdown of the most suitable options:
- Hammer Drill: This is your go-to for most concrete drilling tasks. A hammer drill combines rotation with a rapid, percussive hammering action. This hammering action chips away at the concrete as the bit rotates, significantly increasing drilling speed and efficiency. They are ideal for drilling holes for anchors, screws, and general-purpose fasteners in masonry and concrete.
- Rotary Hammer Drill (or SDS Drill): For more demanding jobs, especially those requiring larger diameter holes or drilling into very hard concrete, a rotary hammer drill is the superior choice. These drills use a piston mechanism to deliver a much more powerful hammering action than a hammer drill. They also utilize special SDS (Slotted Drive System) bits that lock securely into the chuck, allowing for more impact and less slippage. These are often used by professionals for demolition, breaking concrete, and drilling large-diameter holes for rebar or extensive anchoring.
- Standard Drill/Driver (with caution): While not ideal, a powerful standard drill/driver can be used for very small holes in softer concrete or mortar, provided you use a masonry bit and the hammer function (if available). However, prolonged use can overheat and damage the drill’s motor. It’s best reserved for light-duty tasks or as a last resort.
Essential Drill Bits for Concrete
The drill bit is just as important as the drill itself. You need bits specifically designed for masonry.
- Masonry Drill Bits: These bits have a hardened tip, often made of carbide, with a chisel-like point. This design allows them to penetrate and chip away at hard materials like concrete, brick, and stone. They are available in various sizes, typically measured in fractions of an inch or millimeters.
- Carbide-Tipped Masonry Bits: These are the most common and effective for DIYers. The carbide tip is brazed onto the steel bit shank, providing excellent durability and heat resistance.
- Masonry Screw Anchor Bits: Some specialized bits are designed to drill the precise diameter and depth required for specific masonry screw anchors, simplifying the process.
When selecting a masonry bit, consider the diameter and depth of the hole you need. It’s always a good idea to have a range of sizes on hand for different projects.
Safety First: Protecting Yourself
Drilling into concrete can create dust and debris, and power tools always require caution. Prioritize safety with these essentials:
- Safety Glasses: This is non-negotiable. Concrete dust and small fragments can fly off at high speeds, and eye protection is crucial to prevent serious injury.
- Dust Mask or Respirator: Concrete dust, especially from older concrete, can contain silica, which is harmful to your lungs if inhaled repeatedly. A good quality dust mask or a P95/P100 respirator will protect your respiratory system.
- Hearing Protection: Hammer drills and rotary hammers can be loud. Earplugs or earmuffs will protect your hearing, especially during extended drilling sessions.
- Gloves: Work gloves will protect your hands from abrasion and provide a better grip on the drill.
- Secure Footing: Ensure you have stable footing before you start drilling. Avoid working on slippery surfaces or at awkward angles.
Always read the manufacturer’s instructions for both your drill and drill bits. Familiarize yourself with the tool’s safety features and operating procedures.
How to Drill Into Concrete: A Step-by-Step Guide
Now that you have the right tools and understand the safety precautions, let’s get to the actual drilling. Follow these steps for a clean, effective hole.
Step 1: Mark Your Drilling Location
Use a pencil or a marker to clearly mark the exact spot where you need to drill. If you’re drilling multiple holes, use a tape measure and level to ensure they are accurately positioned and aligned.
Step 2: Prepare Your Drill and Bit
- Insert the Masonry Bit: For corded or cordless drills, ensure the chuck is clean. Insert the shank of the masonry bit firmly into the chuck. Tighten the chuck securely, either by hand (for keyless chucks) or using the chuck key. Make sure the bit is centered and straight.
- Set the Drill Mode: If you are using a hammer drill or a rotary hammer, set it to the appropriate drilling mode with hammering action. If you are using a standard drill with a hammer function, switch it to that mode. Ensure the direction is set for forward drilling.
- Adjust Depth Stop (Optional but Recommended): Many drills come with a depth stop rod. This helps you drill to a specific depth, preventing you from drilling too deep. Measure the length of the anchor or fastener you’ll be using, add a little extra depth for dust clearance, and set the depth stop accordingly.
Step 3: Start Drilling
This is where patience and steady pressure come in.
- Position the Drill: Place the tip of the masonry bit precisely on your marked spot. Hold the drill perpendicular to the concrete surface. For larger drills or rotary hammers, use the auxiliary handle for better control and leverage.
- Start Slow: Begin drilling at a slow speed. This allows the bit to create a small indentation, preventing it from “walking” or slipping across the surface.
- Apply Steady Pressure: Once the bit has started a small divot, gradually increase the speed and apply firm, steady pressure. Don’t force the drill; let the hammering action do the work.
- Drill in Short Bursts: Drill for about 10-15 seconds at a time. Then, pull the drill bit slightly out of the hole while it’s still spinning. This helps clear out the dust and debris from the hole, preventing the bit from overheating and binding. Repeat this drilling and clearing cycle.
Step 4: Clear the Hole
Periodically, you’ll need to remove accumulated dust and debris from the hole. You can do this by:
- Pulling the spinning bit partially out of the hole.
- Using compressed air to blow out the dust.
- Using a vacuum cleaner with a narrow nozzle.
A clean hole is essential for the anchor or fastener to work correctly. For deeper holes, clearing the dust becomes even more critical.
Step 5: Finishing the Hole
Continue drilling and clearing until you reach the desired depth. Once complete, switch the drill off. Remove the drill bit from the hole. Blow out any remaining dust before inserting your anchor or fastener.
Troubleshooting Common Concrete Drilling Issues
Even with the best intentions, you might encounter a few hiccups. Here’s how to handle them:
- Drill Bit Not Penetrating: This usually means you’re not using a hammer drill or rotary hammer, or the bit is dull. Ensure you’re using the correct tool and a sharp masonry bit.
- Drill Bit Stuck: If the bit gets stuck, don’t force it. Try reversing the drill direction to back it out. If it’s still stuck, try wiggling it gently while in reverse. Sometimes, a bit of WD-40 can help loosen debris.
- Overheating: If the drill or bit feels excessively hot, stop drilling and let them cool down. Ensure you are clearing the hole regularly to reduce friction and heat buildup.
- Uneven Hole: This can happen if the drill slips at the start. Starting slowly in a small divot helps prevent this.
When to Use What: A Quick Comparison
To help you choose the right tool for your needs, here’s a simplified comparison:
| Drill Type | Best For | Power/Impact | Typical Use Cases |
|---|---|---|---|
| Standard Drill/Driver | Light-duty tasks, wood, metal, small holes in soft concrete (with masonry bit) | Low to Medium | Hanging pictures, light fixtures |
| Hammer Drill | Most DIY concrete tasks, anchors, fasteners | Medium | Mounting shelves, installing curtain rods, general home repairs |
| Rotary Hammer Drill (SDS) | Heavy-duty tasks, large holes, hard concrete, frequent use | High | Concrete demolition, installing large anchors, structural work |
For most home improvement projects involving concrete, a good quality hammer drill is sufficient and a worthwhile investment.
Types of Anchors for Concrete
Once you’ve drilled your hole, you’ll likely need an anchor to secure your item to the concrete. Here are a few common types:
- Expansion Anchors (e.g., Wedge Anchors, Sleeve Anchors): These are very common and strong. You drill a hole, insert the anchor, and then tighten a bolt. This expands the anchor within the hole, creating a tight grip. They are excellent for heavy-duty applications.
- Drop-In Anchors: These are internally threaded anchors. You drill the hole to the specified size, place the anchor in the hole, and then thread a bolt into it. The bolt drives an internal plug, expanding the anchor.
- Concrete Screws (e.g., Tapcons): These specialized screws are designed to tap their own threads directly into concrete. You drill a pilot hole of the correct size and depth, then drive the screw in. They are convenient for lighter-duty applications like mounting electrical boxes or conduit straps.
Always choose an anchor appropriate for the weight and type of item you are hanging, and ensure you follow the anchor manufacturer’s specific installation instructions, which often detail the required hole size and depth.
Frequently Asked Questions (FAQ)
Can I use a regular drill to drill into concrete?
While a standard drill can be used for very light-duty drilling into softer concrete or mortar with a masonry bit, it’s not ideal. The lack of a hammering action means it will be slow and can overheat the drill’s motor. A hammer drill or rotary hammer is highly recommended for efficiency and to prevent damage to your tool.
What is the best drill bit for concrete?
The best drill bit for concrete is a masonry drill bit with a carbide tip. These bits are designed to withstand the abrasion and hardness of concrete. Ensure the bit is sharp and the correct diameter and depth for your intended anchor or fastener.
How deep should I drill into concrete?
The depth you need to drill depends on the anchor or fastener you are using. Always check the manufacturer’s specifications for the anchor. Generally, you should drill slightly deeper than the required embedment depth of the anchor to allow space for dust and ensure the anchor seats properly.
What if my drill bit gets stuck in the concrete?
If a drill bit gets stuck, do not force it. Try reversing the drill direction to back the bit out slowly. Gently wiggling the drill while in reverse can also help dislodge it. If it remains stuck, you may need to use pliers or a specialized extractor, but be cautious not to break the bit.
Do I need to clear the hole after drilling into concrete?
Yes, absolutely. It’s crucial to clear out the dust and debris from the hole after drilling. Dust can prevent anchors from seating correctly and can cause the drill bit to overheat and bind. Clearing the hole ensures a secure installation for your anchor or fastener.
What kind of safety gear is essential when drilling concrete?
Essential safety gear includes safety glasses to protect your eyes from flying debris, a dust mask or respirator to prevent inhalation of harmful silica dust, and hearing protection (earplugs or earmuffs) as hammer drills can be loud. Work gloves are also recommended for grip and hand protection.
Can I drill into reinforced concrete?
Drilling into reinforced concrete (concrete with steel rebar inside) is possible but more challenging. A powerful rotary hammer drill with a suitable masonry bit is usually required. If you hit rebar, the drill bit may snag. You might need to adjust your drilling location slightly or use a specialized bit designed for rebar if you are frequently encountering it. For extensive rebar drilling, professional equipment and expertise are often necessary.
Drilling into concrete is a skill that can be learned with the right tools and knowledge. By following these steps and prioritizing safety, you can confidently tackle a wide range of DIY projects that require drilling into concrete. Remember, patience and using the correct equipment are key to achieving proven results!