Yes, you absolutely can drill into brick, and with the right tools and technique, it’s a straightforward DIY task! Whether you’re hanging shelves, mounting fixtures, or creating ventilation, drilling into brick is achievable for anyone with a few essential items and a little guidance. We’ll show you how to do it safely and effectively.
Must-Have Tools in Your House If You Work Regularly


So, Can You Drill Into Brick? The Definitive Answer!
Ever stared at a solid brick wall, wondering if your trusty drill could handle it? Many of us have been there, needing to hang a heavy mirror, secure a garden hose reel, or install some shelving, only to be met with the daunting prospect of that tough brick surface. It’s a common question for homeowners and DIY enthusiasts alike, and the good news is: yes, you can drill into brick! It might seem intimidating at first, but with the correct approach and the right equipment, it’s a perfectly manageable task. Forget the frustration of skipped bits and crumbled surfaces; we’re here to guide you through it, making sure your project goes smoothly from start to finish. Let’s get that hole drilled perfectly!
Understanding Brick and What You’ll Need
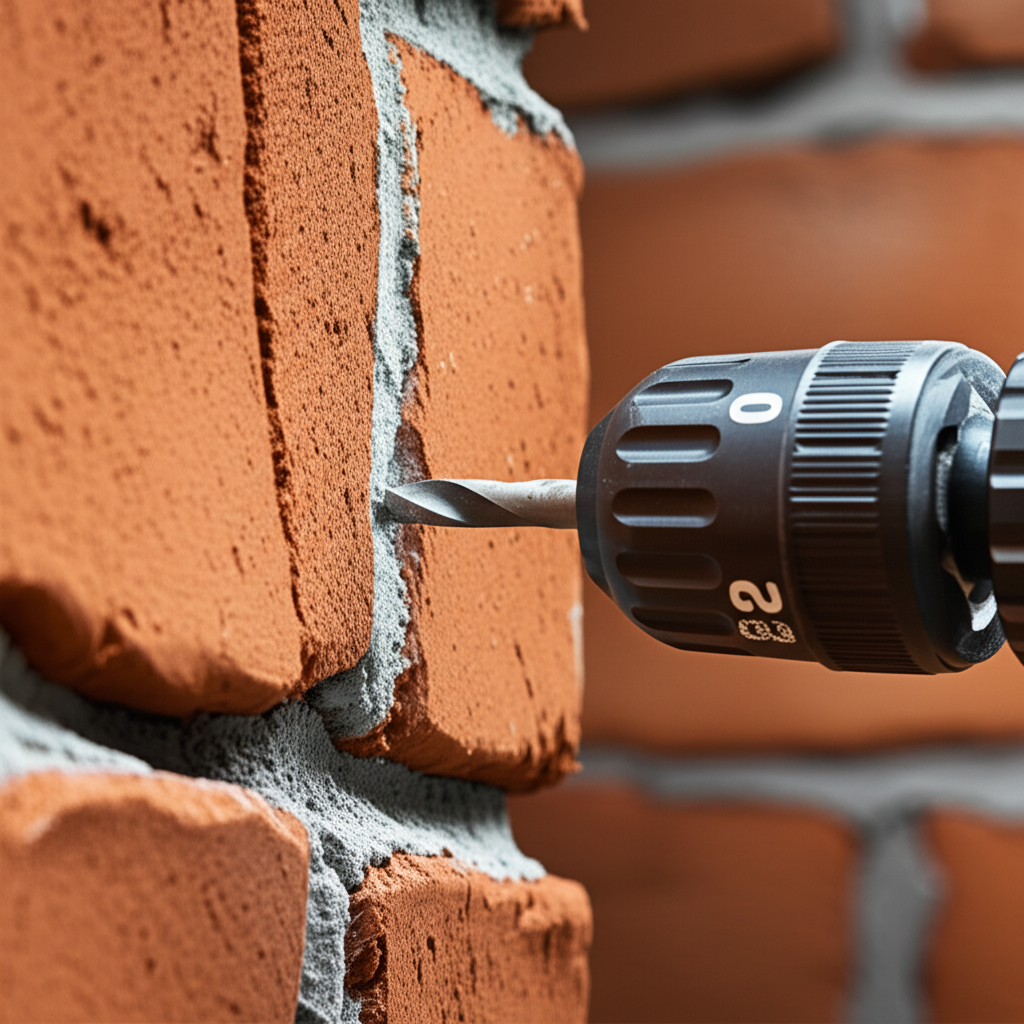
Before we grab our tools, let’s talk about brick itself. Bricks are typically made from clay that’s fired at high temperatures, making them dense and durable. However, they’re not as hard as solid rock, which is why drilling is possible. The key is to use the right type of drill and the correct drill bit designed for masonry.
The Essential Toolkit for Drilling Brick
Gathering the right tools is half the battle. Here’s what you’ll need to successfully drill into brick:
- Hammer Drill or Rotary Hammer: While a standard drill might struggle, a hammer drill is your best friend for masonry. It combines rotation with a percussive hammering action, which pulverizes the brick as it drills, making the process much faster and easier. A rotary hammer is even more powerful and suited for larger or more frequent masonry drilling.
- Masonry Drill Bits: These are specifically designed for drilling into hard materials like brick, concrete, and stone. They typically have a carbide tip that’s shaped to break through tough surfaces. They come in various sizes, so choose the one appropriate for your needs.
- Safety Glasses: Essential for protecting your eyes from flying dust and debris.
- Dust Mask: Brick dust can be harmful if inhaled, so a mask is crucial, especially in enclosed spaces.
- Measuring Tape and Pencil: For marking the exact spot you need to drill.
- Level: To ensure your holes are straight, especially if you’re hanging something that needs to be perfectly aligned.
- Vacuum Cleaner or Dustpan and Brush: To clean up the dust as you go and after you’re finished.
- Optional: Wall Anchors and Screws: Depending on what you’re mounting, you’ll likely need appropriate anchors and screws.
Choosing the Right Drill Bit
The drill bit is arguably the most critical component. For brick, you’ll want masonry drill bits. These are easily identifiable by their hardened carbide tip, which is shaped to withstand the abrasive nature of brick.
Here’s a quick rundown of common masonry bit types:
| Drill Bit Type | Best For | Key Features |
|---|---|---|
| Carbide-Tipped Masonry Bit | General brick, concrete block, mortar | Centering point, durable carbide tip |
| SDS Plus Masonry Bit | Rotary hammers, harder concrete and brick | Slotted shank for hammer drills, aggressive cutting |
| Spade Bits (for wood) | Wood only! | Not suitable for masonry at all. |
Always ensure the bit’s shank (the part that goes into the drill chuck) matches your drill’s chuck type. Most modern hammer drills use a standard keyless or keyed chuck, while rotary hammers use an SDS (Slotted Drive System) chuck.
Step-by-Step: How to Drill into Brick
Now that you have your tools, let’s get drilling! Follow these steps carefully for the best results.
Step 1: Safety First!
Before you even plug in your drill, put on your safety glasses and dust mask. Ensure your work area is clear of clutter and that any electrical cords are safely out of the way. If you’re drilling indoors, consider covering nearby furniture or floors with a drop cloth to catch any dust that escapes.
Step 2: Mark Your Spot
Use your measuring tape and pencil to mark precisely where you want the hole. If you’re hanging something that requires multiple holes, use a level to ensure they are aligned correctly. For critical placements, a small piece of painter’s tape over the mark can help prevent the drill bit from wandering on the surface as you start.
Step 3: Set Up Your Drill
Insert the correct masonry drill bit into your hammer drill’s chuck and tighten it securely. If your drill has different settings, ensure it’s set to the “hammer” or “percussion” mode. If your drill has speed settings, start with a lower speed to make an initial mark, then increase the speed for drilling.
Step 4: Start Drilling
Hold the drill perpendicular to the brick surface. Begin drilling at a slow speed to create a small indentation at your mark. This “pilot” hole helps prevent the bit from slipping. Once you have a small divot, increase the speed and apply steady, firm pressure. Let the hammer action do the work; don’t force the drill.
Maintain a consistent angle. If you feel the drill binding or the bit overheating, pull it out of the hole to clear out dust and allow the bit to cool. A little bit of drilling, then pulling out to clear dust, can be more efficient than trying to drill a long hole in one go.
Step 5: Clearing the Hole
Periodically withdraw the drill bit from the hole while it’s still spinning slowly. This action helps clear out the brick dust and debris, preventing it from clogging the bit and the hole. You can also use a blast of compressed air or a vacuum extension to clean out the hole as you go. This is crucial for ensuring your anchor or screw can be fully inserted.
Step 6: Check the Depth
If you need to drill to a specific depth, you can mark the required depth on your drill bit with a piece of painter’s tape. Stop drilling when the tape reaches the brick surface. Alternatively, many hammer drills have an adjustable depth stop that you can set before you begin.
Step 7: Finishing Up
Once you’ve reached the desired depth, slowly withdraw the drill bit. Clean the hole thoroughly with a vacuum cleaner or compressed air. If you’re inserting a wall anchor, gently tap it into the hole with a hammer until it’s flush with the brick surface. Then, insert your screw and tighten it to secure whatever you’re mounting.
When to Use a Hammer Drill vs. a Standard Drill for Brick
The difference between a standard drill and a hammer drill when tackling brick is significant. A standard drill relies solely on rotation to cut through material. Brick, being dense and hard, offers a lot of resistance to this.
A hammer drill, on the other hand, adds a rapid hammering action. This pulsing force helps to break up the brick material, making it much easier for the rotating bit to remove it. Think of it like chipping away at something hard versus just trying to grind it down with friction alone.
| Drill Type | Pros for Brick | Cons for Brick | Best Use Case |
|---|---|---|---|
| Standard Drill | Lighter, more affordable | Slow, inefficient, can overheat, may damage bit | Very soft mortar only, occasional light tasks |
| Hammer Drill | Faster, more efficient, less strain on user and tool | Heavier, can be more expensive | Most common brick and concrete tasks, hanging shelves, mounting fixtures |
| Rotary Hammer | Most powerful, fastest, efficient for large/frequent jobs | Heaviest, most expensive, overkill for small tasks | Demolition, drilling large holes, frequent heavy-duty masonry work |
For most DIYers, a hammer drill is the ideal choice for drilling into brick. It offers a significant advantage in performance without the bulk and cost of a full rotary hammer, making it a worthwhile investment for any homeowner who anticipates masonry work.
Troubleshooting Common Issues
Even with the right tools, you might encounter a few snags. Here are some common problems and how to fix them:
- Drill Bit Slipping: This usually happens when you start drilling. Ensure you’re using a masonry bit with a centering point, and start at a slow speed to create a small pilot hole before increasing speed. A piece of painter’s tape on the brick surface can also help.
- Overheating: If your drill bit or drill feels excessively hot, you’re drilling too fast or applying too much pressure. Pull the bit out periodically to clear dust and let it cool. Using a lubricant like water or a specialized cutting fluid can also help, but be cautious of electrical hazards with water.
- Not Making Progress: This can occur if you hit a particularly hard spot, a piece of aggregate within the brick, or if your drill bit is dull or damaged. Ensure you are using the hammer function and applying steady pressure. If the bit is visibly worn, it might be time to replace it.
- Hole is Too Big/Rough: This is usually a sign of a dull bit or excessive force. Try to maintain a consistent speed and pressure. If the hole is slightly rough, you can often clean it up with a bit of gentle scraping or by ensuring your wall anchor is designed to accommodate minor imperfections.
When Not to Drill into Brick (and What to Do Instead)
While drilling into brick is generally safe and effective, there are a few situations where you might want to reconsider or proceed with extreme caution:
- Structural Brickwork: If you’re unsure about the structural integrity of the brickwork or if you’re drilling into load-bearing walls, it’s always best to consult a professional. Drilling into the wrong place could compromise the building’s stability.
- Very Old or Deteriorated Brick: Bricks that are crumbly, spalling, or showing significant signs of wear may not be able to withstand drilling. You might end up causing more damage than good. In such cases, alternative mounting methods or repairing the brickwork first might be necessary.
- Near Electrical Wires or Plumbing: Always be aware of what might be behind the wall. If you suspect there are electrical wires or pipes within the brickwork, use a stud finder with AC/metal detection capabilities. If in doubt, do not drill, and call a professional. You can often find diagrams of your home’s wiring and plumbing from your local utility company or building department, as recommended by resources like the Federal Trade Commission.
- Fired Glazed Bricks: Some decorative bricks have a glazed surface. Drilling into these can cause the glaze to chip and crack. If you must drill, use a specialized glass and tile bit and go very slowly.
If you encounter any of these situations, it’s wise to seek advice from a qualified tradesperson. For example, before undertaking any significant home renovation, understanding local building codes and seeking permits can be important, as noted by organizations like the International Association of Certified Home Inspectors (InterNACHI).
Frequently Asked Questions About Drilling Brick
Can I use a regular drill to drill into brick?
While it’s technically possible to drill into very soft mortar with a regular drill and a masonry bit, it will be very slow, inefficient, and can easily overheat your drill. For actual brick, a hammer drill is highly recommended. The hammering action is what makes drilling into brick manageable and effective.
How deep should I drill into brick?
The depth you need to drill depends on what you are mounting. Typically, you’ll drill to the depth required for your wall anchor or screw. Most common anchors require a hole of about 1 to 2 inches deep. Always check the specifications for your chosen anchor or fastener. Using a depth stop on your drill or marking your bit with tape can help ensure you don’t drill too deep.
What kind of drill bit do I need for brick?
You need a masonry drill bit, which features a hardened carbide tip. These bits are specifically designed to withstand the abrasive and hard nature of brick and concrete. They often have a blunt, chisel-like tip that helps break through the material.
How do I prevent dust when drilling brick?
Minimizing dust involves several strategies: using a dust mask is essential. Drilling slowly initially can help contain some dust. Periodically pulling the bit out while it’s still spinning helps clear the hole. You can also attach a small vacuum cleaner hose to the drill or hold a dustpan just below the drilling point. Some specialized attachments can help capture dust at the source.
Can I drill into the mortar between bricks instead of the brick itself?
Yes, you can often drill into the mortar joints, and they are generally softer than the bricks. However, mortar can also be crumbly. If your project requires a very secure hold, drilling into the brick itself is usually stronger, provided you use the correct tools and techniques. If you’re only hanging something very light, drilling into the mortar might suffice.
What if my drill bit breaks while drilling into brick?
Drill bits can break if they overheat, if you apply too much sideways pressure, or if they are low quality. If a bit breaks off inside the hole, it can be very difficult to remove. Try to avoid this by using the correct drill speed, steady pressure, and clearing out dust regularly. If a bit does break, you may need to try and carefully extract the broken piece with pliers or a similar tool, or drill a new hole nearby if possible. For tough materials, always use good quality bits designed for the job.
Drilling into brick might have seemed like a daunting task, but with the right knowledge and tools, it’s a perfectly achievable DIY project. Remember to prioritize safety, use a hammer drill and masonry bits, and take your time. Happy drilling!