Yes, with the right approach and specialized bits, a Dremel can drill a hole in glass. It’s a delicate process requiring patience and specific techniques to prevent breakage, but it’s achievable for DIYers.
Must-Have Tools in Your House If You Work Regularly


Can a Dremel Drill a Hole in Glass? The Beginner’s Guide to Success
Ever looked at a beautiful glass vase or a unique glass tabletop and wondered if you could personalize it? Perhaps you’re a DIY enthusiast who loves adding custom touches to your home or a car owner looking to modify a glass headlight housing. The thought of drilling into glass can seem daunting, often conjuring images of shattered pieces and frustration. Many people wonder, “Can a Dremel drill a hole in glass?” It’s a common question, and for good reason. Glass is a fragile material, and using the wrong tool or technique can quickly lead to disaster. But don’t worry! With the right knowledge and a little patience, it’s entirely possible to achieve clean, precise holes in glass using your Dremel. This guide will walk you through everything you need to know, from the essential tools to the step-by-step process, ensuring you can tackle your glass drilling projects with confidence. Let’s get started on uncovering the secrets to successfully drilling glass with your Dremel!
Understanding the Basics: Why Glass is Tricky
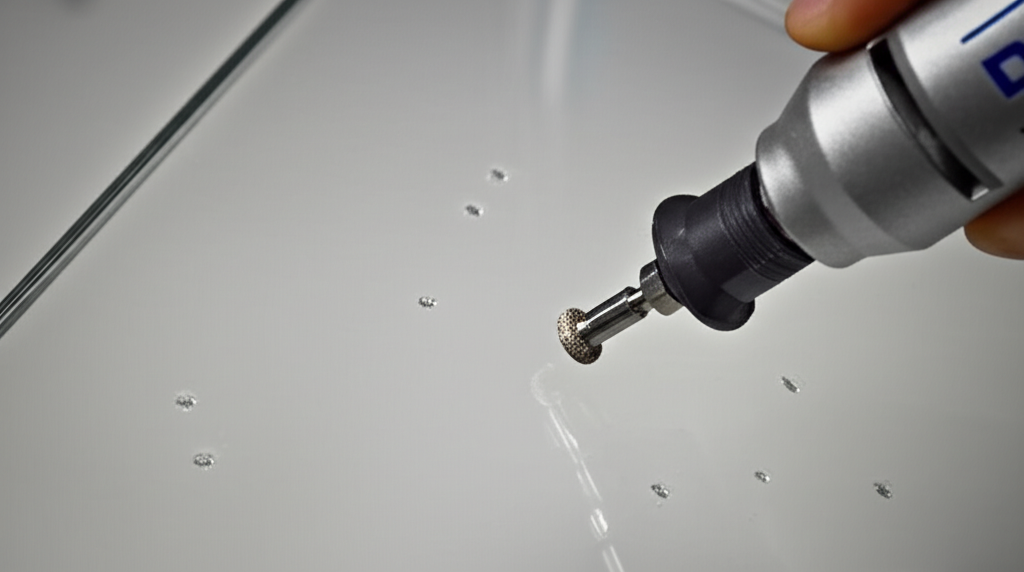
Glass, while appearing solid and strong, is actually quite brittle. Unlike metal or wood, it doesn’t respond well to the aggressive, chipping action of standard drill bits. When you try to drill glass with a regular drill bit, the concentrated force and heat generated can cause stress fractures, leading to the glass cracking or shattering. The key to drilling glass is to remove material slowly and steadily, using a bit designed for this purpose and employing a cooling method to manage heat. This is where a rotary tool like a Dremel shines, offering precision and control, but it still requires the correct accessories and a gentle hand.
What You’ll Need: The Essential Toolkit
Before you even think about plugging in your Dremel, gather all the necessary supplies. Using the wrong bits or neglecting crucial steps can lead to a broken project and wasted effort. Here’s a breakdown of what you’ll need to successfully drill glass with your Dremel:
Specialized Drill Bits for Glass
This is non-negotiable. Standard metal or wood drill bits will not work. You need bits specifically designed for drilling glass and tile. These are typically made of diamond-coated carbide or solid diamond.
Diamond-Coated Hole Saws/Core Bits: These are the most effective for drilling larger holes. They have a hollow, cylindrical shape with diamond grit on the cutting edge. They work by grinding away the glass rather than cutting it.
Diamond-Tipped Drill Bits: These look more like traditional drill bits but have a diamond tip. They are excellent for smaller pilot holes or when precise entry points are needed.
Your Dremel Rotary Tool
Any Dremel rotary tool can technically be used, but models with variable speed settings are highly recommended. This allows you to control the rotational speed precisely, which is crucial for glass drilling. Look for tools that offer lower RPM settings.
Coolant/Lubricant
Heat is the enemy of glass when drilling. To prevent thermal shock and cracking, you must keep the drilling area cool.
Water: The simplest and most accessible coolant.
Cutting Fluid/Lubricant: Specialized cutting fluids designed for glass and tile can also be very effective, providing both cooling and lubrication. Some DIYers use a mixture of water and a drop of dish soap to help the water spread and penetrate better.
Safety Gear
Safety first, always! Working with glass and power tools demands proper protection.
Safety Glasses/Goggles: Essential to protect your eyes from glass dust and shards.
Gloves: Cut-resistant gloves are highly recommended to protect your hands from sharp edges.
Dust Mask: When drilling glass, fine glass dust is created. A dust mask will protect your lungs.
Workpiece Support and Stabilization
The glass needs to be stable and won’t move during drilling.
Flat, Stable Surface: Ensure your workspace is level and sturdy.
Clamps: Non-marring clamps are ideal for securing the glass without damaging it.
Painter’s Tape or Masking Tape: Applying tape to the drilling area can help prevent chipping on the entry and exit points and can also help keep the bit from “walking” when you start.
Optional but Helpful Tools
Center Punch or Awl: To create a small indentation to guide the bit and prevent it from wandering.
Spray Bottle: For applying water coolant.
Small Container or Dam: To create a small pool of water around the drilling area for continuous cooling.
Step-by-Step Guide: Drilling Glass with Your Dremel
Now that you have your tools ready, let’s get to the actual process. Remember, patience and a gentle approach are key.
Step 1: Prepare Your Workspace and Glass
1. Clean the Glass: Ensure the area where you’ll be drilling is clean and free of dust, grease, or debris.
2. Secure the Glass: Place the glass on a flat, stable surface. Use clamps to secure it firmly, ensuring it cannot move or vibrate during drilling. You can place a piece of wood or thick cardboard under the glass to protect the surface beneath and provide a slightly forgiving base.
3. Apply Tape: Cover the drilling area with a few layers of painter’s tape or masking tape. This helps prevent the bit from slipping and reduces the risk of chipping on the surface.
Step 2: Mark Your Drilling Spot
1. Mark Clearly: Using a fine-tip marker, mark the exact spot where you want to drill.
2. Create a Guide (Optional but Recommended): For diamond-tipped bits, gently tap the marked spot with a center punch or awl. This creates a tiny divot that helps the bit stay centered and prevents it from wandering when you start. Be very gentle; you’re just creating a small guide, not trying to score the glass deeply.
Step 3: Set Up for Cooling
This is arguably the most critical step for preventing breakage.
Water Drip Method: If using a diamond-tipped bit for a small hole, you can set up a slow drip of water directly onto the drilling spot.
Water Dam Method: For hole saws or larger bits, create a small dam around the drilling area using plumber’s putty or a thick ring of masking tape. Fill this dam with water. This creates a reservoir that keeps the bit and the glass consistently cool as you drill. Keep a spray bottle of water handy to reapply coolant as needed.
Step 4: Set Your Dremel and Start Drilling
1. Choose the Right Bit and Speed: Select your diamond-tipped bit or hole saw. For most glass drilling, start with a low RPM setting on your Dremel – think 1,000 to 5,000 RPM. Higher speeds generate more heat and increase the risk of cracking.
2. Begin Drilling: Hold the Dremel firmly but with light pressure. Start the drill at a slight angle (around 45 degrees) against the glass.
3. Ease into the Hole: Once the bit has started to grind a groove at the angle, gradually bring the Dremel to a perpendicular (90-degree) angle to the glass.
4. Apply Gentle, Consistent Pressure: Let the tool do the work. Do not force the bit. Apply just enough downward pressure to keep the bit grinding against the glass. Too much pressure will cause heat buildup and stress fractures.
5. Keep it Cool: Continuously ensure the drilling area remains wet. If the water evaporates, stop drilling immediately and reapply coolant. Listen to your tool; if it sounds strained or you see excessive heat, back off.
Step 5: Drilling Through and Finishing
1. Slow Down as You Approach the Exit: As you get close to breaking through the other side of the glass, reduce pressure even further.
2. Support the Exit Point: If possible, have someone help you support the glass from the exit side to prevent a larger piece from breaking off as the bit goes through. You can also place a piece of wood on the exit side.
3. Clean Up: Once the hole is complete, remove the Dremel. Rinse the glass to wash away any dust and debris. You can use a slightly higher speed (without excessive pressure) to clean up the edges of the hole if necessary, always keeping it cool.
Troubleshooting Common Issues
Even with the best preparation, you might encounter a few hiccups. Here’s how to handle them:
Bit Wandering: This is common when starting. Ensure you have applied tape and, if possible, made a small guide mark with a punch. Start at a shallow angle.
Overheating: If you see steam or hear a high-pitched squeal, stop immediately! The glass is too hot. Ensure you have sufficient coolant and are not applying too much pressure.
Chipping: Minor chipping around the entry or exit point can occur. Applying tape helps. If it’s significant, you might need to use a larger bit or a specialized grinding bit to smooth the edges.
Slow Progress: Drilling glass is slow by nature. Don’t be tempted to rush it by increasing speed or pressure, as this is the surest way to break the glass.
Dremel Bit Types for Glass: A Closer Look
Not all Dremel bits are created equal when it comes to glass. Here’s a quick comparison:
| Bit Type | Best For | Considerations |
| :—————————- | :—————————————- | :—————————————————————————— |
| Diamond-Coated Hole Saw | Larger holes (1/4″ and up) | Requires more coolant, slower drilling, best for clean, circular openings. |
| Diamond-Tipped Drill Bits | Smaller holes (under 1/4″), pilot holes | Easier to manage coolant for small holes, good for precision. |
| Grinding/Engraving Bits | Smoothing edges, small detail work | Not for drilling holes, but useful for post-drilling cleanup. |
| Standard Drill Bits (Metal/Wood) | DO NOT USE FOR GLASS | Will shatter the glass due to aggressive cutting action and heat generation. |
When to Use Which Dremel Attachment
For clean, circular holes: Diamond-coated hole saws are your best bet. They are designed to grind through materials like glass and tile efficiently. They come in various sizes, allowing you to choose the exact diameter you need.
For smaller holes or intricate designs: Diamond-tipped drill bits are excellent. They offer more control for smaller perforations and can be used for creating patterns or smaller access points.
For smoothing edges after drilling: Once you have your hole, you might find small burrs or rough edges. A diamond-tipped grinding stone or a diamond file attachment can be used at a low speed to gently smooth these imperfections.
Safety First: Protect Yourself and Your Project
Working with glass and power tools carries inherent risks. Prioritizing safety ensures you complete your project without injury and without damaging your materials.
Essential Safety Precautions:
Eye Protection: Always wear ANSI-approved safety glasses or goggles. Glass dust and small shards can fly unexpectedly.
Hand Protection: Cut-resistant gloves are a must. Glass edges, even if not sharp to the eye, can be surprisingly abrasive and cause cuts.
Respiratory Protection: Fine glass dust is harmful if inhaled. Wear a properly fitted dust mask or respirator.
Secure Your Workpiece: Never attempt to drill glass that isn’t firmly secured. Clamps are essential.
Proper Ventilation: Work in a well-ventilated area, especially when using cutting fluids.
Coolant Management: Be mindful of where your coolant is going. Water and cutting fluids can make surfaces slippery.
For more in-depth safety guidelines on using power tools, the Occupational Safety and Health Administration (OSHA) provides valuable resources on their website, including general safety practices for hand and power tools. https://www.osha.gov/
Can a Dremel Drill Any Glass? Considerations
While a Dremel can drill glass, it’s important to understand its limitations and the types of glass it’s best suited for.
Tempered Glass: This is the trickiest. Tempered glass is designed to shatter into small, relatively harmless pieces when broken. Attempting to drill it after it has been tempered will likely cause it to shatter explosively. If you need a hole in tempered glass, you must have the hole drilled before the tempering process.
Laminated Glass: This type of glass has a plastic layer between two panes. While you can drill through it, the plastic layer will behave differently from the glass, and the result might not be as clean.
Standard Annealed Glass: This is the type of glass most commonly found in windows, picture frames, and many decorative items. It’s the most forgiving type for drilling with a Dremel.
If you’re unsure about the type of glass you have, it’s always best to err on the side of caution or test on a scrap piece if possible. For critical applications or very thick glass, professional glass drilling services might be a more suitable option. You can learn more about different types of glass and their properties from resources like the Glass Association of North America (GANA). https://www.glasswebsite.com/
Frequently Asked Questions about Dremel and Glass Drilling
Q1: What is the most important thing to remember when drilling glass with a Dremel?
A1: The absolute most crucial factor is keeping the drilling area cool. Use plenty of water or cutting fluid and don’t apply excessive pressure, as heat buildup is the primary cause of glass cracking.
Q2: Can I use a regular drill bit with my Dremel to drill glass?
A2: No, absolutely not. You must use specialized diamond-coated or diamond-tipped bits designed specifically for drilling glass and tile. Regular bits will not cut glass and will almost certainly cause it to shatter.
Q3: How fast should I set my Dremel when drilling glass?
A3: Always start with a low speed setting, typically between 1,000 and 5,000 RPM. Higher speeds generate more heat, which is detrimental to glass. Variable speed control on your Dremel is a significant advantage here.
Q4: What if my Dremel doesn’t have variable speed? Can I still drill glass?
A4: It’s much more challenging but not entirely impossible. You would need to be extremely cautious, use a very light touch, and focus heavily on cooling. However, it significantly increases the risk of breakage. If possible, using a Dremel with variable speed is highly recommended for glass projects.
Q5: How much pressure should I apply when drilling glass?
A5: Very little pressure is needed. Let the diamond bit do the grinding work. Apply just enough downward force to keep the bit engaged with the glass. Pushing too hard will generate heat and can cause the glass to crack.
Q6: What should I do if the glass starts to get hot?
A6: Stop drilling immediately! If you see steam or feel excessive heat, back the bit out slowly. Reapply your coolant generously and allow the glass to cool down before resuming. Consistent cooling is key.
Q7: Can I drill tempered glass with a Dremel?
A7: It’s generally not recommended to drill tempered glass after it has been tempered. The process of tempering makes it very susceptible to shattering if disturbed. Holes must be drilled before* the glass goes through the tempering process.
Conclusion: Empower Your DIY Projects with Precision
So, can a Dremel drill a hole in glass? The answer is a resounding yes, with the right tools and techniques! While it requires a different approach than drilling wood or metal, understanding the importance of specialized bits, consistent cooling, and a gentle touch will set you up for success. Whether you’re adding a unique touch to a home decor item, creating custom lighting, or tackling a specific automotive modification, your Dremel, when equipped with the proper diamond bits, is a capable tool for the job. Remember to always prioritize safety, keep your workpiece cool, and let patience be your guide. With this knowledge, you’re ready to confidently take on your next glass drilling project and achieve those “shocking”ly good results! Happy creating!